Epson R200 User Manual (P.I.M Plug-in) - Page 5
Printing a P.I.M. Image, Printing in Photoshop 7.0, CS, and Photoshop Elements (Windows)
 |
UPC - 010343849532
View all Epson R200 manuals
Add to My Manuals
Save this manual to your list of manuals |
Page 5 highlights
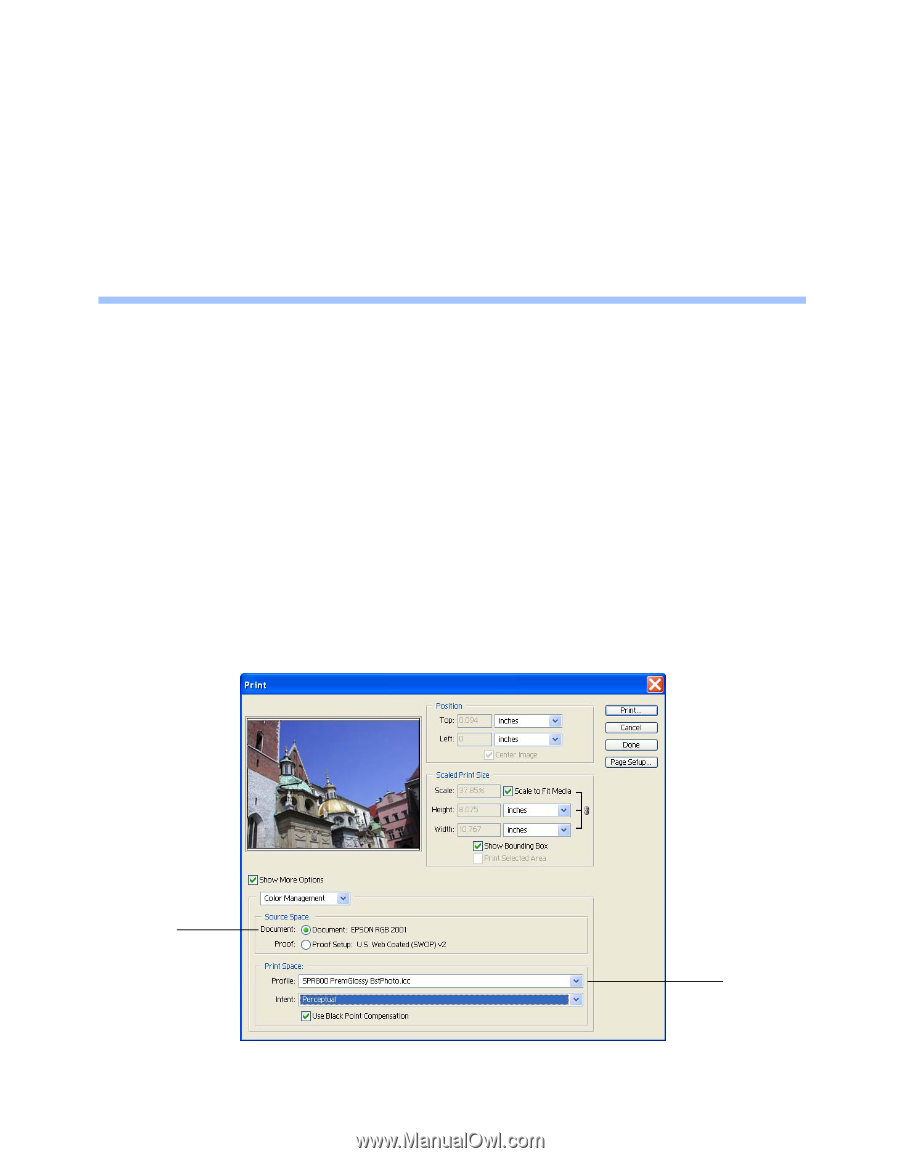
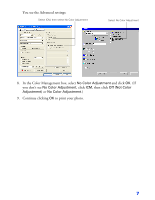
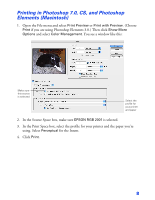
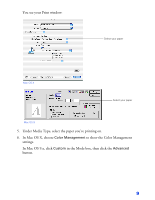
Note: To keep the P.I.M. header information intact for use in other P.I.M.-enabled programs, keep the original file. Do not use the Save command to save your original file. Instead, before you start working with your file in Photoshop, use the Save As command and rename it to save a new file. The new file will not contain P.I.M. header information but will still retain P.I.M. image quality. If you overwrite your original file you will lose all PRINT Image Matching or Exif Print header information. Printing a P.I.M. Image PRINT Image Matching images are converted into the EPSON RGB 2001 color space. To retain the P.I.M. quality and enhancements, make sure you don't change the color space. Follow the steps in one of the sections below, depending on the program and operating system you're using. Printing in Photoshop 7.0, CS, and Photoshop Elements (Windows) 1. From the File menu, select Print Preview, Print with Preview. (Choose Print if you are using Photoshop Elements 3.0.) Then click Show More Options and select Color Management. You see a screen like this: Make sure this source is selected Select the profile for your printer and paper 5
-
 1
1 -
 2
2 -
 3
3 -
 4
4 -
 5
5 -
 6
6 -
 7
7 -
 8
8 -
 9
9 -
 10
10 -
 11
11 -
12
 |
 |