Epson Stylus C86 Product Information Guide - Page 7
Loading Paper, Cleaning the Print Head, Running the Head Cleaning Utility, Windows, Macintosh OS X - printer
 |
View all Epson Stylus C86 manuals
Add to My Manuals
Save this manual to your list of manuals |
Page 7 highlights
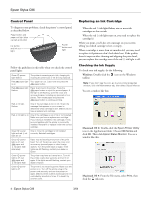
Epson Stylus C86 As with traditional photos, Epson recommends proper care that will minimize color changes and lengthen display life: ❏ Frame prints under glass or a protective plastic sleeve to protect them from atmospheric contaminants like humidity, smoke, and high levels of ozone. ❏ As with all photographs, keep your prints away from direct sunlight. ❏ For proper storage, keep your prints in a photo album or plastic photo storage box in acid-free, archival sleeves commonly available from most camera stores. ❏ Always keep unused paper in the original package. Loading Paper Load paper as shown below. Insert paper against the right edge Caution: When you don't turn on your printer for a long time, print quality can decline, so turn it on and print a few pages at least once a month to maintain good print quality. Running the Head Cleaning Utility 1. Make sure the printer is turned on but not printing, and the red ink light is off. (If the ink light is flashing or on, you need to replace a cartridge.) 2. Windows: Right-click the printer icon on your taskbar (in the lower right corner of your screen). Select Head Cleaning. Note: If you don't see the icon, go to your printer properties window, click the Maintenance tab, then select Head Cleaning. Macintosh OS X: Open the Applications folder and double-click Epson Printer Utility. Select Stylus C86 in the printer list, click OK, and select Head Cleaning. Macintosh OS 9: Open the File menu and choose Page Setup or Print. Click the utility button, then click the Head Cleaning button. You see a screen like the following: Slide the left edge guide against the paper ❏ Always load the short edge first, even for printing landscapeoriented photos. ❏ Load the printable side face up. It's usually whiter or brighter than the other side. ❏ Make sure the paper is under the tabs on the left and right edge guides. ❏ Check the paper package for more loading instructions. Cleaning the Print Head If your printouts are unexpectedly light, or dots or lines are missing, you may need to clean the print head. This unclogs the nozzles so they can deliver ink properly. Print head cleaning uses ink, so clean it only if quality declines. This section explains how to clean the print head using the Head Cleaning utility. You can also clean the print head by holding down the button on the printer for three seconds. (This only works when the red light is off.) 3. Follow the on-screen instructions to clean the print head. Cleaning takes several seconds. The printer makes noise and the green power light flashes. Caution: Never turn off the printer while the green power light is flashing, unless the printer hasn't moved or made noise for more than 5 minutes. 4. When the green power light stops flashing, make sure paper is loaded in the printer, then do the following: Windows: Click Print nozzle check pattern. Then click Print. Macintosh: Click Confirmation, then click Next. The nozzle check pattern prints (see "Examining the Nozzle Check Pattern" on the following page for details). 3/04 Epson Stylus C86 - 7
-
 1
1 -
 2
2 -
 3
3 -
 4
4 -
 5
5 -
 6
6 -
 7
7 -
 8
8 -
 9
9 -
 10
10
 |
 |
