Epson Stylus COLOR 1160 Quick Start - Page 2
Print an Image - printer driver
 |
View all Epson Stylus COLOR 1160 manuals
Add to My Manuals
Save this manual to your list of manuals |
Page 2 highlights
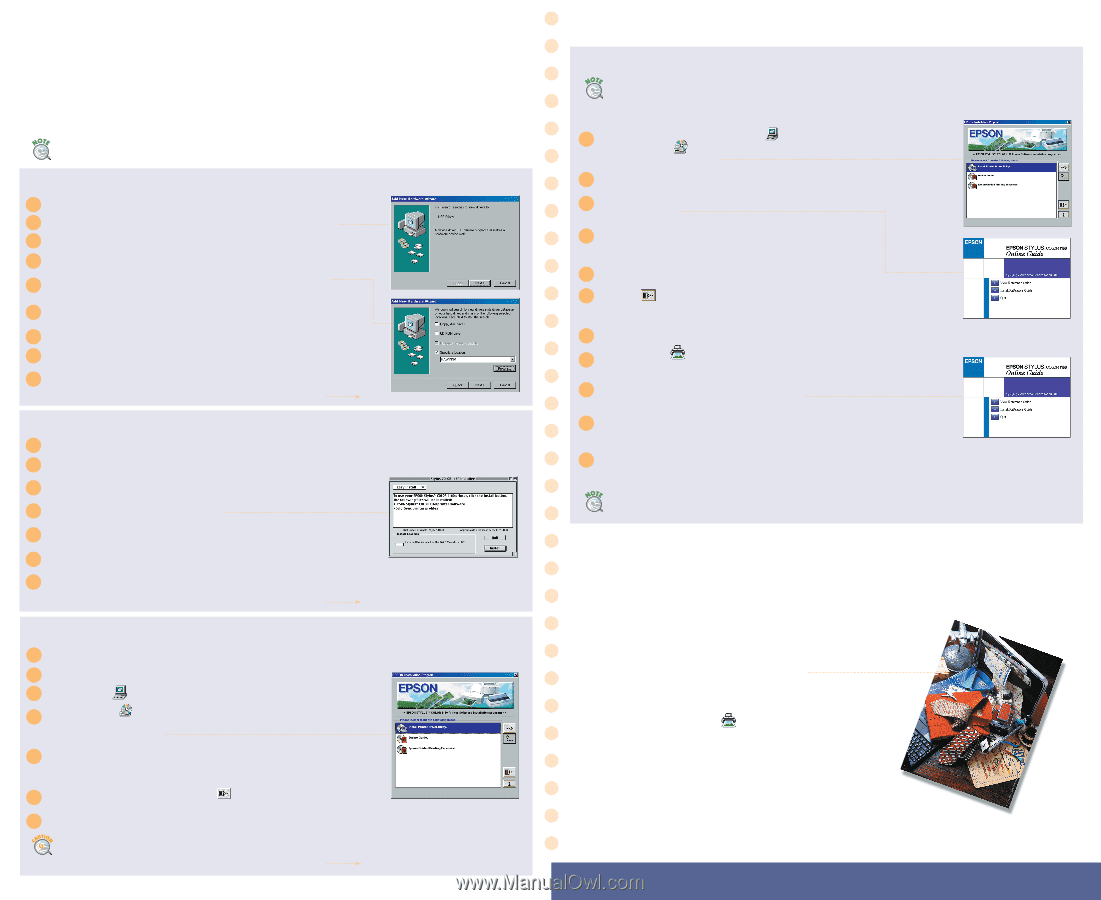
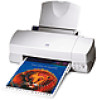
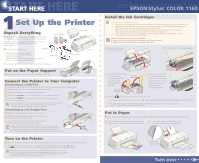
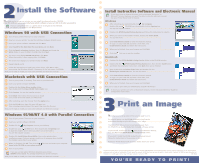
22Install the Software Now that you've set up your printer, you can install its software from the CD-ROM. Keep this card with you as you install your printer software so you can refer to it when you need to. If you're using Windows 3.1, a printer driver is included on the CD-ROM. To install it, run Setup in the Win31 folder. Windows 98 with USB Connection 1 Turn off your printer. Then turn on your computer. 2 Now turn on your printer. You see the Add New Hardware Wizard screen. 3 Insert your printer software CD-ROM and click Next. 4 Select Search for the best driver for your device and click Next. 5 Click the Specify a location checkbox, then click Browse and locate the Win9x folder on your CD-ROM. Click OK, then click Next. 6 The screen now displays EPSON USB Printer; click Next. When the installer is done copying files, click Finish. 7 The screen now displays your printer model; click Next. 8 Repeat steps 4 and 5. 9 Follow the instructions to install your printer driver. Click Yes to make your printer the Windows default, if necessary. At the last screen, click Finish. Now you're ready to install your instructive software and electronic manual. Macintosh with USB Connection 1 Turn on your printer, if necessary. Then turn on your Macintosh. 2 Insert your printer software CD-ROM. 3 Double-click the Printer Driver Installer folder, then double-click the Stylus COLOR 1160 Installer icon. 4 Click Continue. You see the installer window: 5 Click Install, then follow the instructions to install your printer driver and restart your Macintosh. 6 After restarting, open the Chooser from the Apple menu. 7 Click the SC1160 icon, then click your USB port icon. Turn on background printing, if you want, then close the Chooser. Now you're ready to install your instructive software and electronic manual. Windows 95/98/NT 4.0 with Parallel Connection 1 Turn off your printer. Then turn on your computer. 2 Insert your printer software CD-ROM. 3 Double-click the My Computer icon on your desktop. 4 Double-click your CD-ROM icon. Then double-click the Epsetup icon to start the installer. (Don't select any other icon in the folder.) You see the installer window. 5 Double-click Install Printer Driver/Utility. You see the printer driver installation screen. Click your printer model icon, if necessary, then click OK. The installer copies files to your system. 6 When it's finished, click OK. Then click the Exit icon and restart your computer. Leave in the CD-ROM as your system restarts. 7 Turn on your printer. If you see a screen about Windows detecting your printer, ALWAYS select Cancel. You already installed your printer software. Now you're ready to install your instructive software and electronic manual. Install Instructive Software and Electronic Manual If you don't have an Internet browser, such as Netscape® Navigator® or Microsoft® Internet Explorer, you won't be able to view the electronic manual. See your Printer Basics book for details. Windows 1 After rebooting your system,double-click My Computer, double-click your CD-ROM icon, then double-click the Epsetup icon. You see the installer window. 2 Double-click EPSON Guided Printing Exercise and follow the instructions to install it. 3 When you return to the installer window, double-click Online Guide. You see this menu. 4 Click View Reference Guide to view the electronic manual. To copy it to your hard disk and view it from here, click Install Reference Guide and follow the instructions. 5 When you're finished, close your browser and click Quit. 6 Click the Exit icon to exit the installer. Macintosh 1 Double-click the EPSON Guided Printing Exercise folder in the CD-ROM window. 2 Double-click the EPSON Guided Printing Exercise icon, then click the Install button and follow the installation instructions. Click Quit when you're finished. 3 Now double-click the Online Guide folder and double-click the EPSON Stylus COLOR 1160 icon. You see this menu: 4 Click View Reference Guide to view the electronic manual. To copy it to your hard disk and view it from here, click Install Reference Guide and follow the instructions. 5 When you're finished, close your browser and click Quit. Now you're ready to print with your EPSON Stylus COLOR 1160 Printer! To share your printer over a PC or Macintosh network, see the electronic Reference Guide for configuration instructions. 33Print an Image Now that you've set up your printer, you're ready to print. For a quick lesson, run the EPSON Guided Printing Exercise and follow the steps to print this sample color image: The instructions tell you how to load sample paper from the EPSON Photo Quality Media Pack included with your printer. To get started, double-click the icon on your Windows desktop, or in the Macintosh EPSON Guided Printing Exercise folder. (If you didn't install the EPSON Guided Printing Exercise yet, follow the instructions in the previous section.) Read your Printer Basics book for more details about your printer. EPSON and EPSON Stylus are registered trademarks of SEIKO EPSON CORPORATION. General Notice: Other product names used herein are for identification purposes only and may be trademarks of their respective owners. EPSON disclaims any and all rights in those marks. Copyright © 1999 by Epson America, Inc. Printed on recycled paper with at least 10% post-consumer content. 9/99 CPD 9238 YOU'RE READY TO PRINT!
-
 1
1 -
 2
2
 |
 |