Epson Stylus Pro 3800 UltraChrome Edition Printer Guide - Page 88
Replacing Ink Cartridges, Paper Matte. Then press
 |
View all Epson Stylus Pro 3800 UltraChrome Edition manuals
Add to My Manuals
Save this manual to your list of manuals |
Page 88 highlights
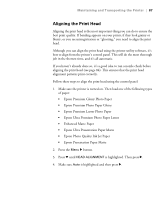
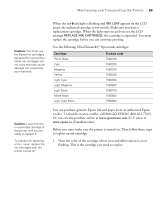
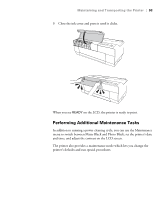
88 | Maintaining and Transporting the Printer 5. Press d or u to select the type of paper you loaded: PREM. GLOSSY/LUSTER, P Q INK JET PAPER (Epson Presentation Paper Matte), or ENHANCED MATTE PAPER (Ultra Premium Presentation Paper Matte). Then press r. 6. Press Enter to start printing. After printing is complete, the printer starts aligning the print head. It takes several minutes to run the head alignment. The printer's white beam sensor reads the alignment pattern and adjusts the printer automatically. Make sure you don't open the top cover or turn off the printer during this process. If you want to verify or fine-tune the alignment process, you can perform a manual head alignment. See your on-screen User's Guide for instructions. Replacing Ink Cartridges Before you begin a large print job, you should check your ink levels. If one of your cartridges is low, you can replace it before you start. Or you can wait until the ink cartridge needs to be replaced, and then continue the job without any loss of print quality. However, it is best to replace a low ink cartridge before starting a large print job. The easiest way to check ink levels is from the control panel: 1 Matte Black 2 Photo Black 3 Light Black 4 Light Light Black 5 Cyan 9 Yellow 8 Light Magenta 7 Light Cyan 6 Magenta 5-88
-
 1
1 -
2
-
3
-
4
-
5
-
6
-
7
-
8
-
9
-
10
-
11
-
12
-
13
-
14
-
15
-
16
-
17
-
18
-
19
-
20
-
21
-
22
-
23
-
24
-
25
-
26
-
27
-
28
-
29
-
30
-
31
-
32
-
33
-
34
-
35
-
36
-
37
-
38
-
39
-
40
-
41
-
42
-
43
-
44
-
45
-
46
-
47
-
48
-
49
-
50
-
51
-
52
-
53
-
54
-
55
-
56
-
57
-
58
-
59
-
60
-
61
-
62
-
63
-
64
-
65
-
66
-
67
-
68
-
69
-
70
-
71
-
72
-
73
-
74
-
75
-
76
-
77
-
78
-
79
-
80
-
81
-
82
-
 83
83 -
 84
84 -
 85
85 -
 86
86 -
 87
87 -
 88
88 -
 89
89 -
 90
90 -
 91
91 -
 92
92 -
 93
93 -
94
-
95
-
96
-
97
-
98
-
99
-
100
-
101
-
102
-
103
-
104
-
105
-
106
-
107
-
108
-
109
-
110
-
111
-
112
-
113
-
114
-
115
-
116
-
117
-
118
-
119
-
120
-
121
-
122
-
123
-
124
-
125
-
126
-
127
-
128
-
129
-
130
-
131
-
132
-
133
-
134
 |
 |
