Epson Stylus Pro 4880 ColorBurst Edition Printer Guide - Page 113
Using the Maintenance Mode, need to back up to the previous menu level, press
 |
View all Epson Stylus Pro 4880 ColorBurst Edition manuals
Add to My Manuals
Save this manual to your list of manuals |
Page 113 highlights
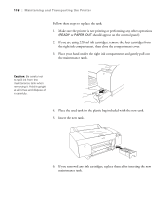
Maintaining and Transporting the Printer | 113 4. Use the or buttons to set each item in the date and time, displayed in the following format: MM/DD/YY HH:MM. After you change an item, press Menu to select the next item. When you have changed the value of the last item (the minutes), press Menu . Using the Maintenance Mode The maintenance mode allows you to make special settings and perform maintenance procedures that may be needed occasionally. You can use the maintenance mode to do the following: • Print a hex dump for diagnosing problems • Change the language or units of measurements used on the printer's control panel menus • Enable the printable pages counter • Change the default pressure setting for the automatic cutter • Run a "super strong" cleaning cycle. • Return all of the printer's control panel settings to their default values. Follow these steps to use the maintenance mode: 1. Make sure the printer is turned off. Press and hold the pause button, then press the P power button until the printer turns on and displays HEX DUMP on the LCD panel. 2. Press the or button to select the settings described below. If you need to back up to the previous menu level, press the button. • To print a hex dump of data in the printer's buffer, press the Menu button to display EXEC. Then press Menu again to print the 16-byte hex data in the left column and corresponding ASCII characters in the right column. Press the pause button to print the last page. • To change the language displayed on the LCD panel, press the button until you see LANGUAGE, then press the Menu button. Press the button until you see the language you want, then press Menu again to select it. Press the button when done. 113
-
 1
1 -
2
-
3
-
4
-
5
-
6
-
7
-
8
-
9
-
10
-
11
-
12
-
13
-
14
-
15
-
16
-
17
-
18
-
19
-
20
-
21
-
22
-
23
-
24
-
25
-
26
-
27
-
28
-
29
-
30
-
31
-
32
-
33
-
34
-
35
-
36
-
37
-
38
-
39
-
40
-
41
-
42
-
43
-
44
-
45
-
46
-
47
-
48
-
49
-
50
-
51
-
52
-
53
-
54
-
55
-
56
-
57
-
58
-
59
-
60
-
61
-
62
-
63
-
64
-
65
-
66
-
67
-
68
-
69
-
70
-
71
-
72
-
73
-
74
-
75
-
76
-
77
-
78
-
79
-
80
-
81
-
82
-
83
-
84
-
85
-
86
-
87
-
88
-
89
-
90
-
91
-
92
-
93
-
94
-
95
-
96
-
97
-
98
-
99
-
100
-
101
-
102
-
103
-
104
-
105
-
106
-
107
-
 108
108 -
 109
109 -
 110
110 -
 111
111 -
 112
112 -
 113
113 -
 114
114 -
 115
115 -
 116
116 -
 117
117 -
 118
118 -
119
-
120
-
121
-
122
-
123
-
124
-
125
-
126
-
127
-
128
-
129
-
130
-
131
-
132
-
133
-
134
-
135
-
136
-
137
-
138
-
139
-
140
-
141
-
142
-
143
-
144
-
145
-
146
-
147
-
148
-
149
-
150
-
151
-
152
-
153
-
154
-
155
-
156
 |
 |