Epson Stylus Pro 7890 Network Guide - Page 21
Install, Manual, desktop, and register your printer.
 |
View all Epson Stylus Pro 7890 manuals
Add to My Manuals
Save this manual to your list of manuals |
Page 21 highlights
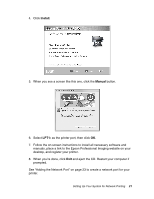
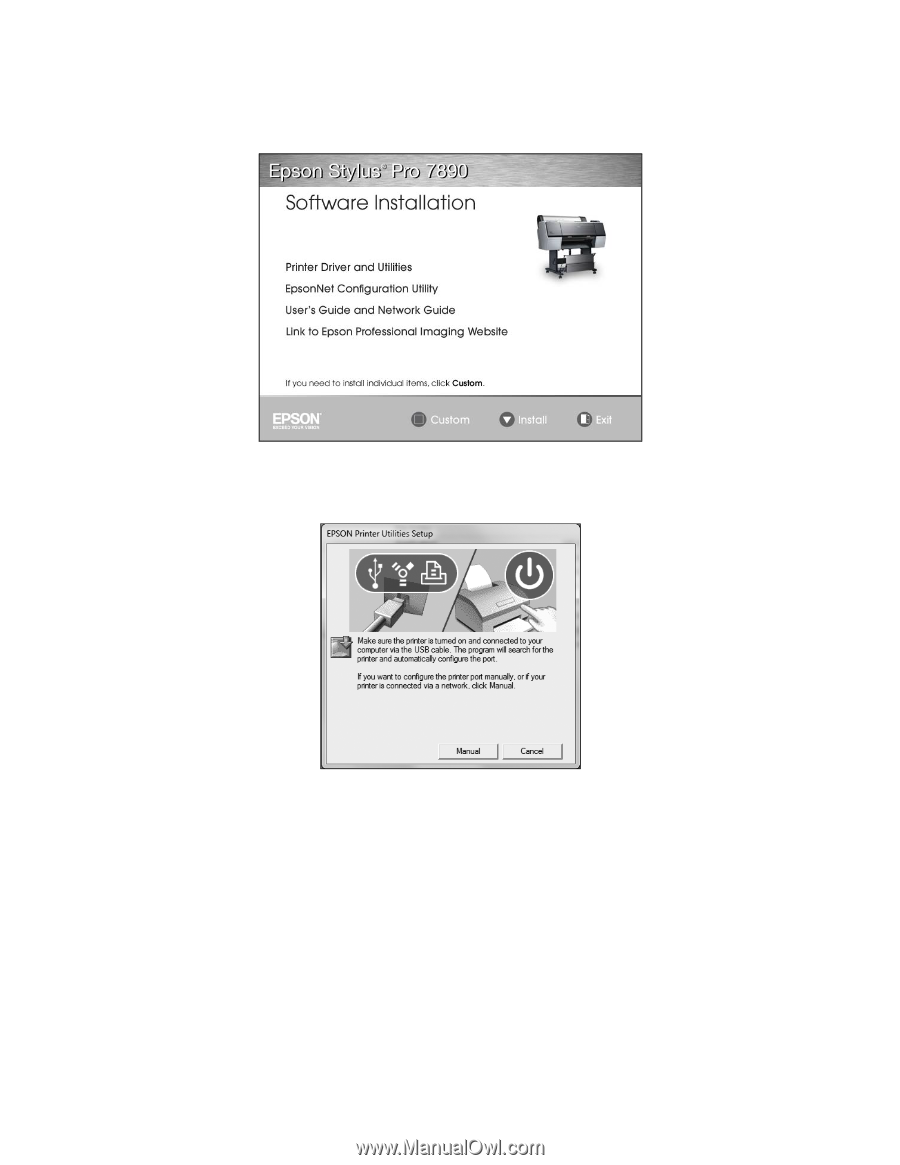
4. Click Install. 5. When you see a screen like this one, click the Manual button. 6. Select LPT1: as the printer port, then click OK. 7. Follow the on-screen instructions to install all necessary software and manuals, place a link to the Epson Professional Imaging website on your desktop, and register your printer. 8. When you're done, click Exit and eject the CD. Restart your computer if prompted. See "Adding the Network Port" on page 23 to create a network port for your printer. Setting Up Your System for Network Printing 21
-
 1
1 -
2
-
3
-
4
-
5
-
6
-
7
-
8
-
9
-
10
-
11
-
12
-
13
-
14
-
15
-
 16
16 -
 17
17 -
 18
18 -
 19
19 -
 20
20 -
 21
21 -
 22
22 -
 23
23 -
 24
24 -
 25
25 -
 26
26 -
27
-
28
-
29
-
30
-
31
-
32
-
33
-
34
-
35
-
36
-
37
-
38
-
39
-
40
 |
 |
Setting Up Your System for Network Printing
21
4. Click
Install
.
5.
When you see a screen like this one, click the
Manual
button.
6. Select
LPT1:
as the printer port, then click
OK
.
7.
Follow the on-screen instructions to install all necessary software and
manuals, place a link to the Epson Professional Imaging website on your
desktop, and register your printer.
8.
When you’re done, click
Exit
and eject the CD. Restart your computer if
prompted.
See “Adding the Network Port” on page 23 to create a network port for your
printer.