Epson SureColor P6000 Standard Edition User Manual - Page 29
button. The Install From Disk dialog box, Common\Printer. Double-click
 |
View all Epson SureColor P6000 Standard Edition manuals
Add to My Manuals
Save this manual to your list of manuals |
Page 29 highlights
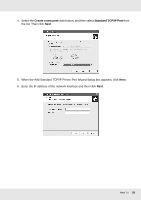
7. If an error occurs, the following dialog box appears. Select the Standard radio button and then select EPSON Network Printer. Click Next. 8. Click Finish. 9. See "Installing the printer driver" on page 26 to install the printer driver. Installing the printer driver 1. Insert the Software Disc shipped with the printer or run the software package that you downloaded. 2. Close the software installer screen. 3. On the Add Printer screen, click the Have Disk button. The Install From Disk dialog box appears. 4. Click Browse. 5. Do one of the following: O CD/DVD: Select the CD/DVD drive for the drive, and and navigate to \Common\Printer. Double-click the WINX64 folder or the WINX86 folder depending on your operating system. Click Open. Click OK in the Install From Disk dialog box. O Software package: Navigate to the location of the downloaded software package, select it and click OK in the Install From Disk dialog box. 6. Select the model name of the printer, and then click Next. Note: If the Add Printer wizard prompts you to select either Keep existing driver or Replace existing driver, be sure to select the Replace existing driver radio button, and then click Next. How To 29
-
 1
1 -
2
-
3
-
4
-
5
-
6
-
7
-
8
-
9
-
10
-
11
-
12
-
13
-
14
-
15
-
16
-
17
-
18
-
19
-
20
-
21
-
22
-
23
-
 24
24 -
 25
25 -
 26
26 -
 27
27 -
 28
28 -
 29
29 -
 30
30 -
 31
31 -
 32
32 -
 33
33 -
 34
34 -
35
-
36
-
37
-
38
-
39
-
40
-
41
-
42
-
43
-
44
-
45
-
46
-
47
-
48
-
49
-
50
-
51
-
52
-
53
-
54
-
55
 |
 |
