Epson SureColor P8000 Standard Edition User Manual - Page 150
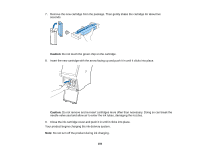
Close the ink cartridge cover and push it in until it clicks into place.
 |
View all Epson SureColor P8000 Standard Edition manuals
Add to My Manuals
Save this manual to your list of manuals |
Page 150 highlights
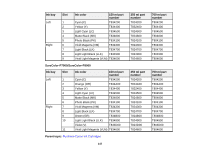
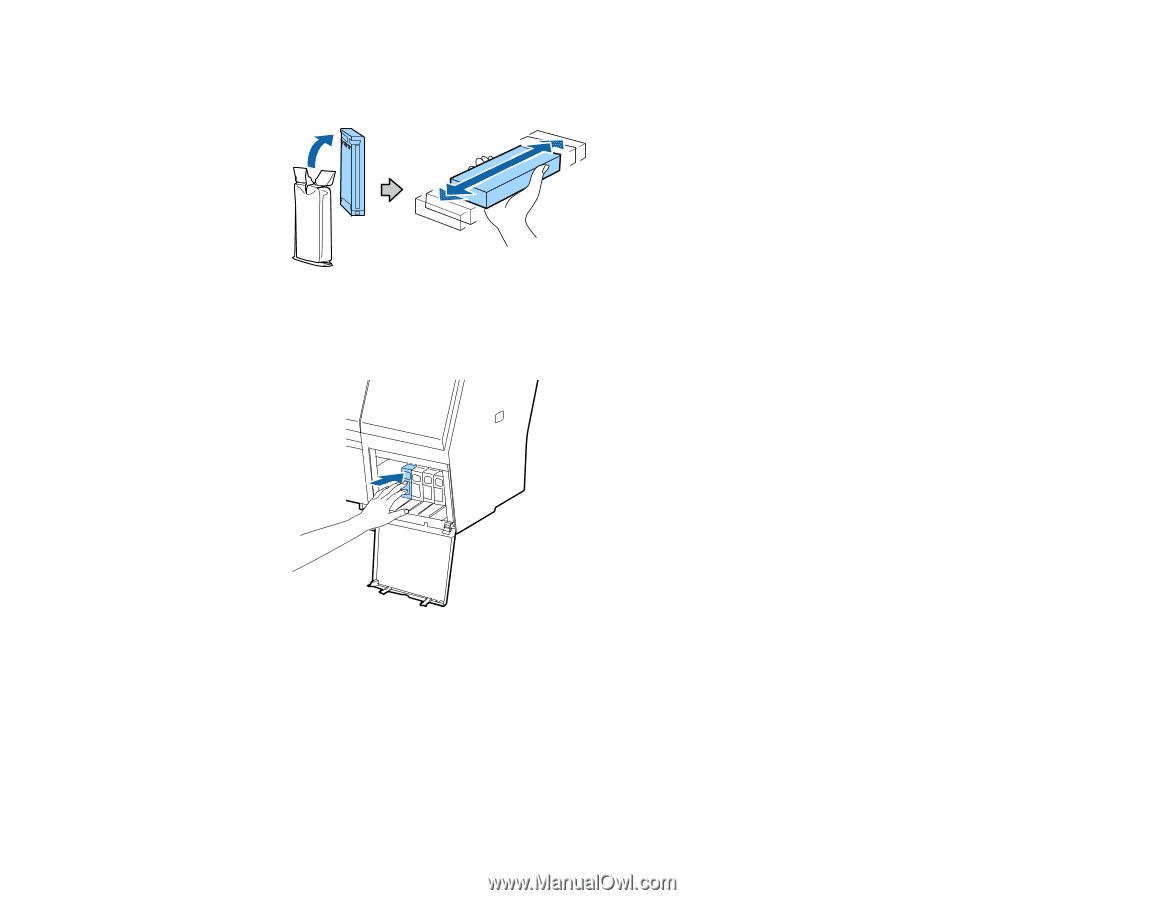
7. Remove the new cartridge from the package. Then gently shake the cartridge for about five seconds. Caution: Do not touch the green chip on the cartridge. 8. Insert the new cartridge with the arrow facing up and push it in until it clicks into place. Caution: Do not remove and re-insert cartridges more often than necessary. Doing so can break the needle valve seal and allow air to enter the ink tubes, damaging the nozzles. 9. Close the ink cartridge cover and push it in until it clicks into place. Your product begins charging the ink delivery system. Note: Do not turn off the product during ink charging. 150
-
 1
1 -
2
-
3
-
4
-
5
-
6
-
7
-
8
-
9
-
10
-
11
-
12
-
13
-
14
-
15
-
16
-
17
-
18
-
19
-
20
-
21
-
22
-
23
-
24
-
25
-
26
-
27
-
28
-
29
-
30
-
31
-
32
-
33
-
34
-
35
-
36
-
37
-
38
-
39
-
40
-
41
-
42
-
43
-
44
-
45
-
46
-
47
-
48
-
49
-
50
-
51
-
52
-
53
-
54
-
55
-
56
-
57
-
58
-
59
-
60
-
61
-
62
-
63
-
64
-
65
-
66
-
67
-
68
-
69
-
70
-
71
-
72
-
73
-
74
-
75
-
76
-
77
-
78
-
79
-
80
-
81
-
82
-
83
-
84
-
85
-
86
-
87
-
88
-
89
-
90
-
91
-
92
-
93
-
94
-
95
-
96
-
97
-
98
-
99
-
100
-
101
-
102
-
103
-
104
-
105
-
106
-
107
-
108
-
109
-
110
-
111
-
112
-
113
-
114
-
115
-
116
-
117
-
118
-
119
-
120
-
121
-
122
-
123
-
124
-
125
-
126
-
127
-
128
-
129
-
130
-
131
-
132
-
133
-
134
-
135
-
136
-
137
-
138
-
139
-
140
-
141
-
142
-
143
-
144
-
 145
145 -
 146
146 -
 147
147 -
 148
148 -
 149
149 -
 150
150 -
 151
151 -
 152
152 -
 153
153 -
 154
154 -
 155
155 -
156
-
157
-
158
-
159
-
160
-
161
-
162
-
163
-
164
-
165
-
166
-
167
-
168
-
169
-
170
-
171
-
172
-
173
-
174
-
175
-
176
-
177
-
178
-
179
-
180
-
181
-
182
-
183
-
184
-
185
-
186
-
187
-
188
-
189
-
190
-
191
-
192
-
193
-
194
-
195
-
196
-
197
-
198
-
199
-
200
-
201
-
202
-
203
-
204
-
205
-
206
-
207
-
208
-
209
-
210
-
211
-
212
-
213
-
214
-
215
-
216
-
217
-
218
-
219
-
220
-
221
-
222
-
223
-
224
-
225
-
226
 |
 |
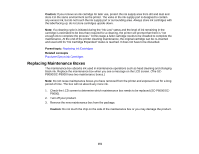
7.
Remove the new cartridge from the package. Then gently shake the cartridge for about five
seconds.
Caution:
Do not touch the green chip on the cartridge.
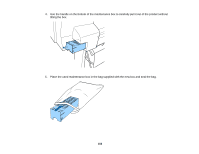
8.
Insert the new cartridge with the arrow facing up and push it in until it clicks into place.
Caution:
Do not remove and re-insert cartridges more often than necessary. Doing so can break the
needle valve seal and allow air to enter the ink tubes, damaging the nozzles.
9.
Close the ink cartridge cover and push it in until it clicks into place.
Your product begins charging the ink delivery system.
Note:
Do not turn off the product during ink charging.
150