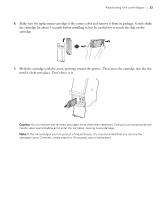
Epson SureColor P9000 Standard Edition Quick Reference - Page 29
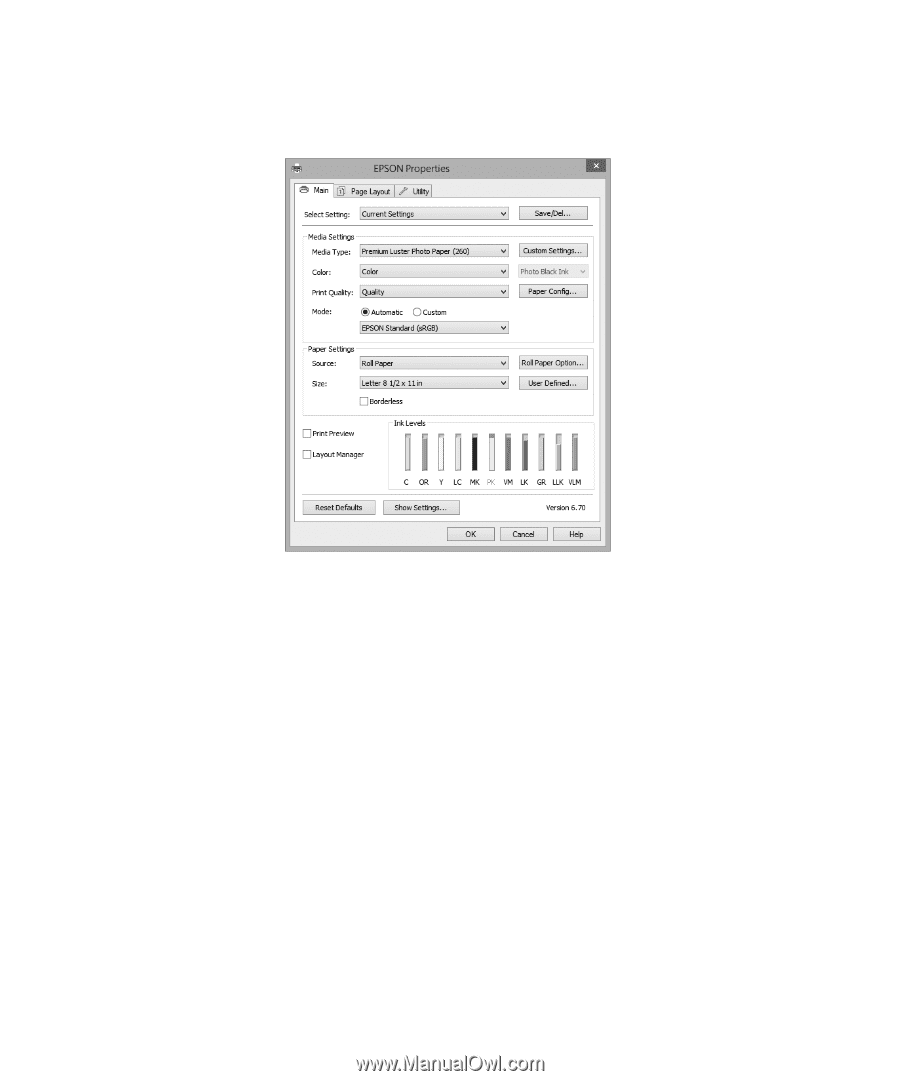
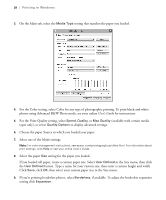
If you loaded roll paper, create a custom paper size. Select, setting for the paper you loaded.
 |
View all Epson SureColor P9000 Standard Edition manuals
Add to My Manuals
Save this manual to your list of manuals |
Page 29 highlights
28 | Printing in Windows 3. On the Main tab, select the Media Type setting that matches the paper you loaded. 4. For the Color setting, select Color for any type of photographic printing. To print black-and-white photos using Advanced B&W Photo mode, see your online User's Guide for instructions. 5. For the Print Quality setting, select Speed, Quality, or Max Quality (available with certain media types only), or select Quality Options to display advanced settings. 6. Choose the paper Source in which you loaded your paper. 7. Select one of the Mode settings. Note: For color management instructions, see epson.com/proimaging/iccprofiles.html. For information about print settings, click Help or see your online User's Guide. 8. Select the paper Size setting for the paper you loaded. If you loaded roll paper, create a custom paper size. Select User Defined in the Size menu, then click the User Defined button. Type a name for your custom size, then enter a custom height and width. Click Save, click OK, then select your custom paper size in the Size menu. 9. If you're printing borderless photos, select Borderless, if available. To adjust the borderless expansion setting click Expansion.
-
 1
1 -
2
-
3
-
4
-
5
-
6
-
7
-
8
-
9
-
10
-
11
-
12
-
13
-
14
-
15
-
16
-
17
-
18
-
19
-
20
-
21
-
22
-
23
-
 24
24 -
 25
25 -
 26
26 -
 27
27 -
 28
28 -
 29
29 -
 30
30 -
 31
31 -
 32
32 -
 33
33 -
 34
34 -
35
-
36
-
37
-
38
-
39
-
40
-
41
-
42
-
43
-
44
-
45
-
46
 |
 |