Epson SureColor S40600 User Manual - Page 12
Epson SureColor S40600 Manual
 |
View all Epson SureColor S40600 manuals
Add to My Manuals
Save this manual to your list of manuals |
Page 12 highlights
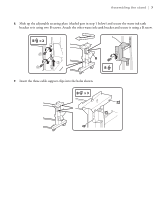
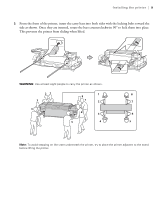
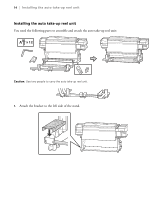
12 | Installing the printer 9. Remove the protective covering from the waste ink tube and then feed the tube through the hole in the frame. 10. Open the two latches on the side of the stand and secure the waste ink tube. Make sure the zip ties on the tube are below the bottom latch, then close both latches. Note: Make sure the waste ink tube is not pinched in any place to avoid having ink back up in it.
-
 1
1 -
2
-
3
-
4
-
5
-
6
-
 7
7 -
 8
8 -
 9
9 -
 10
10 -
 11
11 -
 12
12 -
 13
13 -
 14
14 -
 15
15 -
 16
16 -
 17
17 -
18
-
19
-
20
-
21
-
22
-
23
-
24
-
25
-
26
-
27
-
28
-
29
-
30
-
31
-
32
 |
 |

12
|
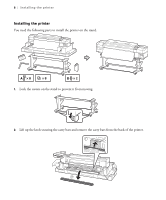
Installing the printer
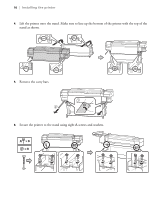
9.
Remove the protective covering from the waste ink tube and then feed the tube through the hole in
the frame.
10.
Open the two latches on the side of the stand and secure the waste ink tube. Make sure the zip ties on
the tube are below the bottom latch, then close both latches.
Note:
Make sure the waste ink tube is not pinched in any place to avoid having ink back up in it.