Epson TM-L90 Plus with Peeler UB-R04 Users Manual - Page 2
DIP Switches, How to Set Up the UB-R04
 |
View all Epson TM-L90 Plus with Peeler manuals
Add to My Manuals
Save this manual to your list of manuals |
Page 2 highlights
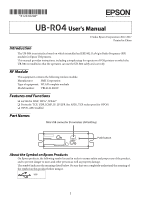
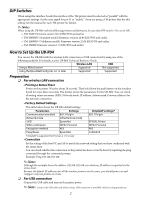
DIP Switches When using this interface board, the interface of the TM printer must be selected as "parallel" with the appropriate settings. Set the reset signal for pin 31 to "enable," if you are using a TM printer that has this setting. See the manual for each TM printer for details. Note: When using the UB-R04 with the following printers and firmware, be sure that DIP switch 1-8 is set to ON. • TM-T88V Firmware version 30.21 ESC/POS and earlier • TM-H6000IV (Standard model) Firmware version 20.04 ESC/POS and earlier • TM-H6000IV (Validation model) Firmware version 21.04 ESC/POS and earlier • TM-H2000 Firmware version 1.51 ESC/POS and earlier How to Set Up the UB-R04 You can set the UB-R04 with the wireless LAN connection or USB connection by using one of the following methods. For details, see the UB-R04 Technical Reference Guide. Wireless LAN USB Using a Web browser Supported Not supported Using the EpsonNetConfig Ver. 4.1 or later Supported Supported Preparation ❏ For wireless LAN connection • Printing a Status Sheet Power on the printer. Wait for about 20 seconds. Then hold down the push button on the interface board for more than 3 seconds. The printer prints the parameters for the UB-R04. You can check all setting values necessary (SSID, Network mode, IP address, Subnet mask, Gateway address) for the network connection. • Factory Default Settings The table below shows the UB-R04 default settings. Parameters Settings Communication standard 802.11b/g/n Network mode Infrastructure mode SSID EpsonNet WPA certification WPA2-Personal Encryption method AES Passphrase EpsonNet SimpleAP settings* 802.11b/g/n EPSON_Printer WPA2-Personal AES 12345678 *) SimpleAP is supported if Soft Version is 1.10 or later. • Connection Set the setting of the host PC and AP to match the network setting that you have confirmed with the status sheet. You can check whether the connection to the printer has been correctly done by inputting the ping command through the command prompt. Example: Ping 192.168.192.168 Note: Although the example shows the address 192.168.192.168, use whatever IP address is reported on the status sheet. Because the default IP addresses for all the wireless printers are the same, you should power on and configure only one printer at a time. ❏ For USB connection Connect the USB cable and turn on the printer power. Note: Connect the USB cable only when setting. USB connection is available only for setting parameters. 2
-
 1
1 -
 2
2 -
 3
3 -
 4
4
 |
 |
