Epson XP-446 Start Here - Installation Guide - Page 2
Load paper - ink
 |
View all Epson XP-446 manuals
Add to My Manuals
Save this manual to your list of manuals |
Page 2 highlights
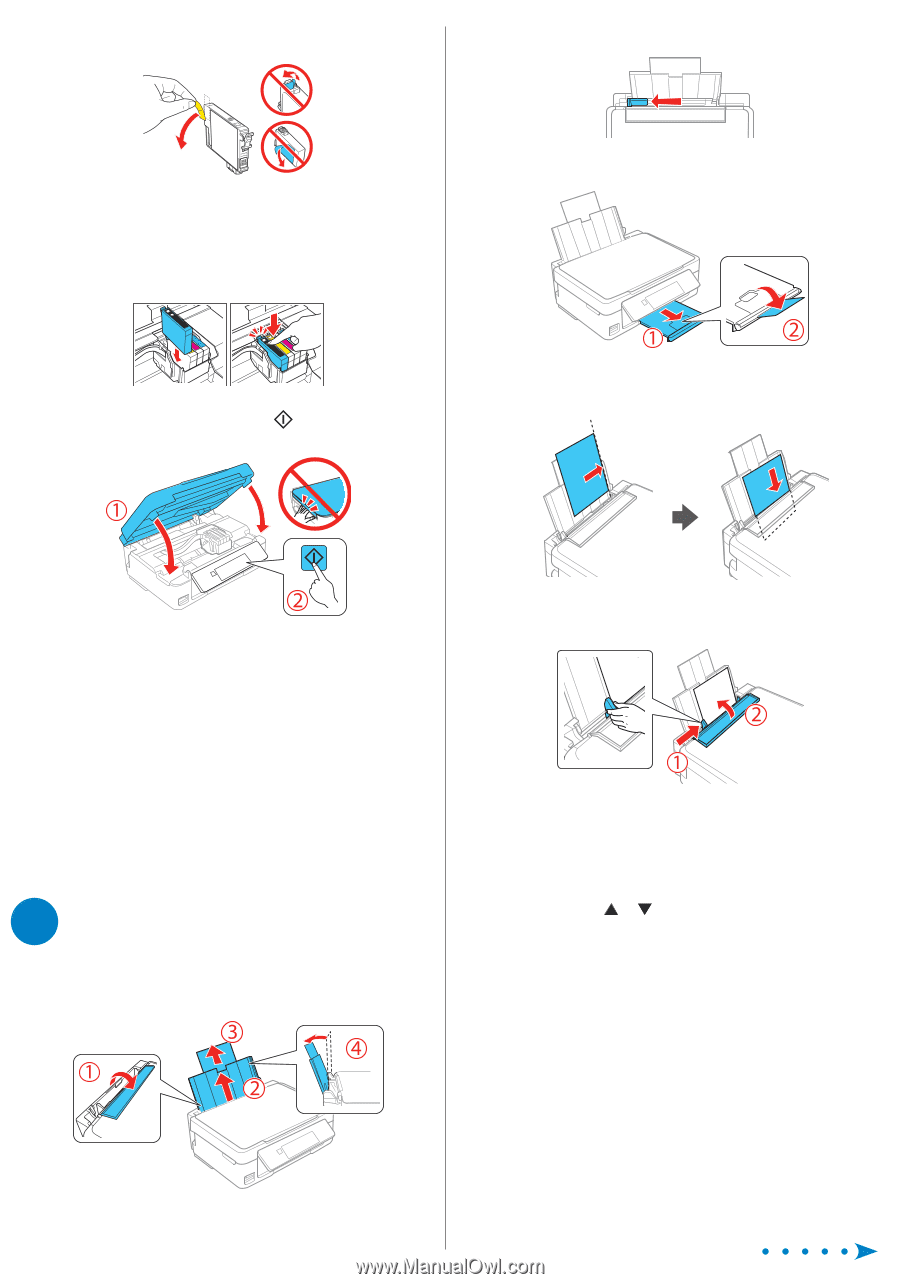
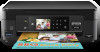
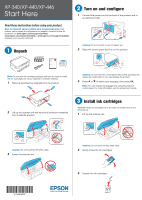
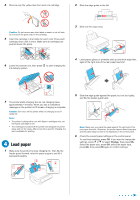
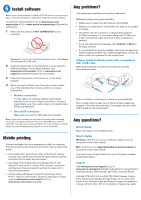
4 Remove only the yellow tape from each ink cartridge. 2 Slide the edge guide to the left. Caution: Do not remove any other labels or seals, or ink will leak. Do not touch the green chip on the cartridge. 5 Insert the cartridge in the holder for each color. Press each cartridge down until it clicks. Make sure all cartridges are pushed down into place. 3 Slide out the output tray. 6 Lower the scanner unit, then press ink delivery system. to start charging the 4 Load paper, glossy or printable side up and short edge first, against the right side of the rear paper feed slot. 7 The printer starts charging the ink. Ink charging takes approximately 4 minutes. When you see a completion message on the printer's LCD screen, charging is complete. Caution: Don't turn off the printer while it is charging or you'll waste ink. Note: • The printer is designed for use with Epson® cartridges only, not third-party cartridges or ink. • The cartridges included with the printer are designed for printer setup and not for resale. After some ink is used for charging, the rest is available for printing. 4 Load paper 1 Make sure the product is done charging ink. Then flip the feeder guard forward, raise the paper support, and tilt it backwards slightly. 5 Slide the edge guide against the paper, but not too tightly, and flip the feeder guard back. Note: Make sure you place the paper against the right side of the rear paper feed slot. Otherwise, the printer cannot detect the paper and the paper setup screen is not displayed on the control panel. 6 Check the current paper settings on the control panel. To use these settings, press OK. If you want to change the settings, press or to select Change, then press OK. Select the paper size, press OK, select the paper type, press OK, then press OK again to confirm settings.
-
 1
1 -
 2
2 -
 3
3 -
 4
4
 |
 |