Eureka LightSpeed 4750A Quick Start Guide - Page 1
Eureka LightSpeed 4750A Manual
 |
View all Eureka LightSpeed 4750A manuals
Add to My Manuals
Save this manual to your list of manuals |
Page 1 highlights
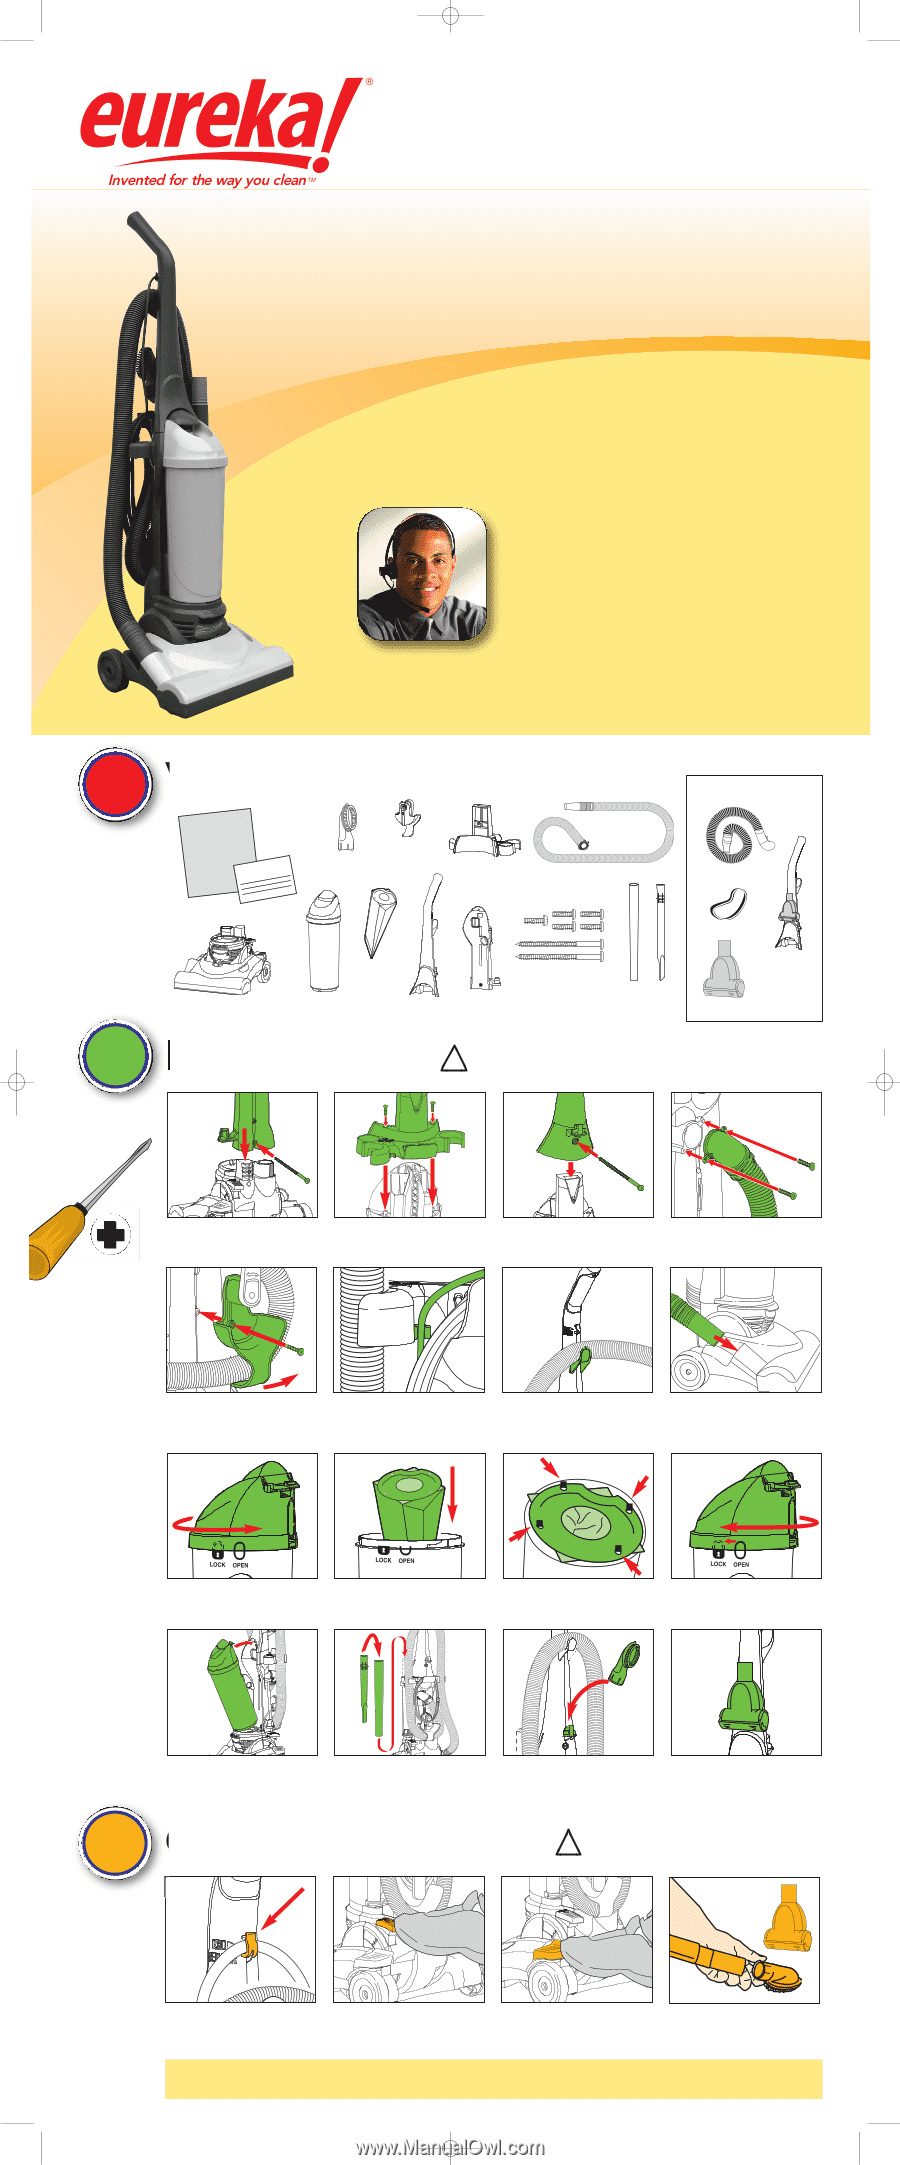
PN81158_LightspBagQS.qxp:front englsh 3/4/09 4:59 PM Page 1 4750 Series QUICK START GUIDE Thank you for purchasing your new Eureka vacuum! Before returning, call Eureka Customer Service HELPLINE 1-800-282-2886 8 a.m. to 7:30 p.m. (CST), Monday - Friday 10 a.m. to 6:30 p.m. (CST), Saturday - Sunday www.eureka.com 1STEP What's in the carton OWNER'S GUIDE REGISTRATION Dusting Brush Hose Retainer Tool Caddy Hose SPECIAL FEATURES Available on some models Stair Hose 2STEP Important Safeguards Ext-U Belt Vacuum Base Dust Bag Style PL Dust Cup and Filter Handle Vacuum Back 2 Long and 5 Short Screws Extension Wand and Crevice Tool Handle with Power Paw® Power Paw® Easy assembly ! READ ALL INSTRUCTIONS BEFORE USING THIS VACUUM CLEANER. Moving parts! Assemble the vacuum cleaner before using. Slide vacuum back onto base. Fasten with one long screw. Use a Phillips screwdriver. Slide tool caddy onto back. Fasten with two short screws. Slide handle onto tool caddy. Fasten with one long screw. Attach hose to vacuum back. Fasten with two short screws. Attach hose retainer with one Pull up cord and push into short screw. Pull retainer out lower cord retainer. Wrap cord. to position hose. Place hose over hose hook on handle. Push end of hose into opening on vacuum base. Twist cover counter-clockwise and lift off. Place bag inside dust cup. Position holes in cardboard collar over posts in cup. Line up dust cup cover; twist clockwise to lock. Place dust cup on base and snap into place. Place wand/crevice tool in holder on side of vacuum. Place dusting brush on back of handle. Some models: Snap Power Paw® into clip on front. 3STEP Get ready to vacuum ! Do not use the vacuum cleaner without disposable dust bag and motor filter in place. Push cord into top cord retainer. Plug into outlet. Step on power switch to turn on; step on again to turn off. Step on handle release to lower handle into position. For accessories: Loosen lower end of hose and attach tool. PROBLEM SOLVING Refer to Owner's Guide. MAINTENANCE SCHEDULE Refer to back of dust cup or Owner's Guide.
-
 1
1
 |
 |