Fisher and Paykel RF195ADUX1 Active Smart RF175 & RF195 User Guide & I - Page 35
Humidity Control System
 |
View all Fisher and Paykel RF195ADUX1 manuals
Add to My Manuals
Save this manual to your list of manuals |
Page 35 highlights
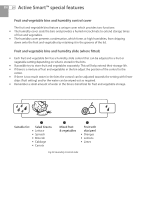
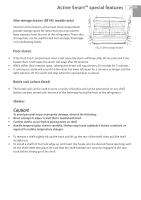
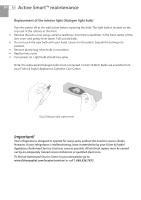
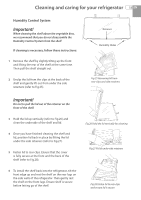
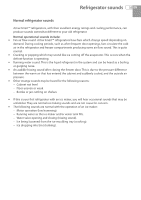
Cleaning and caring for your refrigerator 33 EN Humidity Control System Important! When cleaning the shelf above the vegetable bins, we recommend that you do not disassemble the Humidity Control System from the shelf. If cleaning is necessary, follow these instructions: 1 Remove the shelf by slightly tilting up the front and lifting the rear of the shelf at the same time. Then pull the shelf straight out. 2 Unclip the lid from the clips at the back of the shelf and gently lift out from under the side retainers (refer to Fig.25). Retainer Humidity Slides Fig.25 Removing lid from rear clips and side retainers Important! Do not to pull the lid out of the retainer on the front of the shelf. 3 Hold the lid up vertically (refer to Fig.26) and clean the underside of the shelf and lid. 4 Once you have finished cleaning the shelf and lid, position lid back in place by fitting the lid under the side retainers (refer to Fig.27). 5 Fasten lid to rear clips. Ensure that the cover is fully secure at the front and the back of the shelf (refer to Fig.28). 6 To install the shelf back into the refrigerator, tilt the front edge up and rest the shelf on the rear lugs on the side walls of the refrigerator. Then gently rest the shelf on the front lugs. Ensure shelf is secure before letting go of the shelf. Fig.26 Hold the lid vertically for cleaning Fig.27 Fit lid under side retainers Fig.28 Fasten lid to rear clips and ensure lid is secure
-
 1
1 -
2
-
3
-
4
-
5
-
6
-
7
-
8
-
9
-
10
-
11
-
12
-
13
-
14
-
15
-
16
-
17
-
18
-
19
-
20
-
21
-
22
-
23
-
24
-
25
-
26
-
27
-
28
-
29
-
 30
30 -
 31
31 -
 32
32 -
 33
33 -
 34
34 -
 35
35 -
 36
36 -
 37
37 -
 38
38 -
 39
39 -
 40
40 -
41
-
42
-
43
-
44
-
45
-
46
-
47
-
48
-
49
-
50
-
51
-
52
-
53
-
54
-
55
-
56
-
57
-
58
-
59
-
60
-
61
-
62
-
63
-
64
-
65
-
66
-
67
-
68
-
69
-
70
-
71
-
72
-
73
-
74
-
75
-
76
-
77
-
78
-
79
-
80
-
81
-
82
-
83
-
84
-
85
-
86
-
87
-
88
-
89
-
90
-
91
-
92
-
93
-
94
-
95
-
96
 |
 |
