Fluke 2271A-N-G20M Product Manual - Page 31
Table 9. Front-Panel Features cont., Description, Select
 |
View all Fluke 2271A-N-G20M manuals
Add to My Manuals
Save this manual to your list of manuals |
Page 31 highlights
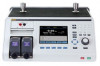
2271A Operators Manual Item Table 9. Front-Panel Features (cont.) Description Test ports which can be connected with UUTs or a test station (with caps). The Product can be equipped with two different types of test ports: P3000 or M20x1.5. The Product comes with a full set of adapters. Numbered keys to change numerical values on the Product user interface. To enter a value, select an editable section of the display and then change the numerical values with the numbered keys. Push to accept and set the entry. For example, to set an output of 100 psi, push and then push Note Use to give an entry a positive or negative value, but if this button is pushed and held, it will lock the front control panel. Push to unlock the control panel. The Product controls pressure when in the Control mode only. See the Control Modes section for more information. - As a new value is entered with the numbered keys, push this button to delete the last key entry. - Push to clear the value entry in progress. - Push as the final step when inputting a numerical value. When on the main menu, use the Jog Knob to make fine adjustments to the setpoint value. When turned, the value changes by the least significant digit based on the measurement resolution refer to the Measurement Resolution section for more information. Jogging the pressure with the Jog Knob adjusts the Setpoint value in any mode but will only actively change the applied pressure while in Control mode. Turn counter-clockwise to decrease pressure or clockwise to increase. The Jog Knob can also be used to quickly navigate menus. - Push to quickly enter a pressure value to control to. - Push to put the Product into standby mode. In standby, the display is off and the keys are disabled. Standby mode also disables remote operation. See the Turn on the Product section. - Push to immediately vent the system pressure and stop all pressure control. In addition, remote communication is stopped and the Product enters a safety mode until manually deactivated. See the Vent and Abort section for more information. - Push this button to enter the Setup Menu. Use these arrow buttons to move the cursor through the UI. As the different UI items are highlighted, the softkey becomes active and turns to Select. The Jog Knob can also be used for navigation as well. 24 MyFlukeStore Shop for Fluke products online at: www. .com 1.888.610.7664
-
 1
1 -
2
-
3
-
4
-
5
-
6
-
7
-
8
-
9
-
10
-
11
-
12
-
13
-
14
-
15
-
16
-
17
-
18
-
19
-
20
-
21
-
22
-
23
-
24
-
25
-
 26
26 -
 27
27 -
 28
28 -
 29
29 -
 30
30 -
 31
31 -
 32
32 -
 33
33 -
 34
34 -
 35
35 -
 36
36 -
37
-
38
-
39
-
40
-
41
-
42
-
43
-
44
-
45
-
46
-
47
-
48
-
49
-
50
-
51
-
52
-
53
-
54
-
55
-
56
-
57
-
58
-
59
-
60
-
61
-
62
-
63
-
64
-
65
-
66
-
67
-
68
-
69
-
70
-
71
-
72
-
73
-
74
-
75
-
76
-
77
-
78
-
79
-
80
-
81
-
82
-
83
-
84
-
85
-
86
-
87
-
88
-
89
-
90
-
91
-
92
-
93
-
94
-
95
-
96
-
97
-
98
-
99
-
100
 |
 |
