Foscam FI8910W QUICK INSTALLATION GUIDE_1 - Page 3
Hardware Installation, Security Warning - firmware
 |
View all Foscam FI8910W manuals
Add to My Manuals
Save this manual to your list of manuals |
Page 3 highlights
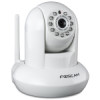
Foscam Digital Technologies LLC Security Warning FI8910W Quick Installation Guide Foscam cameras require good security practices to safeguard your privacy. You can help protect your camera by changing the default username and/or password. You should update your camera regularly at http://www.foscam.us/firmware.html. Make sure your camera has the latest firmware installed for your specific camera model. Start Installation 1. Hardware Installation 1) Open the package. Take the camera out of the box carefully. 2) Mount the antenna. Then take the Wi-Fi antenna, mount it on the SMA connector on the back of the camera, screw the antenna into the port, and make the antenna stand vertically. Mount the antenna Plug in the network cable 3) Get the camera connected to the router, and insert the power plug. Use the network cable to connect the camera to the router or the switch in the LAN network at your home or your office. Plug in the power. The green network light at the rear of the camera will blink and the camera will automatically pan/tilt. The red power light will also turn on. 2. Software Installation Insert the CD into the CD drive of your computer and find the folder "For Windows OS". Copy the IP camera tool to your computer and start the program or double click on the setup file to install. -2-
-
 1
1 -
 2
2 -
 3
3 -
 4
4 -
 5
5 -
 6
6 -
 7
7 -
 8
8 -
 9
9 -
10
-
11
-
12
-
13
-
14
-
15
-
16
-
17
-
18
-
19
-
20
-
21
-
22
-
23
-
24
-
25
-
26
-
27
-
28
-
29
-
30
 |
 |
