Frigidaire FFH17F7HW Complete Owner's Guide (English) - Page 4
Setting, Temperature Control, Energy Saving Tips - reversible door
 |
UPC - 012505226489
View all Frigidaire FFH17F7HW manuals
Add to My Manuals
Save this manual to your list of manuals |
Page 4 highlights
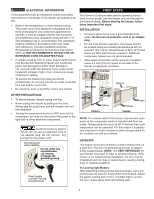
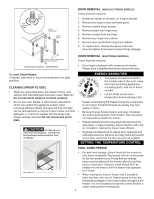
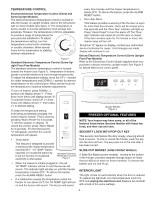
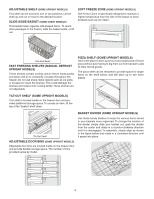
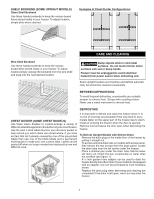
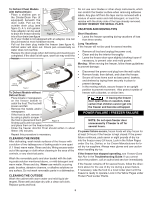
Turn Right To Lower Turn Left To Raise Plastic Leveling Feet Crating Screw Door Removal (NON-ELECTRONIC MODELS) If door must be removed: 1. Gently lay freezer on its back, on a rug or blanket. 2. Remove two base screws and base panel. 3. Remove bottom hinge screws. 4. Remove plastic top hinge cover. 5. Remove screws from top hinge. 6. Remove top hinge from cabinet. 7. Remove door and bottom hinge from cabinet. 8. To replace door, reverse the above order and securely tighten all screws to prevent hinge slippage. Discard The (4) Crating Screws And (2) Wood Bases Door Removal (ELECTRONIC MODELS) If door must be removed: Unpacking and Leveling -- Upright Models • Door hinge is fastened with tamper-proof screws. Please have a qualified technician remove the door. To Level Chest Models: If needed, add metal or wood shims between foot pads and floor. cleaning (Prior to use) • Wash any removable parts, the freezer interior, and exterior with mild detergent and warm water. Wipe dry. Do not use harsh cleaners on these surfaces. • Do not use razor blades or other sharp instruments, which can scratch the appliance surface when removing adhesive labels. Any glue left from the tape can be removed with a mixture of warm water and mild detergent, or touch the residue with the sticky side of tape already removed. Do not remove the serial plate. To allow door to close and seal properly, DO NOT let food packages extend past the front of shelves. SA GY EY SA ENERGY SAVING TIPS VE MON • The freezer should be located in the coolest area of the room, away from heat producing appliances or heating ducts, and out of direct sunlight. VE ENER • Let hot foods cool to room temperature before placing in the freezer. Overloading the freezer forces the compressor to run longer. Foods that freeze too slowly may lose quality or spoil. • Be sure to wrap foods properly, and wipe containers dry before placing them in the freezer. This cuts down on frost build-up inside the freezer. • Freezer shelves should not be lined with aluminum foil, wax paper, or paper toweling. Liners interfere with cold air circulation, making the freezer less efficient. • Organize and label food to reduce door openings and extended searches. Remove as many items as needed at one time, and close the door as soon as possible. SETTING THE temperature CONTROL Shelf Front Cool Down Period • For safe food storage, allow 4 hours for the freezer to cool down completely. The freezer will run continuously for the first several hours. Foods that are already frozen may be placed in the freezer after the first few hours of operation. Unfrozen foods should NOT be loaded into the freezer until the freezer has operated for 4 hours. • When loading the freezer, freeze only 3 pounds of fresh food per cubic foot of freezer space at one time. Distribute packages to be frozen evenly throughout the freezer. It is not necessary to turn the control knob to a colder setting while freezing food. 4
-
 1
1 -
 2
2 -
 3
3 -
 4
4 -
 5
5 -
 6
6 -
 7
7 -
 8
8 -
 9
9 -
 10
10 -
11
 |
 |
