Frigidaire FFTA1033S1 Installation Instructions
Frigidaire FFTA1033S1 Manual
 |
View all Frigidaire FFTA1033S1 manuals
Add to My Manuals
Save this manual to your list of manuals |
Frigidaire FFTA1033S1 manual content summary:
- Frigidaire FFTA1033S1 | Installation Instructions - Page 1
Installation Instructions READ BEFORE INSTALLING UNIT For Through-the-Wall Air Conditioners INSTALLATION WARNINGS AND CAUTION Carefully read the installation manual before beginning. Follow each step as shown. Observe all local, state, and national electrical codes and by qualified, licensed, - Frigidaire FFTA1033S1 | Installation Instructions - Page 2
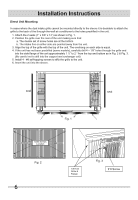
a stop for the air conditioner. For new or replacement installations, a Frigidaire Sleeve Kit (EA108T) is recommended. NOTE: When installation is complete, replacement unit must have rearward slope as shown in Fig 1. • Remove old air conditioner from wall sleeve and prepare wall sleeve as follows - Frigidaire FFTA1033S1 | Installation Instructions - Page 3
two rear intakes. It is very important that these installation instructions are followed so your unit can operate at maximum efficiency. Frigidaire sleeves may have older single sided intake grilles • These grilles should be replaced with the dual intake grille supplied with the air conditioner. - Frigidaire FFTA1033S1 | Installation Instructions - Page 4
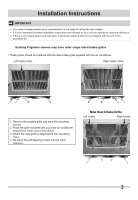
Installation Instructions Grille Removal Important: Single intake grilles must be removed when used with used with dual intake Through-the-wall Units. Warning: When removing grilles, protect from falling by securing with a leash. This can be fashioned from cord or strapping looped through the grille - Frigidaire FFTA1033S1 | Installation Instructions - Page 5
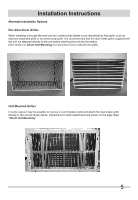
Instructions Alternate Installation Options Non-Directional Grilles When installing a through-the-wall unit into a sleeve that utilizes a non-directional air Mounting for instructions how to attache the grille) Unit Mounted Grilles In some cases it may be possible to remove a non-Frigidaire grille - Frigidaire FFTA1033S1 | Installation Instructions - Page 6
Installation Instructions Direct Unit Mounting In cases where the dual intake grille cannot be mounted directly to the sleeve it is desirable to attach the grille to the back of the through-the-wall air conditioner to the holes predrilled in the unit. 1. Attach the 2 seals (1" x 3/8" x 14") as shown - Frigidaire FFTA1033S1 | Installation Instructions - Page 7
Instructions Grille to Sleeve Attachment In cases where the dual intake grille fits inside the sleeve and the grille flange overlaps the sleeve flange, direct attachment may be possible. Grille Installation 1. Remove the existing grille. 2. Place the grille included with the new air conditioner - Frigidaire FFTA1033S1 | Installation Instructions - Page 8
Installation Instructions Non-Frigidaire Dual Intake Grille In cases where the existing sleeve is a non-Frigidaire sleeve but is installed with a dual intake grille. The existing grille necessary to reduce recirculation of hot exhaust air into the intakes which would reduce system performance. 8 - Frigidaire FFTA1033S1 | Installation Instructions - Page 9
Subsitute Grille Installation Instructions Important: Single intake grilles must be removed when used with used with dual intake Through-the-wall Units. Installation of a standard size Through-the-Wall unit into older - larger sleeves may leave undesirable gaps around the grille edges. An option - Frigidaire FFTA1033S1 | Installation Instructions - Page 10
Trim Kit Installation Instructions 1. Install the 1" x 1" x 84" long stuffer seal between the wall sleeve and the and comfort, it is recommended to use an appropriately sized cover to provide additional insulation and air sealing when the unit is not in use during the off-season. The size of the
-
 1
1 -
 2
2 -
 3
3 -
 4
4 -
 5
5 -
 6
6 -
 7
7 -
8
-
9
-
10
 |
 |
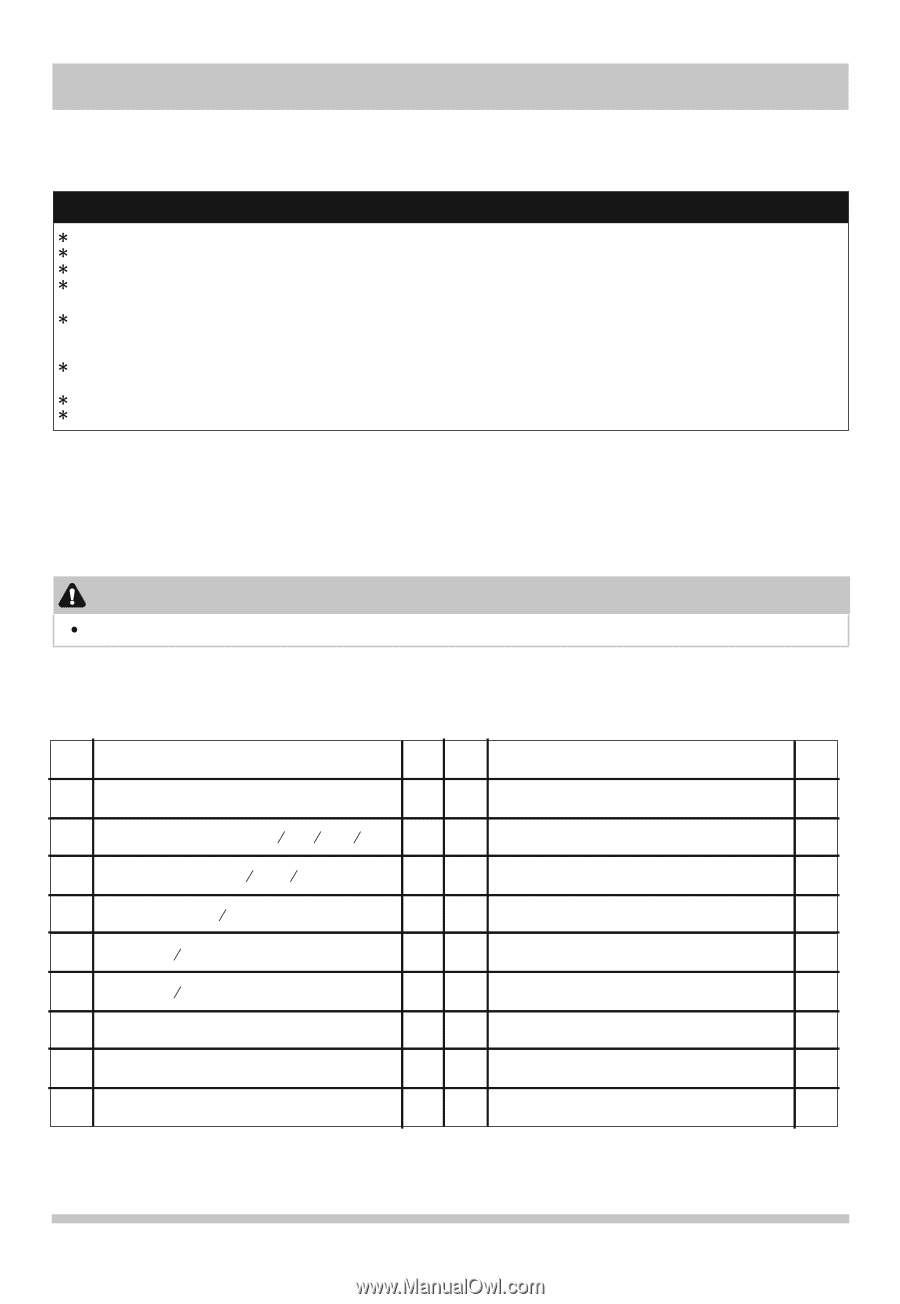
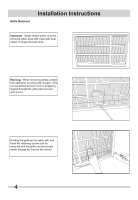
Hardware
2
2
3
Tapered Spacer (17” Long)
4
4
1
2
3
4
5
1
6
2
7
3
8
No.
Qty.
2
9
Centering/Support Blocks (
”
)
4
”
x 3
”
x 1
1
2
1
2
1
2
Plastic Divider (
)
1/8
”
x 4
”
x 14
”
1
2
1
2
Stuffer Seal (
)
1
”
x 1
”
x 84
”
1
2
Seal (
)
1
”
x 1
”
x 25
”
1
2
Seal (
)
1
”
x 1
”
x 14
”
1
2
Seal (
)
1
”
x 3/8
”
x 25
”
Seal(
)
1
”
x 3/8
”
x 14
”
Seal (
)
1
”
x 3/4
”
x 14
”
2
Hardware
2
1
1
Ground Wire (green)
2
13
10
11
12
14
Grounding Screw
15
1
16
1
17
No.
Qty.
4
18
Trim Frame (top & bottom legs)
Grille (plastic)
Grille Aluminum
Nuts (plastic)
Screw w/washer
4
Trim Frame (side legs)
Tooth washer for grounding screw
2
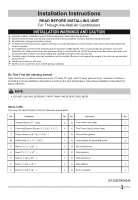
READ BEFORE INSTALLING UNIT
For Through-the-Wall Air Conditioners
1
Installation Instructions
NOTE:
DO NOT USE ANY SCREWS OTHER THAN THOSE SPECIFIED HERE
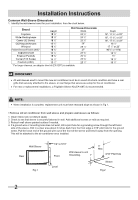
Note that the air conditioner dimensions are: 24" wide,14" high, and 19" deep (without front). Install air conditioner
according to these installation instructions to achieve the best performance. Save these installation instructions for
future reference.
Do This First (for existing sleeve)
You may not need all parts in the kit. Discard unused parts.
Items in Kit
16120300A04644
INSTALLATION WARNINGS AND CAUTION
Carefully read the installation manual before beginning. Follow each step as shown.
Observe all local, state, and national electrical codes and by qualified, licensed, authorized personnel only.
Pay attention to danger and safety notices.
To avoid risk of personal injury, property damage, or product damage due to the weight of this device and sharp edges that
may be exposed.
Air conditioners covered in this manual pose an excessive weight hazard. Two or more people are needed to move and
install the unit. Wear protective gloves whenever lifting or carrying the unit. AVOID the sharp metal fins of front and rear coils.
To prevent injury or strain, use proper lifting and carrying techniques when moving unit.
Carefully inspect location where air conditioner will be installed. Be sure it will support the weight of the unit over an extended
period of time.
Handle air conditioner with care.
Make sure air conditioner does not fall during installation.