Frigidaire FGIH3047VF Installation Instructions - Page 7
Install filler trim kit, Door Handle Mounting In, structions some models
 |
View all Frigidaire FGIH3047VF manuals
Add to My Manuals
Save this manual to your list of manuals |
Page 7 highlights
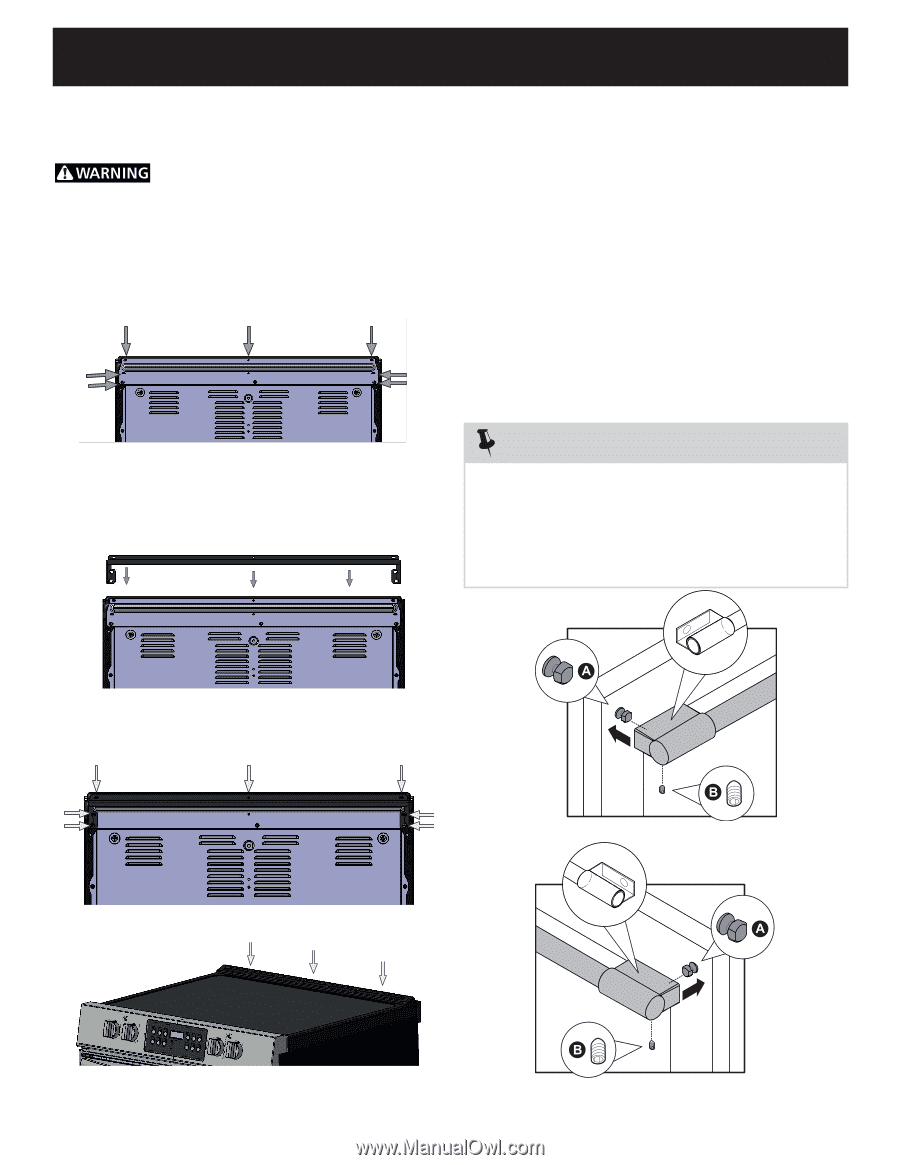
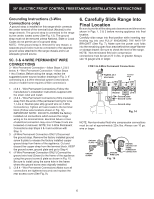
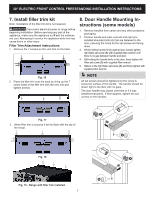
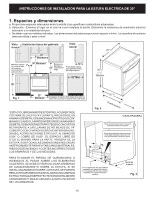
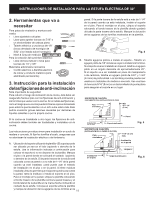
30" ELECTRIC FRONT CONTROL FREESTANDING INSTALLATION INSTRUCTIONS 7. Install filler trim kit Note: Installation of the filler trim kit is not required. Disconnect electrical power to range before beginning installation. Before servicing any part of the appliance, make sure the appliance is off and the surfaces are cool. Attempting to service the appliance while hot may cause burns or other injury. Filler Trim Attachment Instructions: 1. Remove the 7 screws on the vent trim on the back. Fig. 16 2. Place the filler trim over the back by lining up the 7 screw holes of the filler trim with the vent trim and tighten screws. 8. Door Handle Mounting Instructions (some models) 1. Remove handles from carton and any other protective packaging. 2. Position handle end caps over left and right preinstalled shoulder bolts (A) that are fastened to the door, ensuring the holes for the set screws are facing down. 3. While holding handle firmly against door, loosely tighten right Allen set screw (B) with supplied Allen wrench until there is no gap between handle and door. 4. Still holding the handle firmly to the door, firmly tighten left Allen set screw (B) with supplied Allen wrench. 5. Return to the right Allen set screw (B) and firmly tighten with supplied Allen wrench. NOTE All set screws should be tightened so the screw is below the surface of the handle. The handle should be drawn tight to the door with no gaps. The door handle may loosen over time or if it was installed improperly. If this happens, tighten the set screws on the handles. Fig. 17 3. When filler trim is secured it will be flush with the top of the range. Fig. 18 Fig. 19 - Range with filler trim installed. 7
-
 1
1 -
 2
2 -
 3
3 -
 4
4 -
 5
5 -
 6
6 -
 7
7 -
 8
8 -
 9
9 -
 10
10 -
 11
11 -
 12
12 -
13
-
14
-
15
-
16
 |
 |