Frigidaire FPIB10B7NS Complete Owner's Guide - Page 5
H O W To Assemble Your Immersion Blender, Caution
 |
View all Frigidaire FPIB10B7NS manuals
Add to My Manuals
Save this manual to your list of manuals |
Page 5 highlights
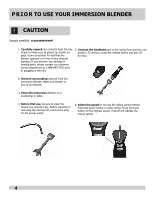
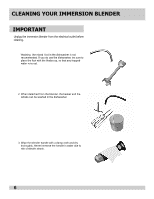
H O W TO ASSEMBLE YOUR IMMERSION BLENDER ! CAUTION Blades are very sharp. Avoid handling the power blades with your fingers. 1. Insert the immersion blender deep into the beaker. Begin mixing at normal speed. Make sure the beaker is no more than 2/3 full. If you aren't using the beaker, do not immerse the mixing foot more than 2/3 of its length. Move the blender around to insure best results with the food. Release the switch to stop blending. 4. Insert the handheld part into the chopper's lid and lock it into position. Plug the cord into the power outlet, select the speed, and press the power button to start. Remove the handheld part by pressing the release button. The blender can be used continuously for up to 30 seconds. Afterwards, allow the blender to cool down for 1 minute. 2. To use the mini-chopper, place the chopper bowl on a clean and level surface. Put the stainless steel blade into place. 5. To work with the double whisk, attach the whisk to the handheld part and lock into place. To disassemble, press the release button and pull the whisks off. The appliance can be used continuously for 30 seconds, then cool for one minute. (The whisk attachment works well for whipping egg whites and whipping cream). 3. Place food into the chopper bowl. (The chopper works well for herbs, nuts, and some vegetables). The maximum amount of food to be chopped cannot exceed ½ pound. Close the lid. 6. To store your blender, use the wall mounting device. Drill two holes into the wall, insert the two plastic tubes, then secure the device with two screws. 5
-
 1
1 -
 2
2 -
 3
3 -
 4
4 -
 5
5 -
 6
6 -
 7
7 -
 8
8 -
 9
9 -
 10
10 -
 11
11 -
12
-
13
-
14
-
15
-
16
-
17
-
18
-
19
-
20
-
21
-
22
-
23
-
24
 |
 |
