Frigidaire FRE5711KW Complete Owner's Guide (English) - Page 6
Features, Care and Cleaning - dryer model #
 |
UPC - 012505380716
View all Frigidaire FRE5711KW manuals
Add to My Manuals
Save this manual to your list of manuals |
Page 6 highlights
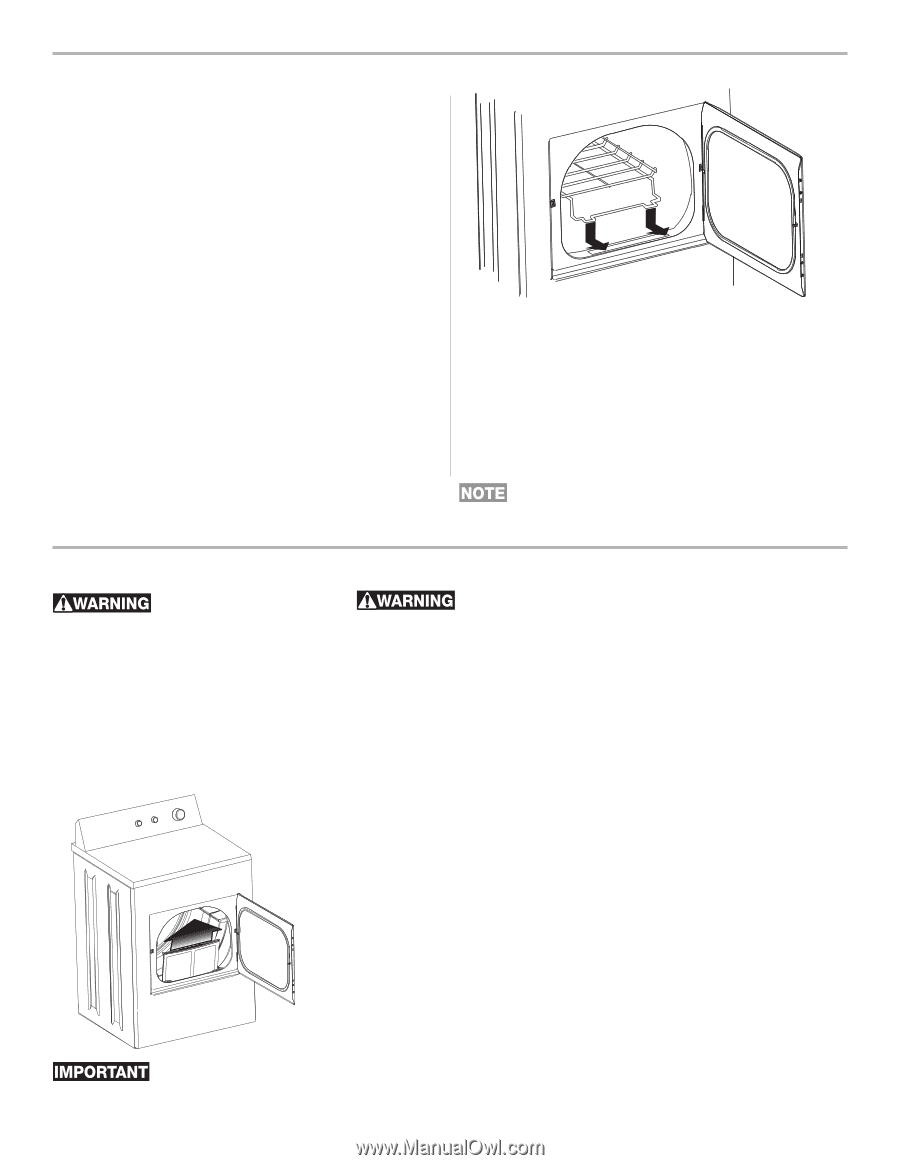
Features END OF CYCLE SIGNAL A signal will sound at the end of the cycle and periodically during wrinkle release (some models) if selected. DRYING RACK (some models) Use the drying rack to dry items which should not be tumble dried. 1.Open the dryer door and remove the lint screen. 2.Insert drying rack into the dryer drum. Place the front bar under the lip of the lint screen opening. 3.Place items to be dried on top of the rack. Weight should not exceed 10 lbs. Leave space between items, but do not let items hang over the sides or through the grids. Do not tumble other items when using the drying rack. 4.Select Timed Dry. Use only the Air Fluff/No Heat option for items containing plastic, foam rubber, rubber-like materials, feathers or down. 5.When items are dry, remove the rack and replace the lint screen. If lint screen is not in place, tumbling items could enter the exhaust system and cause damage to the dryer. Place the front bar under the lip of the lint screen opening. DRUM LIGHT (some models) The drum light will come on whenever the door is opened to illuminate the drum during loading and unloading. Closing the door turns off the light. REVERSIBLE DOOR Your dryer is equipped with a reversible door. The door can be hinged on the right or left side. For step-by-step instructions on DOOR REVERSAL, refer to the Installation Instructions supplied with this dryer. Care and Cleaning - FIRE HAZARD - A clothes dryer produces combustible lint. The dryer must be connected to an outdoors exhaust. Regularly inspect the outdoor exhaust opening and remove any accumulation of lint around the opening and in the surrounding area. To reduce risk of fire or serious injury to persons or property, comply with the basic warnings listed in the Important Safety Instructions and those listed below. • Before cleaning the dryer interior, unplug the electrical power cord to avoid electrical shock hazards. • Do not use any type spray cleanser when cleaning the dryer interior. Hazardous fumes or electrical shock could occur. INSIDE • Clean the lint filter after every load. Lint build-up on the filter restricts air flow, which causes longer drying times. The filter is located at the bottom of the door opening. Remove by pulling straight up. Remove the lint and replace the filter. • Occasionally a waxy build-up may form on the lint filter and/or moisture sensing bars from using dryer-added fabric softener sheets. To remove this build-up, wash them with warm, soapy water. Dry the filter thoroughly and replace. Do not operate the dryer without the lint filter in place. • If the dryer drum becomes stained from noncolorfast fabrics, clean the drum with a damp cloth and a mild liquid household cleanser. Remove cleanser residue before drying the next load. • Every 18 months an authorized servicer should clean the dryer cabinet interior and exhaust duct. These areas can collect lint and dust over time. An excessive amount of lint build-up could result in inefficient drying and possible fire hazard. every load. Clean the lint filter after 6
-
 1
1 -
 2
2 -
 3
3 -
 4
4 -
 5
5 -
 6
6 -
 7
7 -
 8
8 -
 9
9 -
 10
10
 |
 |