Frigidaire FTW3011KW Installation Instructions (All Languages) - Page 4
Installed Washer Dimensions, Unpacking Instructions - installation
 |
UPC - 012505380679
View all Frigidaire FTW3011KW manuals
Add to My Manuals
Save this manual to your list of manuals |
Page 4 highlights
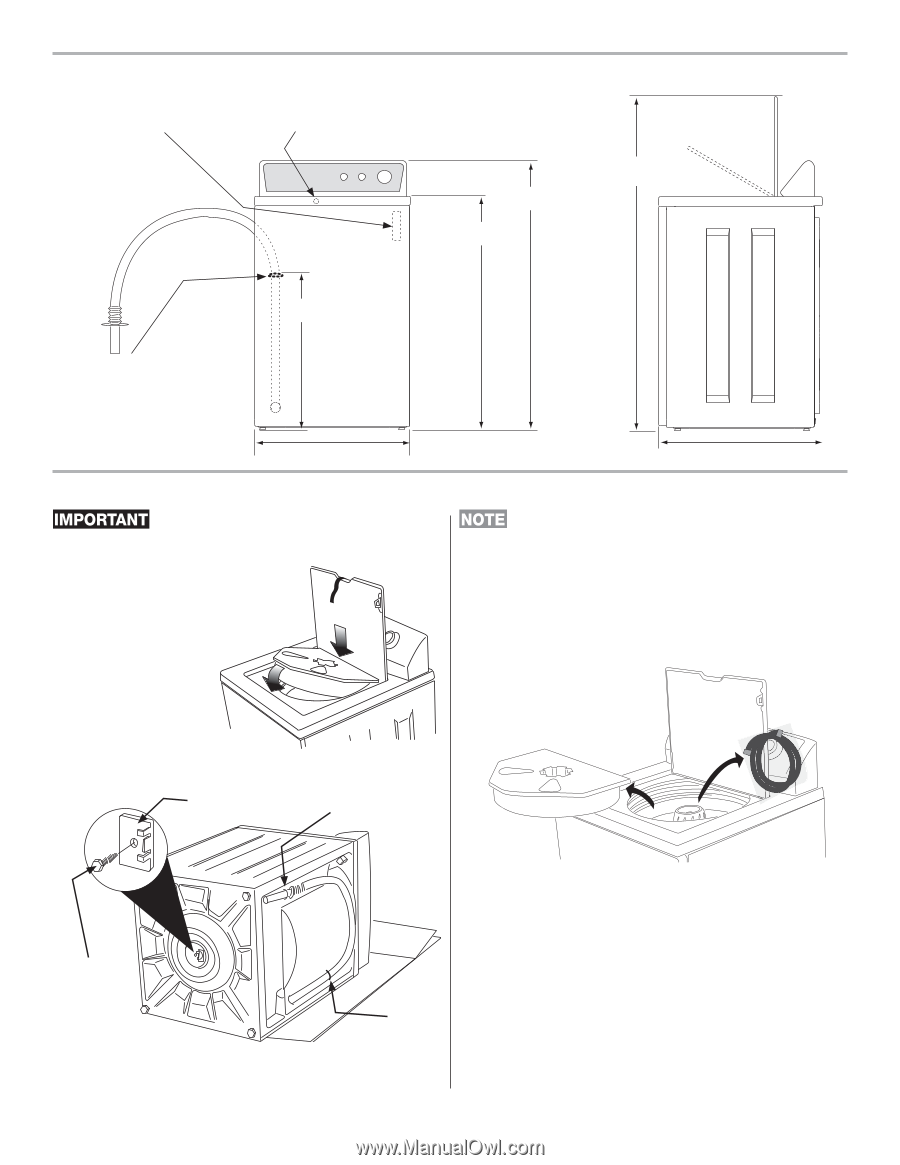
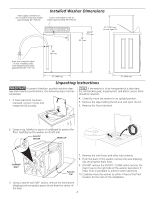
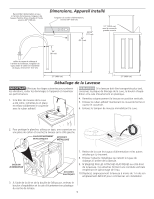
water supply connection on rear of washer, inlet hose length approximately 43" (109 cm) Installed Washer Dimensions power cord length on rear of washer approximately 59" (150 cm) 43 5/8" (111 cm) 36" (91.5 cm) 51" (129.5 cm) to clear open lid drain hose retention clamp on rear of washer, loose hose length beyond clamp approximately 54" (137 cm) 24" (61 cm) 27" (68.6 cm) 27" (68.6 cm) Unpacking Instructions To prevent vibration, possible machine damage and maximize performance, the following steps must be completed. 1. If foam tub block has been removed, reinsert it now and retape the lid securely. If the washer is to be transported at a later date, the tub blocking pad, shipping bolt, and plastic spacer block should be retained. 4. Carefully return the washer to an upright position. 5. Remove the tape holding the lid shut and open the lid. 6. Remove the foam tub block. 2. Using a rug, blanket or piece of cardboard to protect the floor, carefully lay the washer on its left side. PLASTIC SPACER WIRE CLIP SHIPPING BOLT PLASTIC CLIP 7. Remove the inlet hoses and other tub contents. 8. From the back of the washer, remove the wire shipping clip securing the drain hose. 9. DO NOT remove the PLASTIC CLAMP which secures the drain hose to the right side of the washer backsheet. It helps form a standpipe to prevent water siphoning. 10.Carefully move the washer to within 4 feet of the final location for the start of the installation. 3. Using a ratchet with 3/8" socket, remove the mechanism shipping bolt and plastic spacer block from the center of the base. 4
-
 1
1 -
 2
2 -
 3
3 -
 4
4 -
 5
5 -
 6
6 -
 7
7 -
 8
8 -
 9
9 -
 10
10 -
11
-
12
 |
 |