Frigidaire PLCS389EC Use and Care Guide - Page 19
Removing and Replacing Storage Drawer with, Extendible Glide some models, Removing and Replacing
 |
UPC - 057112090573
View all Frigidaire PLCS389EC manuals
Add to My Manuals
Save this manual to your list of manuals |
Page 19 highlights
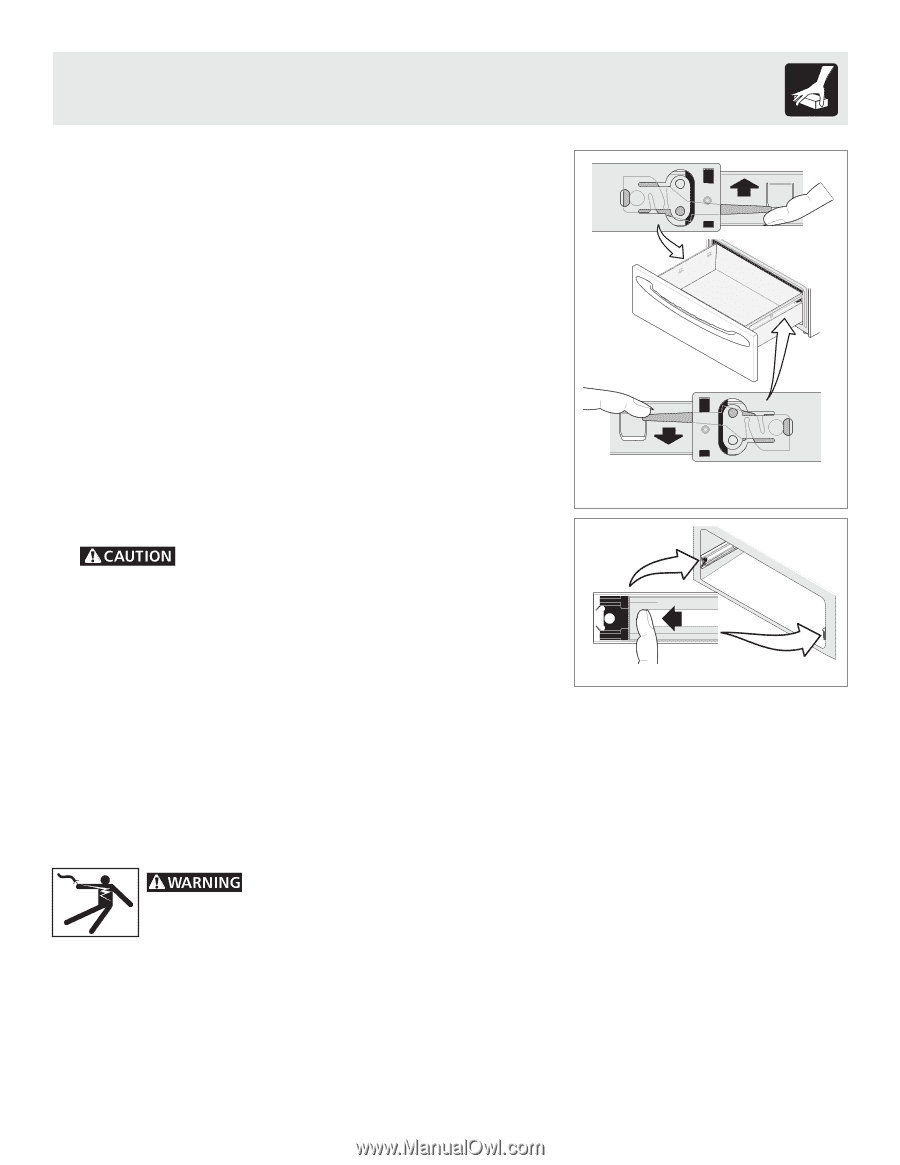
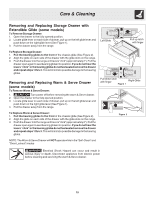
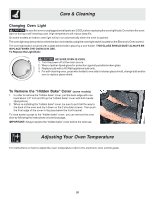
Care & Cleaning Removing and Replacing Storage Drawer with Extendible Glide (some models) To Remove Storage Drawer: 1. Open the drawer to the fully opened position. 2. Locate glide lever on each side of drawer, pull up on the left glide lever and push down on the right glide lever (See Figure 1). 3. Pull the drawer away from the range. Left Glide Latch Pull up latch with finger To Replace Storage Drawer: 1. Pull the bearing glides to the front of the chassis glide (See Figure 2). 2. Align the glide on each side of the drawer with the glide slots on the range. 3. Push the drawer into the range until levers "click" (approximately 2"). Pull the drawer open again to seat bearing glides into position. If you do not hear the levers "click" or the bearing glides do not feel seated remove the drawer and repeat steps 1 thru 3. This will minimize possible damage to the bearing glides. Latch Removing and Replacing Warm & Serve Drawer (some models) To Remove Warm & Serve Drawer: 1. Turn power off before removing the warm & Serve drawer. 2. Open the drawer to the fully opened position. 3. Locate glide lever on each side of drawer, pull up on the left glide lever and push down on the right glide lever (See Figure 1). 4. Pull the drawer away from the range. Pull down latch with finger Right Glide Figure 1 Bearing Glide To Replace Warm & Serve Drawer: 1. Pull the bearing glides to the front of the chassis glide (See Figure 2). 2. Align the glide on each side of the drawer with the glide slots on the range. 3. Push the drawer into the range until levers "click" (approximately 2"). Pull the drawer open again to seat bearing glides into position. If you do not hear the levers "click" or the bearing glides do not feel seated remove the drawer and repeat steps 1 thru 3. This will minimize possible damage to the bearing glides. Figure 2 NOTE: The Warm & Serve Drawer will NOT operate while in the "Self-Clean" and "Oven Lockout" modes Electrical Shock Hazard can occur and result in serious injury or death. Disconnect appliance from electric power before cleaning and servicing the warm & Serve drawer. 19
-
 1
1 -
2
-
3
-
4
-
5
-
6
-
7
-
8
-
9
-
10
-
11
-
12
-
13
-
 14
14 -
 15
15 -
 16
16 -
 17
17 -
 18
18 -
 19
19 -
 20
20 -
 21
21 -
 22
22 -
 23
23 -
 24
24
 |
 |