Fujitsu Fi-4340 Operator's Guide - Page 90
Video Interface Board, How To Install The Video Interface Board
 |
UPC - 000057481906
View all Fujitsu Fi-4340 manuals
Add to My Manuals
Save this manual to your list of manuals |
Page 90 highlights
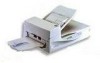
VIDEO INTERFACE BOARD I How to Install the VIDEO INTERFACE BOARD Loosen the two screws to remove the plate. Plate Screws CAUTION Turn Off the power before removing the Third Party slot plate. Insert the board along the rails of the third party slot. Make sure that the connector is connected securely. Secure the board with two screws. VIDEO INTERFACE BOARD CAUTION Protective measures are required to prevent damage from static electricity. NOTICE When the scanner power is turned On again, the scanner automatically recognizes the video interface board. G 9-4
-
 1
1 -
2
-
3
-
4
-
5
-
6
-
7
-
8
-
9
-
10
-
11
-
12
-
13
-
14
-
15
-
16
-
17
-
18
-
19
-
20
-
21
-
22
-
23
-
24
-
25
-
26
-
27
-
28
-
29
-
30
-
31
-
32
-
33
-
34
-
35
-
36
-
37
-
38
-
39
-
40
-
41
-
42
-
43
-
44
-
45
-
46
-
47
-
48
-
49
-
50
-
51
-
52
-
53
-
54
-
55
-
56
-
57
-
58
-
59
-
60
-
61
-
62
-
63
-
64
-
65
-
66
-
67
-
68
-
69
-
70
-
71
-
72
-
73
-
74
-
75
-
76
-
77
-
78
-
79
-
80
-
81
-
82
-
83
-
84
-
 85
85 -
 86
86 -
 87
87 -
 88
88 -
 89
89 -
 90
90 -
 91
91 -
 92
92 -
 93
93 -
 94
94 -
 95
95 -
96
-
97
-
98
-
99
-
100
-
101
-
102
-
103
-
104
-
105
-
106
-
107
-
108
-
109
-
110
-
111
-
112
-
113
-
114
 |
 |

●
9-4
■
How to Install the VIDEO INTERFACE BOARD
Loosen the two screws to remove the plate.
CAUTION
Turn Off the power before removing the Third Party slot plate.
Insert the board along the rails of the third party slot. Make sure that the connector is connected
securely.
Secure the board with two screws.
CAUTION
Protective measures are required to prevent damage from static electricity.
NOTICE
When the scanner power is turned On again, the scanner automatically recognizes the video
interface board.
VIDEO INTERFACE BOARD