Fujitsu S510M Quick Install Guide - Page 2
Installing Adobe Acrobat, Installing ABBYY FineReader, Installing ScanSnap Manager, Connecting - scansnap driver
 |
UPC - 097564307324
View all Fujitsu S510M manuals
Add to My Manuals
Save this manual to your list of manuals |
Page 2 highlights
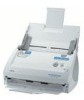
2. Software Installation Before connecting the scanner to your computer, please install the following software on your PC. Adobe Acrobat Pro (Application) ScanSnap Manager (Driver) The table below shows the OS support required by the different components Installing ABBYY FineReader Please prepare the ABBYY FineReader CD-ROM. 1. Insert the "ABBYY FineReader CD-ROM" into the CD-ROM drive. The ABBYY FineReader window appears. 2. Click the Finder icon in the Dock menu Installing ScanSnap Manager Please prepare the ScanSnap Setup CD-ROM. 1. Insert the "ScanSnap Setup CD-ROM" into the CD-ROM drive. The "ScanSnap" window appears. Click the Finder icon in the Dock menu 2. Double-click the ScanSnap icon. 3. Connecting the Scanner Connecting the AC cable 1. Connect the AC cable to the AC adapter. 2. Insert the connectors of the AC adapter to the scanner inlet and power outlet. Installing Adobe Acrobat Please prepare the Adobe Acrobat Setup DVD-ROM. 1. Insert the "Adobe Acrobat 8 Professional" into the DVD-ROM drive. The Adobe Acrobat window appears. 2. Click the Finder icon in the Dock menu 3. Select the [Applications] folder at Finder. 3. Select the [Applications] folder at Finder. 4. Select the icon pointed to by the arrow and drag the [FineReader for ScanSnap] folder to the [Applications] folder where the software will be installed. 4. Select the icon pointed to by the arrow and drag the [Adobe Acrobat 8 Professional] folder to the [Applications] folder where the software will be installed. The installation of ScanSnap Manager starts up, and the "Welcome to the ScanSnap Manager Installer" window appears. 3. Follow the instructions to install the software. 4. Refer to the "ScanSnap Operator's Guide" (Manual.pdf) on the ScanSnap Setup CD-ROM to learn more about ScanSnap Manager. Connecting USB cable 1. Remove the seal from the USB connector. 2. Connect the scanner to your computer with the USB cable. 3. Open the Paper chute cover of scanner. ATTENTION: If the scanner does not automatically turn on, press the [POWER] button on the scanner. 5. After finishing copying, eject CD-ROM, Open the [FineReader for ScanSnap] folder and double-click the FineReader for ScanSnap application and follow the instructions. 5. After finishing copying, eject DVD-ROM, open [Adobe Acrobat 8 Professional] folder and, double-click Acrobat application and follow the instructions. 4. The scanner will be detected automatically. 5. The installation of your ScanSnap is complete! ATTENTION: When connecting to a USB hub, be sure to connect the scanner to the hub nearest to your computer (first stage). If you connect to a USB hub, which is daisy-chained to a second USB Hub (second stage), the ScanSnap may not operate correctly.
-
 1
1 -
 2
2
 |
 |
