Fujitsu S6510 S6510 Getting Started Guide - Page 1
Fujitsu S6510 - LifeBook - Core 2 Duo GHz Manual
 |
UPC - 611343080712
View all Fujitsu S6510 manuals
Add to My Manuals
Save this manual to your list of manuals |
Page 1 highlights
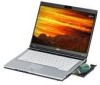
This convenient guide will lead you through the start-up process and will also offer some valuable tips. What's in the Box Check to see that all of the following items are in the box: ❏ LifeBook notebook ❏ Lithium ion battery, pre-installed ❏ AC adapter with power cord ❏ Weight saver module ❏ Drivers and Applications Restore DVD ❏ Microsoft® associated material ❏ Recovery and Utility Disc Depending upon your configuration, the following items may also be shipped with your notebook: ❏ DVD/CD-RW combo or Dual-Layer Multi-Format ❏ DVD and/or CD-RW application CD ❏ Additional Lithium ion battery ❏ Modular Bay Battery Microphone Controls, Connectors, and Access Points Stereo Speaker Webcam Microphone Display Panel LifeBook Security/Application Panel Fingerprint Sensor Touchpad Pointing Device Wireless LAN/Bluetooth On/Off Switch Power/Suspend/Resume Button Status Indicator Panel IEEE 1394 Jack Headphone Jack Stereo Speaker Microphone Jack RIGHT PANEL S-Video Out Jack Keyboard Display Panel Latch Button Status Indicator Panel BACK PANEL Anti-Theft Lock Slot USB Ports Air Vents USB Port Modem Jack Optical Drive Release Button Flexible Bay (shown with Optical Drive installed LEFT PANEL LAN (RJ-45) Jack DC-In Jack Air Vents PC Card Eject Button PC Card Slot Anti-Theft Lock Slot BOTTOM PANEL Lithium ion Battery Bay Flexible Bay Device Lock External Video Port Memory Stick/SD/xD Card Slot Memory Upgrade Compartment Air Vents (multiple locations) Battery Release Latches Dust Filter Initial Start Up Display Panel Latch Button DC Power Jack AC Adapter Telephone Jack LAN Jack Power/Suspend/Resume Button WLAN Switch If you have a: Webcam Dual-Layer Multi-Format DVD Writer You will need to install the following software: Arcsoft WebCam Companion CyberLink PowerProducer 1. Open the Display Panel • Ensure that your LifeBook is on a hard level surface and that the air vents are not blocked. • Lift the display, being careful not to touch the screen. • Adjust the display until it is at a comfortable viewing angle. 2. Connect AC Power • Plug the AC adapter into your notebook. • Plug the power cord into the AC adapter. • Connect the power cord to an electrical outlet. 3. Connect to Internet or Network • Connect either a phone cord to the modem jack or an Ethernet cable to the LAN jack on your notebook and to a wall jack or to an Ethernet router. Important: • During the setup procedure, do not disconnect the power supply, press any buttons, or use any peripheral devices such as a mouse, keyboard, or remote control. • You should not attach any external devices and do not put a DVD/CD in your drive until you have gone through the initial power on sequence. 4. Booting the System The Lithium ion battery is not charged upon purchase. Initially you will need to connect either the AC adapter or the Auto/Airline adapter to use your notebook. • Press the Suspend/Resume/Power button (above the keyboard) to turn on the notebook. When you do this for the first time, it will display a Fujitsu logo on the screen. If you do nothing the system will load the operating system, and then the Windows Welcome will begin. 5. Register For Genuine Microsoft® Windows® XP: • After the operating system has initialized, enter the information as prompted to personalize your notebook and configure your modem to dial. For Genuine Windows Vista®: • Accept the Microsoft® Windows® Licensing Agreement and the Fujitsu End User License Agreement to proceed. • Select your User ID and Password during the "Welcome Screen." • Keep a record of your User ID and password stored in a secure place. • THE SCREEN WILL GO DARK FOR APPROXIMATELY TWO MINUTES. • Do not attempt to turn power on or off during this stage. 6. Registering Your LifeBook notebook • Register your notebook with Fujitsu Service and Support via our Web site at us.fujitsu.com/computers. • You will need to be set up with an Internet Service Provider (ISP) to register online. 7. Installing Click Me! • Check to be sure the WLAN switch is on. For Genuine Microsoft® Windows® XP: The first time you boot up your system, you will see an icon called Click Me! in the Start menu. For Genuine Windows Vista®: In addition to an icon on the desktop, a dialog box will automatically open that prompts you to run Click Me!. If you choose not run ClickMe! at this time, the ClickMe! icon will appear on your desktop. • When you click the Click Me! icon, your system will automatically build the icon tray in the bottom right of the screen. These icons provide links to utilities that you will frequently access. (For Additional Utilities) (For Latest Drivers) CLICK ME "Click Me!" (FDU) 8. Install Additional Software • Close any open programs, applications or utilities Insert software application CD into media drive. • Open the application folder, select the set-up icon, and load desired software, as shown in the table. • Restart your computer. 9. Access your User's Guide • To take advantage of all the features of your new Fujitsu LifeBook notebook, it is highly recommended that you read your electronic User's Guide. It contains important detailed information about your new computer. You can access your User's Guide by selecting its icon from the screen desktop. • The Fujitsu Installer should automatically launch. If it doesn't, you will need to find the Setup.exe file on the Recovery CD's root folder. • If you are using Genuine Windows Vista®, Click [Allow] in the User Account Control (UAC) box. • Click [Continue] • Select "I Agree" and click [Continue] in the License Agreement box. • Select "User's Guide" from the "Utilities/Applications" category. • Click [Install Selected Subsystems] • The User's Guide will be copied to your hard drive in the C:\Fujitsu\Manual directory. Shortcuts to the Users Guide will be placed on your desktop and in the Start menu. Common Indicators Status Display Panels The Status Display Panels are located above and below the keyboard as shown. Following are some common indicators. Power Indicator The Power indicator symbol states whether your system is operational. It has several different states, each of which tells you the mode your notebook is in. Steady On: This means that there is power to your notebook and that it is ready for use. Flashing: This means that your notebook is in Standby mode. Steady Off: This means that your system is either in Save-to-Disk mode, or that your notebook has been turned off. If you are charging your battery, the Power indicator will remain on even if your notebook is shut off. The Power indicator will also remain on if you have either adapter connected and are shut down from Windows. AC Adapter Indicator The AC Adapter indicator states whether your notebook is operating from the AC adapter, Auto/Airline adapter or battery. This icon has two different states that can tell you what power source your notebook is using. On: This means that either of the adapters are currently in use. Off: Power is only coming from the battery and you do not have an adapter connected. Battery Charge Indicators Note that there are indicators for the primary battery (Battery 1) and an optional second battery (Battery 2). Orange, solid: Battery is available and system is charging. Green, solid: Battery is available and system is fully charged. Orange, blinking: Battery is available and waiting to charge battery (battery is out of thermal range). Off: AC adapter is not plugged in. Battery Level Indicators Note that there are indicators for the primary battery (Battery 1) and an optional second battery (Battery 2). The Battery Level indicators display the charge level of the indicated battery pack, as follows: Green, solid: Battery is between 51% and 100% charged. Orange, solid: Battery is between 13% and 50% charged. Red, solid: Battery is 12% or less charged. Orange, blinking: Blinks during battery status measurement (Four seconds after the battery is installed). Red, blinking: There is a problem with the battery. Off: There is no battery installed or the battery has no charge. Hard Drive/Optical Drive Access Indicator The Hard Drive/Optical Drive Access indicator glows green when your internal hard drive is being accessed. Note that flickering is normal. NumLk Indicator The NumLk indicator states that the integral keyboard is set in ten-key numeric keypad mode. CapsLock Indicator The CapsLock indicator states that your keyboard is set to type in all capital letters. ScrLk Indicator The ScrLk indicator states that your scroll lock is active. Quick Tips It takes approximately 4 hours to charge a fully discharged single battery with unit off or in suspend mode. Optimizing Battery Life • Set power management setting to Maximize Battery Life. • Adjust display brightness levels to lowest comfortable setting. • Remove PC Card when not needed. • Utilize Suspend mode when not using your notebook. • Read the Power Management section in your electronic User's Guide for additional features. Adjusting Display Brightness • Fn + F6 to decrease brightness • Fn + F7 to increase brightness Adjusting Volume • Fn + F8 to decrease volume • Fn + F9 to increase volume * Mono microphone jack or stereo microphone/line in jack depending on configuration. * * Stereo headphone/Optical Digital Audio out jack or stereo headphone/Line Out/Optical Digital Audio out jack. Drivers Look for the latest drivers on the Drivers and Applications Restore CD. Right-click the FDU icon and select "update", or download them at us.fujitsu.com/computers.
-
 1
1 -
 2
2
 |
 |
