Garmin Fishfinder 90 Owner's Manual - Page 16
Installing the Fishfinder Unit, Selecting a Fishfinder installation Location - manuale
 |
UPC - 753759052003
View all Garmin Fishfinder 90 manuals
Add to My Manuals
Save this manual to your list of manuals |
Page 16 highlights
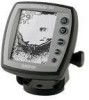
INSTALLING YOUR FISHFINDER > INSTALLING THE FISHFINDER UNIT Drill pilot holes here. Level Vertical Align with the transom bottom. The transducer should extend 1/8" below fiberglass hulls or 3/8" below aluminum hulls. Bottom of the transom Keep it parallel with the water line. OK Installing the Fishfinder Unit Selecting a Fishfinder installation Location Select a Fishfinder installation location that allows you to view and operate it easily while operating the vessel. Select a mounting surface strong enough to support the weight of the Fishfinder and protect it from excessive vibration or shock. DO NOT mount the bracket in a location where the Fishfinder is exposed to extreme temperature conditions. When installing the mounting bracket, be sure to allow room to connect and rout the power cable. Mounting the Bracket Assembly Tool List (not included)-drill, screwdriver (Phillips or standard), three #8 pan-head machine bolts with matching nuts and washers, and a 5/32" drill bit; or three #8 pan-head, self-tapping screws and a 1/16" drill bit. 10 Fishfinder 90/140 Owner's Manual
-
 1
1 -
2
-
3
-
4
-
5
-
6
-
7
-
8
-
9
-
10
-
 11
11 -
 12
12 -
 13
13 -
 14
14 -
 15
15 -
 16
16 -
 17
17 -
 18
18 -
 19
19 -
 20
20 -
 21
21 -
22
-
23
-
24
-
25
-
26
-
27
-
28
-
29
-
30
-
31
-
32
 |
 |
