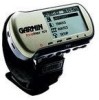
Garmin Foretrex 101 Quick Start Guide - Page 2
Starting Up the Foretrex 101 - manual
 |
UPC - 753759046101
View all Garmin Foretrex 101 manuals
Add to My Manuals
Save this manual to your list of manuals |
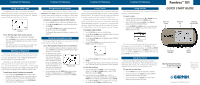
Page 2 highlights
Foretrex 101 Setup Foretrex 101 Setup Foretrex 101 Setup Foretrex 101 Setup Foretrex 101 Buttons ➊ Installing Batteries The Foretrex 101 operates on two AAA alkaline batteries (not included), which are placed in the back of the unit. Rechargeable alkaline, NiMH, NiCad, or lithium batteries may be used. See the section titled "Set System Page" in the Owner's Manual for instructions on selecting battery type. Stored data is not lost when you change the batteries. However, if batteries are completely discharged and are not changed within a couple of days, it may take longer for the unit to get a GPS signal fix. To install the batteries: 1. Remove the battery cover by inserting a coin in the bottom slot. Twist the coin to lift the cover up and pull away. 2. Compare the battery polarity with the diagram in the battery compartment and install the batteries accordingly. -+ +- Installing two AAA batteries 3. To re-install the battery cover, slide the top portion into the appropriate slot, then snap the bottom section securely to the base of the unit. Foretrex 101 Battery Life Your Foretrex 101 should get about 14-15 hours of use before the batteries need to be replaced. ➋ Starting Up the Foretrex 101 After installing batteries in the Foretrex 101, it is ready for use. To turn on the Foretrex 101: 1. Press and hold the POWER button until the Satellite Page is displayed. 2. Allow the Foretrex time to track satellites the first time you use it. Leave the Foretrex outside with a clear view of the sky for 15-30 minutes. After the first use, it should take less than one (1) minute to acquire satellites. 3. When the Foretrex acquires enough satellite signals to determine your location, "3D GPS FIX" or "2D GPS FIX" is displayed, and the satellite dish icon in the upper left corner of the screen stops flashing. Also, the Signal bar fills up to show the strength of the satellite signal. Foretrex 101 Icons Three icons in the upper left-hand corner provide at-aglance-status of the Foretrex: battery, stopwatch (timer), and satellite dish icon. Battery icon: The battery icon indicates how much power the batteries have. A full battery icon indicates new batteries are installed in the Foretrex 101. Timer icon: When the timer feature of the Foretrex is being used, the stopwatch (timer) icon displays just below the battery icon. Satellite Dish icon: When the Foretrex has acquired enough satellites to establish your GPS location fix, this icon displays solid (not flashing) just below the timer icon. The Satellite Dish icon flashes while it is acquiring satellites and determining your location. ➌ Changing the Pages Press the PAGE button to cycle through the main pages: The Satellite Page, Map Page, Navigation Page, Trip Computer, Timer Page (if enabled), and the Menu Page. Satellite Page - Provides notice of satellites being tracked. Map Page - Displays your movements. Navigation Page - Provides guidance to your destination. Trip Computer Page - Provides information about your trip, such as speed, maximum speed, and current location. The data fields are completely customizable to fit your needs. Timer Page (if enabled) - Provides an advanced timer great for a variety of applications such as sailboat racing. Menu Page - Provides access to features and settings. Refer to the Foretrex Owner's Manual for complete information on all of the Foretrex's pages. ➍ Setting the Time Zone When the Foretrex is ready for use, you may need to check the Time Zone selection. The time is set automatically as soon as the unit establishes a fix on the GPS satellites. The current date and time is displayed on the top of the screen. When the Foretrex has established a GPS fix, U.S. Central Time is selected as the default Time Zone. To change the Time Zone: 1. Press the PAGE button to display the Menu Page. 2. Press the DOWN button to highlight 'SETUP'. Press ENTER. 3. Press Enter when 'SET TIME' is highlighted. 4. To change the Time Zone, use the UP/DOWN buttons to select 'TIME ZONE' and press ENTER. 5. Use the UP/DOWN buttons to select the correct time zone and press ENTER. ➎ Adjusting the Display To adjust the light timeout and contrast: 1. Use the PAGE button to access the Satellite Page. 2. Press and release the ENTER button to display the Options Menu. 3. Press ENTER to display the Display Setup Page. 4. Press ENTER when the line below "LIGHT TIMEOUT" is highlighted. Use the UP/DOWN buttons to select the desired length of time for the backlight timeout. Press ENTER to select the highlighted length of time. 5. Use the UP/DOWN buttons to select the slider bar below the 'CONTRAST' field. Press the Enter button to select the slider bar to adjust the contrast. Use the UP/DOWN buttons to adjust the contrast. Press ENTER when done. To turn the backlight On and Off: 1. Press the POWER button to turn the backlight On. 2. Press POWER again to turn the backlight Off. 3. If no other button is pressed, the backlight turns off automatically after 30 seconds or whatever time you have set through the Display Setup Page, which can be accessed from the Main Menu or the Satellite Page. ➏ Adjusting the Strap The Foretrex has been designed to comfortably fit your wrist. A strap extension provides additional length and easily attaches to the existing strap. To add the strap extension: 1. Slide the end of the existing strap through the connector on the extension. 2. Place on your wrist or arm. 3. Slide the end of the extension through the existing connector. 4. Adjust to fit comfortably and secure the strap. Refer to the Owner's Manual for complete instructions. Using the Foretrex 101 Buttons POWER GOTO PAGE ENTER/ MARK DOWN UP The POWER button: • Press and hold to turn unit on and off • Press and release to turn display backlight on and off The GOTO button: • Press to initiate a GoTo (navigate to a specific destination/ waypoint) The PAGE button: • Press to switch between the main Pages • Press to back out or escape out of the present page or screen The ENTER/MARK button: • Press to confirm data entry or menu selection • Press and hold to mark a waypoint The UP/DOWN buttons: • Highlight options on pages and menus • Adjust display contrast • Zoom out (UP) and in (DOWN) on Map Page • Cycle through data fields on Navigation Page
-
 1
1 -
 2
2
 |
 |
