Garmin G3000 User Guide - Page 5
Garmin G3000 Manual
 |
View all Garmin G3000 manuals
Add to My Manuals
Save this manual to your list of manuals |
Page 5 highlights
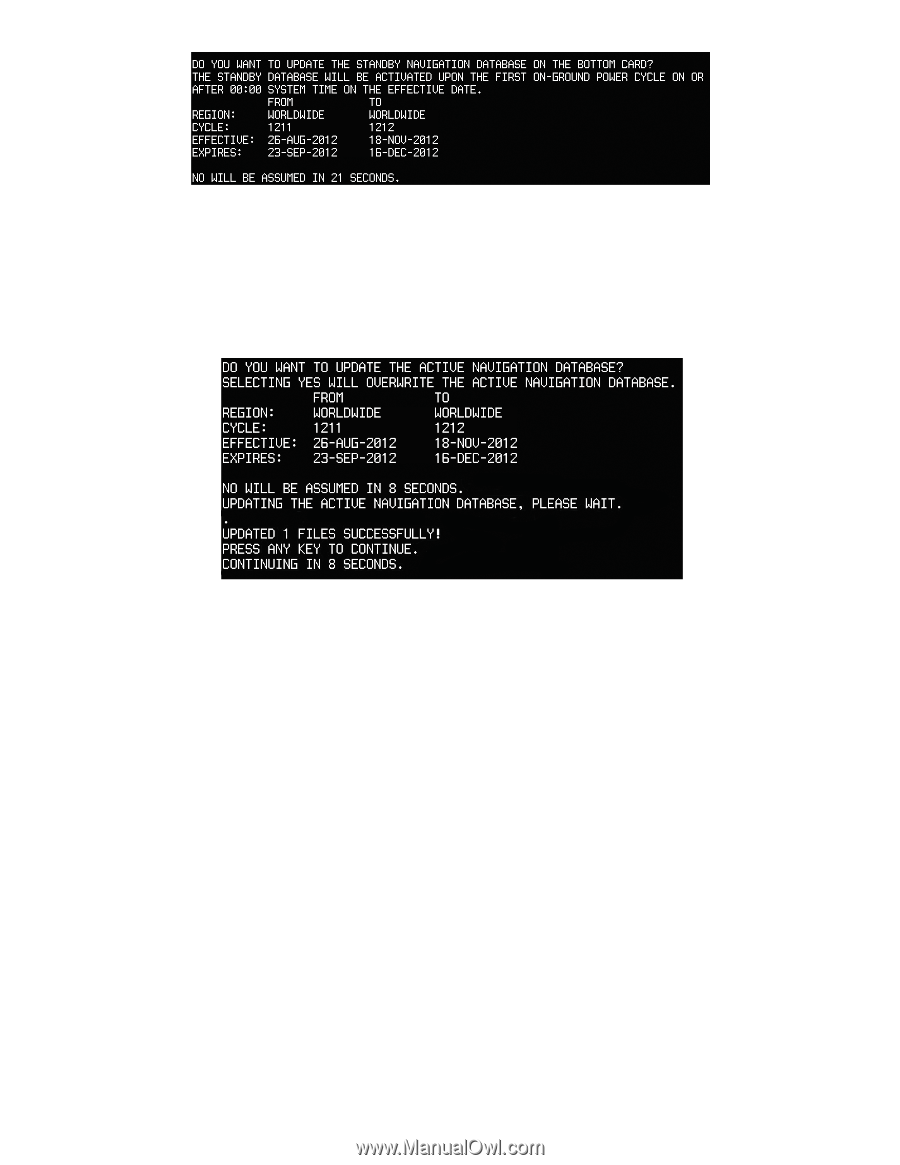
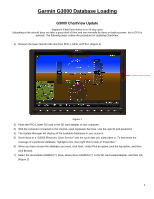
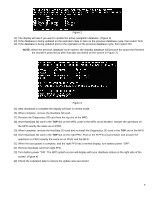
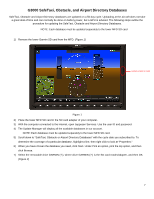
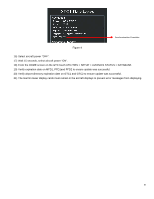
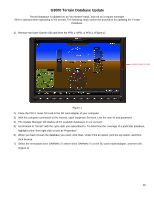
Figure 2 12) The display will ask if you want to update the active navigation database. (Figure 3) 13) If the database is being updated on the expiration date or later on the previous database cycle, then select YES. 14) If the database is being updated prior to the expiration of the previous database cycle, then select NO. NOTE: When the previous database cycle expires, the standby database will become the active the first time the aircraft is powered up after that date (as stated on the screen in Figure 2). Figure 3 15) After download is complete the display will start in normal mode. 16) When complete, remove the NavData SD card. 17) Remove the Diagnostics SD card from the top slot of the MFD. 18) Insert NavData SD card in the TOP slot on the MFD, push in the MFD circuit breaker. Answer the questions on the MFD exactly the same as on PFD1. 19) When complete, remove the NavData SD card and re-install the Diagnostics SD card in the TOP slot of the MFD. 20) Insert NavData SD card in the TOP slot on the right PFD. Push in the R PFD circuit breaker and answer the questions on PFD2 exactly the same as on PFD1 and the MFD. 21) When the last update is complete, and the right PFD has a normal display, turn battery power "OFF". 22) Remove NavData card from right PFD. 23) Turn battery power "ON". The MFD splash screen will display with your database status on the right side of the screen. (Figure 4) 24) Check the expiration date to ensure the update was successful. 5
-
 1
1 -
 2
2 -
 3
3 -
 4
4 -
 5
5 -
 6
6 -
 7
7 -
 8
8 -
 9
9 -
 10
10 -
 11
11 -
12
-
13
-
14
 |
 |