Garmin GPS 76 Owner's Manual - Page 18
Basic Navigation - change time
 |
UPC - 753759029456
View all Garmin GPS 76 manuals
Add to My Manuals
Save this manual to your list of manuals |
Page 18 highlights
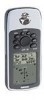
Getting Started Basic Navigation Bearing and Distance from Pointer to current GPS location. Map Pointer 16 You should now have enough knowledge to navigate through the main pages, Option Menus and enter data into your GPS 76. Now let's learn how to navigate! The main use of a GPS is to be able to navigate to a known position. We have already created a waypoint and named it CREEK. Let's create another waypoint on the Map Page using a different method, the Map Pointer. Press the PAGE Key until the Map Page is displayed. Press the IN Key several times until the Zoom Scale in the lower left corner of the Map Page reads 800 ft. The current GPS location is indicated by the triangle in the center of the map. To display the Map Pointer: 1. Press the ROCKER Key any direction. Using the ROCKER Key you can pan the Map Pointer around the map. As you move around the map, the direction and distance from the Map Pointer to the current GPS location is displayed along the top of the map. To mark a waypoint using the Map Pointer: 1. With the Map Pointer at a location on the map about one mile from your current location, and not on a road or map feature, press the ENTER Key. The location of the Map Pointer will be captured and the New Waypoint Page will be displayed. Change the waypoint name to MAP 1, and store the waypoint in memory by highlighting the 'OK' Button then pressing the ENTER Key. Press the QUIT Key to hide the Map Pointer and center the map on the current GPS location. Now that we have a destination, navigating to it is just a step away.
-
 1
1 -
2
-
3
-
4
-
5
-
6
-
7
-
8
-
9
-
10
-
11
-
12
-
 13
13 -
 14
14 -
 15
15 -
 16
16 -
 17
17 -
 18
18 -
 19
19 -
 20
20 -
 21
21 -
 22
22 -
 23
23 -
24
-
25
-
26
-
27
-
28
-
29
-
30
-
31
-
32
-
33
-
34
-
35
-
36
-
37
-
38
-
39
-
40
-
41
-
42
-
43
-
44
-
45
-
46
-
47
-
48
-
49
-
50
-
51
-
52
-
53
-
54
-
55
-
56
-
57
-
58
-
59
-
60
-
61
-
62
-
63
-
64
-
65
-
66
-
67
-
68
-
69
-
70
-
71
-
72
-
73
-
74
-
75
-
76
-
77
-
78
 |
 |
