Garmin GT8HW-TM Plastic Transom or Trolling Motor Mount Transducer High Wide CHI - Page 3
Testing the Installation, Software Update, Registering Your Device, Specifications
 |
View all Garmin GT8HW-TM Plastic Transom or Trolling Motor Mount Transducer High Wide CHIRP 150-240 kHz 250W 8-pin manuals
Add to My Manuals
Save this manual to your list of manuals |
Page 3 highlights
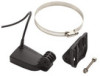
4 Position the transducer so it is parallel to the bottom when in use. 5 Use the included cable ties to secure the transducer cable. 6 Route the transducer cable to the installation location of the sounder while taking these precautions. • The cable should not be routed close to electrical wires or other sources of electrical interference. • The cable must not be pinched when the trolling motor is deployed or stowed. Testing the Installation NOTICE You should check your boat for leaks before you leave it in the water for an extended period of time. Because water is necessary to carry the sonar signal, the transducer must be in the water to work properly. You cannot get a depth or distance reading when out of the water. When you place your boat in the water, check for leaks around any screw holes that were added below the water line. Testing the Transom-Mount Transducer Installation NOTICE When adjusting the depth of the transducer, make the adjustments in small increments. Placing the transducer too deep can adversely affect the performance of the boat and put the transducer at risk of striking underwater objects. Test the transom-mount transducer installation in open water free of obstacles. Pay attention to your surroundings as you test the transducer. 1 With the boat in the water, turn on the chartplotter. 2 Drive the boat at a slow speed. If the chartplotter appears to be working properly, gradually increase speed while observing the chartplotter. 3 If the sonar signal is suddenly lost or the bottom return is severely degraded, note the speed at which this occurs. 4 Return the boat to the speed at which the signal was lost, and make moderate turns in both directions while observing the chartplotter. 5 If the signal strength improves while turning, adjust the transducer so that it extends another 1/8 in. (3 mm) below the transom of the boat. 6 Repeat steps 2-4 until the degradation is eliminated. 7 If the signal does not improve, move the transducer to a different location on the transom, and repeat the test. Cleaning the Transducer Aquatic fouling accumulates quickly and can reduce your device's performance. 1 Remove the fouling with a soft cloth and mild detergent. 2 If the fouling is severe, use a scouring pad or putty knife to remove growth. 3 Wipe the device dry. Software Update You may need to update the device software when you install the device or add an accessory to the device. Loading the New Software on a Memory Card You must copy the software update to a memory card using a computer that is running Windows® software. NOTE: You can contact Garmin customer support to order a preloaded software update card if you do not have a computer with Windows software. 1 Insert a memory card into the card slot on the computer. 2 Go to www.garmin.com/support/software/marine.html. 3 Select Download next to the software bundle that corresponds with your device. 4 Read and agree to the terms. 5 Select Download. 6 If necessary, select Run. 7 If necessary, select the drive associated with the memory card, and select Next > Finish. Updating the Device Software Before you can update the software, you must obtain a software-update memory card or load the latest software onto a memory card. 1 Turn on the chartplotter. 2 After the home screen appears, insert the memory card into the card slot. NOTE: In order for the software update instructions to appear, the device must be fully booted before the card is inserted. 3 Follow the on-screen instructions. 4 Wait several minutes while the software update process completes. 5 When prompted, leave the memory card in place and restart the chartplotter manually. 6 Remove the memory card. NOTE: If the memory card is removed before the device restarts fully, the software update is not complete. Registering Your Device Help us better support you by completing our online registration today. • Go to http://my.garmin.com. • Keep the original sales receipt, or a photocopy, in a safe place. Contacting Garmin Product Support • Go to www.garmin.com/support for in-country support information. • In the USA, call 913-397-8200 or 1-800-800-1020. • In the UK, call 0808 238 0000. • In Europe, call +44 (0) 870 850 1241. Specifications Specification Transmit power Maximum depth* Frequencies** Operating temperature range Measurement 250 W (RMS) 244 m (800 ft.) From 145 to 240 kHz From 0° to 40°C (from 32° to 158°F) *Dependent upon the water conditions. **Dependent upon the chartplotter or fishfinder model. Garmin® and the Garmin logo are trademarks of Garmin Ltd. or its subsidiaries, registered in the USA and other countries. These trademarks may not be used without the express permission of Garmin. 3
-
 1
1 -
 2
2 -
 3
3 -
 4
4
 |
 |
