Garmin GTM 10 Owner's Manual - Page 6
Step 1: Prepare the Radio, Step 2: Choose the Adapter Cables, Step 3: Connect to the Radio - receiver
 |
UPC - 753759050320
View all Garmin GTM 10 manuals
Add to My Manuals
Save this manual to your list of manuals |
Page 6 highlights
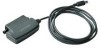
INSTALLING AND TESTING Garmin highly recommends that a professional installer complete the installation. To download a complete Installation Sheet, go to www.garmin.com/products/ gtm10 and click the Manuals link. Do not open the GTM 10 or loosen the case screws. Step 1: Prepare the Radio TEST: Before installation, test the vehicle's radio to ensure that the antenna functions properly and that the radio receives normal FM signals. Remove the vehicle's radio to access the antenna cable. You may need to remove the trim panel or other parts of the dashboard. Detach the antenna cable. Radio Antenna Cable 4 Step 2: Choose the Adapter Cables To select the proper pair of adapter cables to use, match the adapter cable plug to the vehicle's radio antenna cable plug. Then locate the matching receptacle cable. Step 3: Connect to the Radio 1. Connect the antenna plug to the appropriate female (receptacle) adapter cable. Connect the Fakra plug to the In connector on the GTM 10. The Fakra plug locks firmly in place. Fakra connector Female adapter Antenna connector 2. Connect the Fakra connector of the adapter cable to the Out connector of the GTM 10. Connect the male (plug) adapter cable into the radio receptacle. Radio receptacle Male adapter Fakra connector TEST: Turn on the vehicle's radio. If you can hear sound from an FM radio station, you have properly connected the GTM 10. GTM™ 10 Owner's Manual
-
 1
1 -
 2
2 -
 3
3 -
 4
4 -
 5
5 -
 6
6 -
 7
7 -
 8
8
 |
 |
