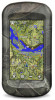
Garmin Montana 610t Camo Owner s Manual - Page 13
Adding a Shortcut to the Main Menu
 |
View all Garmin Montana 610t Camo manuals
Add to My Manuals
Save this manual to your list of manuals |
Page 13 highlights
tempe The tempe is an ANT+ wireless temperature sensor. You can attach the sensor to a secure strap or loop where it is exposed to ambient air, and therefore, provides a consistent source of accurate temperature data. You must pair the tempe with your device to display temperature data from the tempe. Displaying tempe Data When displaying tempe data for the first time, you should complete these tasks to customize the device and data fields. 1 Pair your tempe sensor (Pairing Your ANT+ Sensors, page 8). 2 Customize data fields to display the temperature data (Customizing the Data Fields, page 9). You can select the current temperature from the Current Status category. You can select the minimum and maximum temperatures for a 24-hour period from the Other category. Displaying Heart Rate Data When displaying heart rate data for the first time, you should complete these tasks to customize the device and data fields. 1 Pair your heart rate monitor (Pairing Your ANT+ Sensors, page 8). 2 Customize a data field to display the heart rate (Customizing the Data Fields, page 9). You can select the heart rate data field from the Current Status category. Customizing the Device Activity Profiles Activity profiles are a collection of settings that optimize your device based on how you are using it. For example, the settings and data screens are different when you are using the device for running than for riding your bike. When you are using a profile and you change settings such as data fields or alerts, the changes are saved automatically as part of the profile. Selecting a Profile When you change activities, you can change the setup of the device by changing the profile. 1 Select Profile Change. 2 Select a profile. Creating a Custom Profile You can customize your settings and data fields for a particular activity or trip. 1 Select Setup > Profiles > Create New Profile > OK. 2 Customize your settings and data fields. Editing a Profile Name 1 Select Setup > Profiles. 2 Select a profile. 3 Select Edit Name. 4 Enter the new name. Deleting a Profile NOTE: Before you can delete the active profile, you must activate a different profile. You cannot delete a profile while it is active. 1 Select Setup > Profiles. 2 Select a profile. 3 Select Delete. Customizing the Main Menu • Hold any icon on the main menu or application drawer, and drag it to a new location. • Open the application drawer, and drag an icon up to the main menu. • Select Setup > Main Menu, and follow the on-screen instructions. Creating a Shortcut 1 Select Setup > Shortcuts > Create Shortcut. 2 Select Name, and enter a name. 3 Select Icon, and select an icon. 4 Select Profile, and assign the shortcut to a specific profile. 5 Select an option: • Select Setup to add a shortcut to a specific device setting. • Select Where To? to add a shortcut that begins navigation to a specific waypoint. • Select Application to add a shortcut to a specific application. 6 Select the item. Adding a Shortcut to the Main Menu You can add shortcuts to the main menu, application drawer, or favorites. If the shortcut does not appear in the list, you can create it (Adjusting the Backlight Brightness, page 2). 1 Select Setup > Shortcuts. 2 Select the shortcut. 3 Select Add To Menu. 4 Select Main Menu, Drawer, or Favorites. Custom Data Fields and Dashboards Data fields display information about your location or other specified data. Dashboards are a custom grouping of data that can be helpful to a specific or general task, such as geocaching. You can customize the data fields and dashboards of the map, compass, trip computer, elevation plot, and the status page. Enabling the Map Data Fields You can enable multiple small data fields or one large data field. 1 Select Map > > Setup Map > Dashboard. 2 Select Small Data Fields or Large Data Field. Empty data fields appear on the map. Customizing the Data Fields Before you can change the map data fields, you must enable them (Enabling the Map Data Fields, page 9). You can customize the data fields and dashboards of the map, compass, trip computer, elevation plot, and status pages. 1 From a page that displays data fields, select a data field. 2 Select a data field category and a data field. For example, select Trip Data > Speed - Moving Avg.. Customizing Dashboards 1 Open a page that contains a dashboard you can customize. 2 Select an option: • From the map, select > Setup Map > Dashboard. • From the compass, trip computer, or status page, select > Change Dashboard. 3 Select a dashboard. Customizing the Device 9
-
 1
1 -
2
-
3
-
4
-
5
-
6
-
7
-
 8
8 -
 9
9 -
 10
10 -
 11
11 -
 12
12 -
 13
13 -
 14
14 -
 15
15 -
 16
16 -
 17
17 -
 18
18 -
19
-
20
-
21
-
22
-
23
-
24
 |
 |
