Garmin Rino 655t Quick Start Manual - Page 10
Tracks, Creating a Route, Camera and Photos - instructions
 |
View all Garmin Rino 655t manuals
Add to My Manuals
Save this manual to your list of manuals |
Page 10 highlights
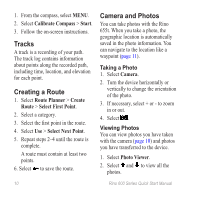
1. From the compass, select MENU. 2. Select Calibrate Compass > Start. 3. Follow the on-screen instructions. Tracks A track is a recording of your path. The track log contains information about points along the recorded path, including time, location, and elevation for each point. Creating a Route 1. Select Route Planner > Create Route > Select First Point. 2. Select a category. 3. Select the first point in the route. 4. Select Use > Select Next Point. 5. Repeat steps 2-4 until the route is complete. A route must contain at least two points. 6. Select to save the route. Camera and Photos You can take photos with the Rino 655t. When you take a photo, the geographic location is automatically saved in the photo information. You can navigate to the location like a waypoint (page 11). Taking a Photo 1. Select Camera. 2. Turn the device horizontally or vertically to change the orientation of the photo. 3. If necessary, select + or - to zoom in or out. 4. Select . Viewing Photos You can view photos you have taken with the camera (page 10) and photos you have transferred to the device. 1. Select Photo Viewer. 2. Select and to view all the photos. 10 Rino 600 Series Quick Start Manual
-
 1
1 -
2
-
3
-
4
-
 5
5 -
 6
6 -
 7
7 -
 8
8 -
 9
9 -
 10
10 -
 11
11 -
 12
12
 |
 |
