Garmin VIRB Elite Aviation Bundle Owners Manual - Page 8
Video Settings, Advanced Recording Settings, Recording Video Automatically, Recording a Time-Lapse
 |
View all Garmin VIRB Elite Aviation Bundle manuals
Add to My Manuals
Save this manual to your list of manuals |
Page 8 highlights
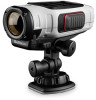
The viewfinder displays the recording status À, the GPS and battery status Á, and the elapsed recording time Â. 2 Record video. 3 When you are finished recording video, slide REC away from the lens. The video is saved on the memory card as an MP4 file, and the track log for the video is saved on the memory card as a GPX file. Video Settings Select MODE > SETUP > VIDEO. Mode: Sets the resolution, aspect ratio, and frame rate. Field of View: Sets the zoom level. Loop: Enables loop recording and sets the number of minutes of video to store when recording a video loop. Auto Record: Enables automatic recording (VIRB Elite only). Microphone: Enables the microphone. NOTE: This setting is not available when the device is connected to an external microphone. TIP: If wind noise is an issue when recording video, you can disable the microphone. Video Modes You can change the video mode to change the resolution, aspect ratio, frame rate, and speed of recorded video. The resolution is the width and height of the video, in pixels. The aspect ratio is the ratio of the video width to the video height. Standard widescreen televisions use a 16:9 aspect ratio, and standard full screen televisions use a 4:3 aspect ratio. The frame rate is expressed in frames per second (fps). The speed indicates the speed of action in the video compared to real time. 1080p: Use this mode when you need high-resolution widescreen shots. 1080p works well as a default setting. Tall HD: Use this mode when you need a large, vertical viewing area. Tall HD is particularly useful for close-up action shots and when using a helmet mount. Fast HD: Use this widescreen mode to capture high-speed action shots. Economy HD: Use this widescreen mode when you need a longer recording time. Economy HD uses less space on your memory card. Slow Mo HD: Use this widescreen mode to capture handheld shots with slow-motion playback. Super Slow Mo: Use this mode when you need super slowmotion playback in standard definition. Time Lapse: Use this high-resolution widescreen mode to capture slow-moving or long-term action. Video Mode Specifications Mode 1080p Tall HD Fast HD Resolution (pixels) 1920×1080 1280×960 1280×720 Aspect Ratio 16:9 4:3 16:9 Frame Rate (fps) 30 48 60 Speed Normal Normal Normal Mode Resolution (pixels) Economy HD 1280x720 Slow Mo HD 1280×720 Super Slow Mo 848×480 Time Lapse 1920×1080 Aspect Ratio 16:9 16:9 16:9 16:9 Frame Rate (fps) 30 60 120 30 Speed Normal 1/2 speed 1/4 speed Varies Field of View Settings You can change the field of view when Lens Correct is set to Off. Field of view is only available for the 1080p video mode. Select MODE > SETUP > VIDEO > Field of View. Wide: Captures a wide view of your surroundings. Use this mode for open areas, close-range video, and when you want to capture as much of your viewing area as possible. Zoom (2x): Captures a tighter view. Use this mode for mediumrange video. Ultra-Zoom (4x): Captures a very focused view. Use this mode for long-range video and closed or covered surroundings. Advanced Recording Settings Select MODE > SETUP > ADVANCED. Lens Correct: Corrects wide-angle barrel distortion and reduces the field of view. Automatically sets Field of View to Ultra-Zoom in the video settings. Stabilize: Turns on image stabilization to reduce shaky video. Automatically enables Lens Correct. Flip Camera: Sets the camera to capture video and images with the screen facing up or down. This Side Down captures correctly oriented video and photos with the screen facing downward. Inverting the Camera Orientation You can change the camera orientation of your device to easily access REC during an activity. If you are mounting the device above your head, you can invert the camera orientation to aid visibility of the recording light or display. 1 Select MODE > SETUP > ADVANCED > Flip Camera. 2 Select an option: • To use the device with the screen facing upward, select This Side Up. • To use the device with the screen facing downward, select This Side Down. Recording Video Automatically NOTE: This feature is available for VIRB Elite only. You can set the device to record video automatically based on your activity. This feature allows you to conserve space on your memory card by recording only the important parts of your activity. 1 Select MODE > SETUP > VIDEO > Auto Record. 2 Select an option: • To record video automatically when the device is moving, select When Moving. The device records video when you are moving and stops recording when you are still. • To record video automatically when you are skiing, select Ski Mode. The device records video when you are moving downhill and stops recording when you board the chairlift. This feature automatically enables GPS in the system settings. Recording a Time-Lapse Video Time-lapse mode captures individual video frames at longer intervals and creates a video that plays much faster than real 4 Video
-
 1
1 -
2
-
 3
3 -
 4
4 -
 5
5 -
 6
6 -
 7
7 -
 8
8 -
 9
9 -
 10
10 -
 11
11 -
 12
12 -
 13
13 -
14
-
15
-
16
 |
 |
