Gateway E-265M Gateway Notebook Reference Guide (Windows XP) - Page 52
Connect the optional port replicator., Reinstall the optional security screw if your notebook
 |
View all Gateway E-265M manuals
Add to My Manuals
Save this manual to your list of manuals |
Page 52 highlights
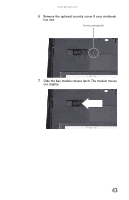
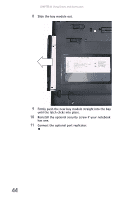
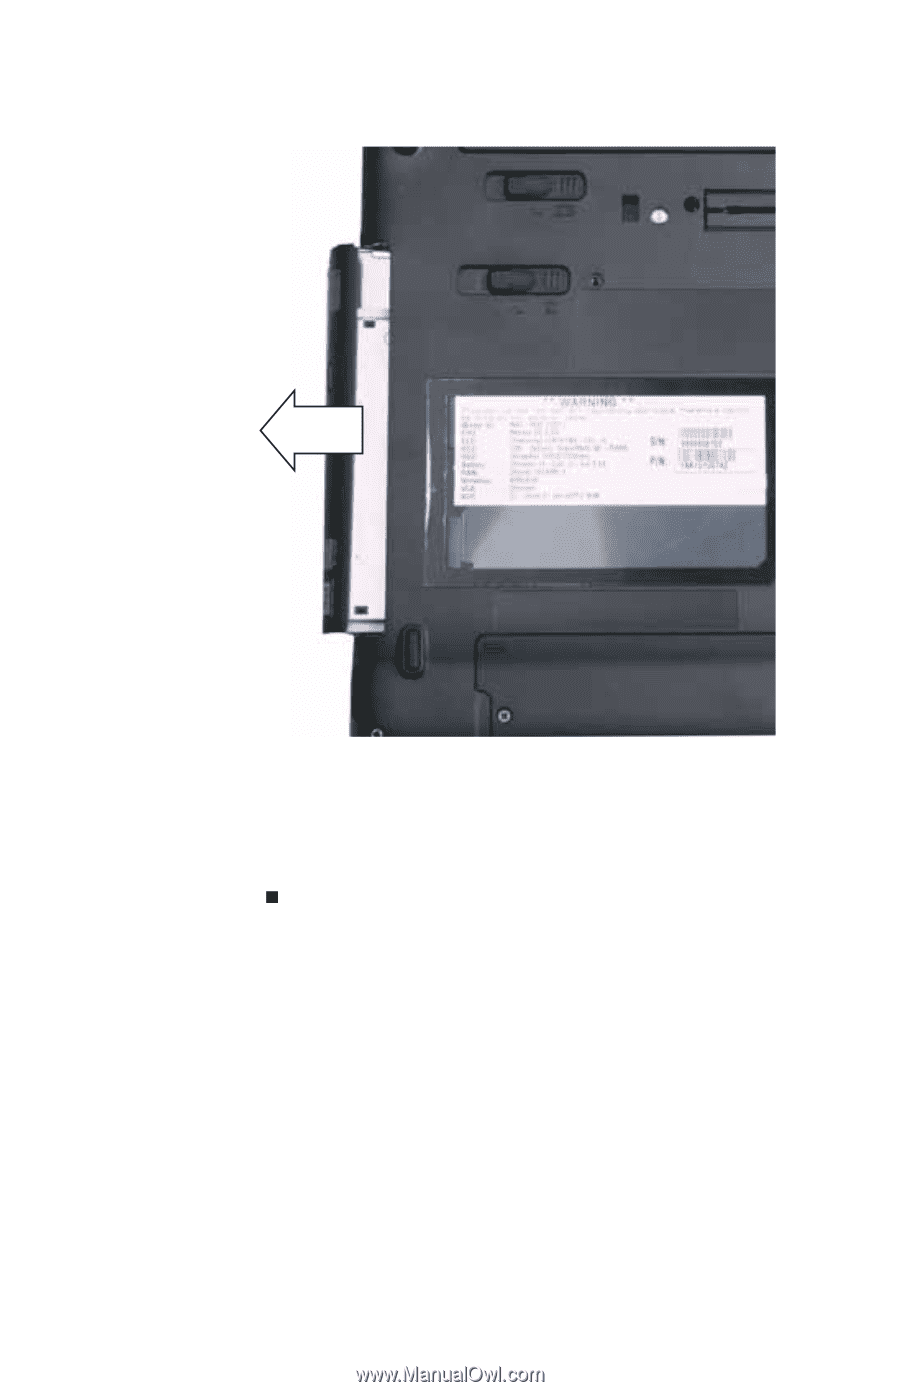
CHAPTER 4: Using Drives and Accessories 8 Slide the bay module out. 9 Firmly push the new bay module straight into the bay until the latch clicks into place. 10 Reinstall the optional security screw if your notebook has one. 11 Connect the optional port replicator. 44
-
 1
1 -
2
-
3
-
4
-
5
-
6
-
7
-
8
-
9
-
10
-
11
-
12
-
13
-
14
-
15
-
16
-
17
-
18
-
19
-
20
-
21
-
22
-
23
-
24
-
25
-
26
-
27
-
28
-
29
-
30
-
31
-
32
-
33
-
34
-
35
-
36
-
37
-
38
-
39
-
40
-
41
-
42
-
43
-
44
-
45
-
46
-
 47
47 -
 48
48 -
 49
49 -
 50
50 -
 51
51 -
 52
52 -
 53
53 -
 54
54 -
 55
55 -
 56
56 -
 57
57 -
58
-
59
-
60
-
61
-
62
-
63
-
64
-
65
-
66
-
67
-
68
-
69
-
70
-
71
-
72
-
73
-
74
-
75
-
76
-
77
-
78
-
79
-
80
-
81
-
82
-
83
-
84
-
85
-
86
-
87
-
88
-
89
-
90
-
91
-
92
-
93
-
94
-
95
-
96
-
97
-
98
-
99
-
100
-
101
-
102
-
103
-
104
-
105
-
106
-
107
-
108
-
109
-
110
-
111
-
112
-
113
-
114
-
115
-
116
-
117
-
118
-
119
-
120
-
121
-
122
-
123
-
124
-
125
-
126
-
127
-
128
-
129
-
130
-
131
-
132
-
133
-
134
-
135
-
136
-
137
-
138
-
139
-
140
-
141
-
142
-
143
-
144
-
145
-
146
-
147
-
148
-
149
-
150
-
151
-
152
 |
 |
CHAPTER
4
: Using Drives and Accessories
44
8
Slide the bay module out.
9
Firmly push the new bay module straight into the bay
until the latch clicks into place.
10
Reinstall the optional security screw if your notebook
has one.
11
Connect the optional port replicator.