Gateway GM5266E 8511625 - Gateway Computer Hardware Reference (6-Bay Micro BTX - Page 30
Replacing the rear fan
 |
View all Gateway GM5266E manuals
Add to My Manuals
Save this manual to your list of manuals |
Page 30 highlights
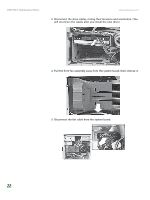
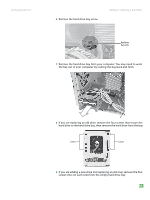
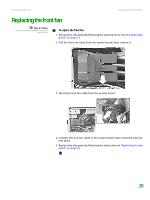
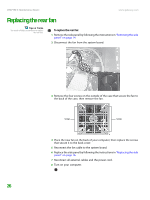
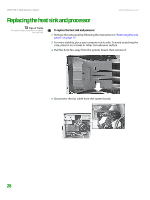
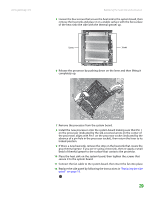
CHAPTER 3: Maintenance Basics www.gateway.com Replacing the rear fan Tips & Tricks You need a Phillips screwdriver to replace the rear fan. To replace the rear fan: 1 Remove the side panel by following the instructions in "Removing the side panel" on page 14. 2 Disconnect the fan from the system board. 3 Remove the four screws on the outside of the case that secure the fan to the back of the case, then remove the fan. Screws Screws 4 Place the new fan on the back of your computer, then replace the screws that secure it to the back cover. 5 Reconnect the fan cable to the system board. 6 Replace the side panel by following the instructions in "Replacing the side panel" on page 16. 7 Reconnect all external cables and the power cord. 8 Turn on your computer. 26
-
 1
1 -
2
-
3
-
4
-
5
-
6
-
7
-
8
-
9
-
10
-
11
-
12
-
13
-
14
-
15
-
16
-
17
-
18
-
19
-
20
-
21
-
22
-
23
-
24
-
 25
25 -
 26
26 -
 27
27 -
 28
28 -
 29
29 -
 30
30 -
 31
31 -
 32
32 -
 33
33 -
 34
34 -
 35
35 -
36
-
37
-
38
-
39
-
40
-
41
-
42
-
43
-
44
-
45
-
46
-
47
-
48
-
49
-
50
-
51
-
52
 |
 |
