Gateway ML6227z 8511725 - Gateway Service Guide - Page 22
Replace the keyboard screw., the numbers 1 through 4 next to them.
 |
View all Gateway ML6227z manuals
Add to My Manuals
Save this manual to your list of manuals |
Page 22 highlights
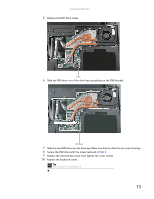
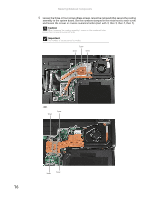
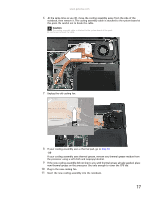
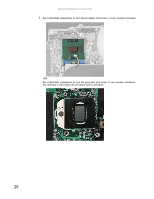
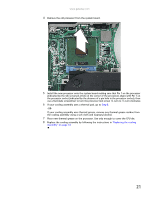
Replacing Notebook Components 12 Tighten the three or four screws, in numerical order, in the holes that are stamped with the numbers 1 through 4 next to them. Caution When tightening the cooling assembly's screws in the numbered holes, tighten them in numerical order. Important The number of screws varies by model. 13 Replace the memory bay cover, then tighten the cover screws. 14 Replace the keyboard screw. Tip The screw hole is marked with a K. 18
-
 1
1 -
2
-
3
-
4
-
5
-
6
-
7
-
8
-
9
-
10
-
11
-
12
-
13
-
14
-
15
-
16
-
 17
17 -
 18
18 -
 19
19 -
 20
20 -
 21
21 -
 22
22 -
 23
23 -
 24
24 -
 25
25 -
 26
26 -
 27
27 -
28
-
29
-
30
-
31
-
32
-
33
-
34
-
35
-
36
-
37
-
38
-
39
-
40
-
41
-
42
-
43
-
44
-
45
-
46
-
47
-
48
-
49
-
50
-
51
-
52
-
53
-
54
-
55
-
56
-
57
-
58
-
59
-
60
-
61
-
62
-
63
-
64
-
65
-
66
-
67
-
68
-
69
-
70
-
71
-
72
-
73
-
74
-
75
-
76
-
77
-
78
 |
 |
Replacing Notebook Components
18
12
Tighten the three or four screws, in numerical order, in the holes that are stamped with
the numbers 1 through 4 next to them.
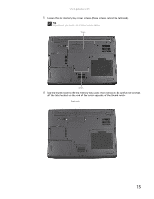
13
Replace the memory bay cover, then tighten the cover screws.
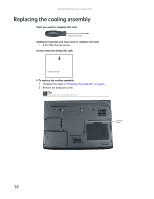
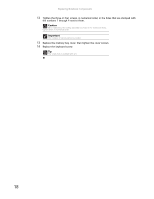
14
Replace the keyboard screw.
Caution
When tightening the cooling assembly’s screws in the numbered holes,
tighten them in numerical order.
Important
The number of screws varies by model.
Tip
The screw hole is marked with a K.