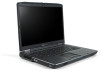
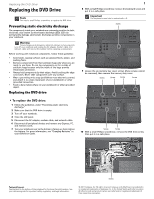
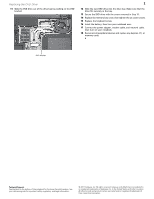
Gateway MT6016j 8512564 - Component Replacement Manual R0 - Page 2
Replacing the Battery, Locating Components
 |
View all Gateway MT6016j manuals
Add to My Manuals
Save this manual to your list of manuals |
Page 2 highlights
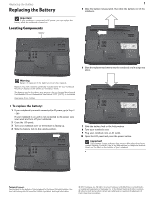
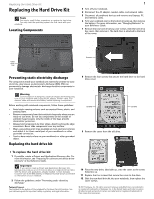
Replacing the Battery Replacing the Battery Important If your notebook is connected to AC power, you can replace the battery while the notebook is turned on. Locating Components Battery 1 5 Slide the battery release latch, then slide the battery out of the notebook. 6 Slide the replacement battery into the notebook until it snaps into place. Warning Danger of explosion if the battery is incorrectly replaced. Replace only with a battery specifically manufactured for your notebook. Recycle or dispose of the battery as hazardous waste. The battery used in this device may present a fire or chemical burn hazard if mishandled. Do not disassemble, heat above 212°F (100°C), or incinerate. Keep away from children. To replace the battery: 1 If your notebook is on and is connected to AC power, go to Step 2. - OR If your notebook is on and is not connected to AC power, save your work and turn off your notebook. 2 Close the LCD panel. 3 Turn your notebook over so the bottom is facing up. 4 Slide the battery lock to the unlock position. 7 Slide the battery lock to the lock position. 8 Turn your notebook over. 9 Plug your notebook into an AC outlet. 10 Open the LCD panel and press the power button. Important If the battery charge indicator does not turn blue after three hours, contact Gateway Customer Care at the Web address or telephone number shown on the label on the bottom of your notebook. Technical Support See the label on the bottom of the notebook for Customer Care Information. See your reference guide for important safety, regulatory, and legal information. © 2007 Gateway, Inc. All rights reserved. Gateway and eMachines are trademarks or registered trademarks of Gateway, Inc. in the United States and other countries. All other brands and product names are trademarks or registered trademarks of their respective companies.
-
 1
1 -
 2
2 -
 3
3 -
 4
4 -
 5
5 -
 6
6 -
 7
7 -
 8
8 -
9
-
10
-
11
-
12
 |
 |
