GE 98536 Instruction Manual - Page 3
Hardware Installation
 |
UPC - 030878985369
View all GE 98536 manuals
Add to My Manuals
Save this manual to your list of manuals |
Page 3 highlights
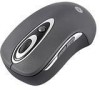
Hardware Installation Please keep these directions in a safe place. 1) Insert the enclosed batteries into the battery compartment located on the bottom of your mouse. Make sure they are facing the proper direction. 2) Plug the GE Wireless Laser Mouse receiver into an available USB port on your computer or GE USB hub. It is not necessary to reboot your computer. 3) Place your Wireless Optical Mouse within 30 feet (approximately 9 meters) of the receiver for optimal communication. 4) Move the mouse to ensure there is a good connection. 5) If the mouse does not work, you may need to move the receiver closer. See the Troubleshooting section for instructions. Page 3
-
 1
1 -
 2
2 -
 3
3 -
 4
4 -
 5
5 -
 6
6 -
 7
7
 |
 |

Page 3
Hardware Installation
Please keep these directions in a safe place.
1)
Insert the enclosed batteries into the battery compartment
located on the bottom of your mouse.
Make sure they are
facing the proper direction.
2)
Plug the GE Wireless Laser Mouse receiver into an available
USB port on your computer or GE USB hub. It is not
necessary to reboot your computer.
3)
Place
your
Wireless
Optical
Mouse
within
30
feet
(approximately 9 meters) of the receiver for optimal
communication.
4)
Move the mouse to ensure there is a good connection.
5)
If the mouse does not work, you may need to move the
receiver
closer.
See
the
Troubleshooting
section
for
instructions.