GE AEE08AP User Manual - Page 10
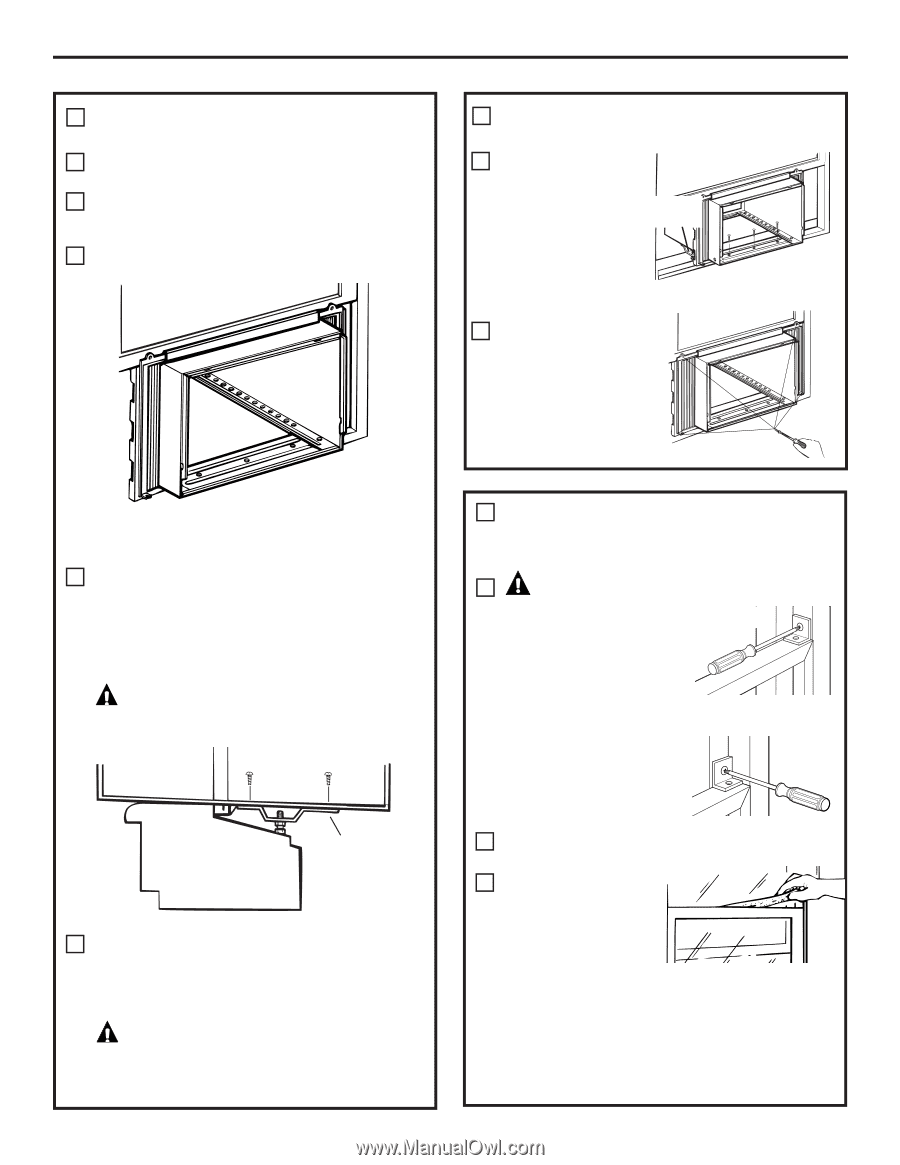
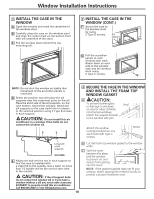
Install The Case In The, Window, Window Cont., Secure The Case In The Window, And Install The Foam
 |
View all GE AEE08AP manuals
Add to My Manuals
Save this manual to your list of manuals |
Page 10 highlights
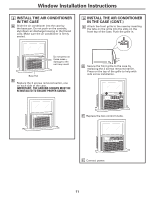
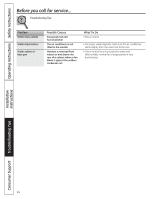
Window Installation Instructions 7 INSTALL THE CASE IN THE WINDOW A Open the window and mark the centerline of the window stool. B Carefully place the case on the window stool and align the center mark on the bottom front with the centerline of the stool. C Pull the window down behind the top mounting rail. 7 INSTALL THE CASE IN THE WINDOW (CONT.) F Secure the case to the window stool by using 3 Type D screws. Sill support G Pull the accordion panels to each window sash track. Attach them on each side to the window sash and the window stool using 4 Type C screws. NOTE: Do not shut the window so tightly that movement of the accordion panels is restricted. D Select the position that will place the sill supports near the outermost point on the sill. Place the short side of the sill supports, on the case bottom, toward the window. Attach the sill supports to the case track hole in relation to the selected position using 2 Type B screws in each support. CAUTION: Do not install this air conditioner in a window if the bolts do not contact the window sill. 8 SECURE THE CASE IN THE WINDOW AND INSTALL THE FOAM TOP WINDOW GASKET A CAUTION: To prevent broken glass or damage to windows, Vinyl on vinyl or other similarly constructed windows, attach the support bracket to the window side jam. Attach the window locking brackets (on one each side) with Type C screws. Wood Long side of sill supports OUTSIDE E Adjust the bolt and the nut in each support so that the case is installed with a slight tilt to the outside. Use a level; no more than 1/2 bubble will be the correct case slant to the outside. CAUTION: If the sill support bolts do not contact the window sill or if you have a window without a sill you must order accessory kit RAK87 to properly install this air conditioner. Call 800.626.2002 or visit GEAppliances.com. B Cut the foam top window gasket to the window width. C Stuff the foam between the glass and the window to prevent air and insects from getting into the room. NOTE: If the gasket supplied does not fit your window, obtain appropriate material locally to provide a proper installation seal. 10
-
 1
1 -
2
-
3
-
4
-
 5
5 -
 6
6 -
 7
7 -
 8
8 -
 9
9 -
 10
10 -
 11
11 -
 12
12 -
 13
13 -
 14
14 -
 15
15 -
16
-
17
-
18
-
19
-
20
-
21
-
22
-
23
-
24
-
25
-
26
-
27
-
28
-
29
-
30
-
31
-
32
-
33
-
34
-
35
-
36
-
37
-
38
-
39
-
40
-
41
-
42
-
43
-
44
-
45
-
46
-
47
-
48
-
49
-
50
-
51
-
52
 |
 |