GE AEL06LP User Manual - Page 10
Window Requirements, Storm Window Requirements, Prepare The Air Conditioner, Attach The Top Mounting - dimensions
 |
View all GE AEL06LP manuals
Add to My Manuals
Save this manual to your list of manuals |
Page 10 highlights
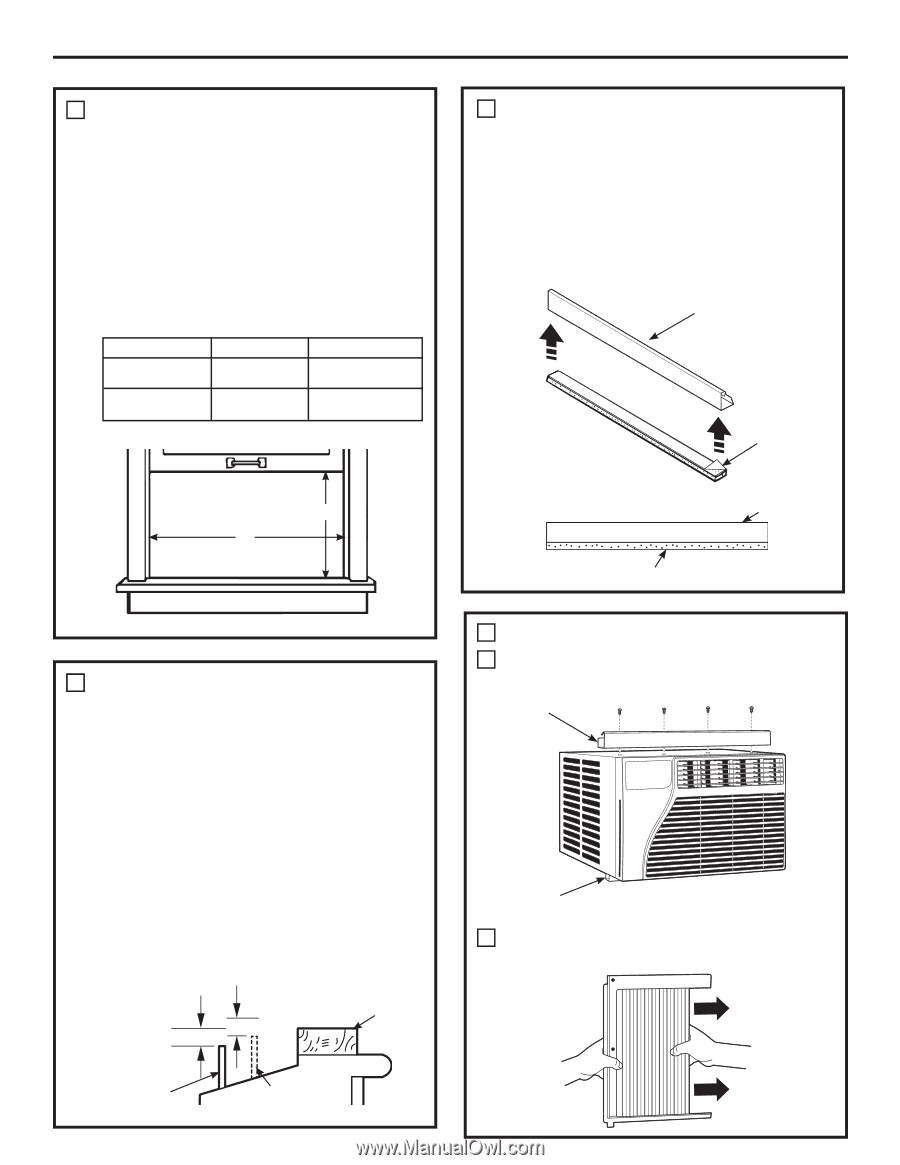
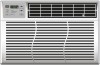
Installation Instructions 1 WINDOW REQUIREMENTS • These instructions are for a standard double-hung window . You will need to modify them for other types of windows . • The air conditioner can be installed without the accordion panels if needed to fit in a narrow window . See the window opening dimensions . • All supporting parts must be secured to firm wood, masonry or metal . • The electrical outlet must be within reach of the power cord . • Follow the dimensions in the table and illustration for your model . Models AEL05 A 12 1/2″ min . B 23″-38″ AEL06 AEL08 13 1/2″ min . 22 1/2″-38 1/8″ A B (With accordion panels) 3 ATTACH THE TOP MOUNTING RAIL SEAL STRIP (Some models may have the seal strip already attached to the top mounting rail . If applicable, skip this step .) Remove the backing from the top mounting rail seal strip and attach the seal strip to the bottom of the top mounting rail, along the front edge . Top mounting rail FRONT VIEW Remove backing from seal strip Top mounting rail Seal strip 4 PREPARE THE AIR CONDITIONER 2 STORM WINDOW REQUIREMENTS A storm window frame will not allow the air conditioner to tilt toward the outside, and will keep it from draining properly . To adjust for this, attach a piece of wood to the sill . A Install the top mounting rail with 4 Type A screws from the outside of the case . Top mounting rail WOOD PIECES WIDTH: 2″ LENGTH: Long enough to fit inside the window frame . THICKNESS: To determine the thickness, place a piece of wood on the sill to make it 1/2″ higher than the top of the storm window frame or the vinyl frame . Attach securely with nails or screws provided by the installer . 1/2″ higher than vinyl frame (on some windows) Bottom mounting rail B Hold the accordion panel in one hand and gently pull back to free the open end . 1/2″ higher than storm window frame Wood Sill Storm window frame Vinyl frame 10
-
 1
1 -
2
-
3
-
4
-
 5
5 -
 6
6 -
 7
7 -
 8
8 -
 9
9 -
 10
10 -
 11
11 -
 12
12 -
 13
13 -
 14
14 -
 15
15 -
16
-
17
-
18
-
19
-
20
-
21
-
22
-
23
-
24
-
25
-
26
-
27
-
28
-
29
-
30
-
31
-
32
-
33
-
34
-
35
-
36
-
37
-
38
-
39
-
40
-
41
-
42
-
43
-
44
-
45
-
46
-
47
-
48
 |
 |