GE AEL14AP User Manual - Page 9
Storm Window Requirements, Window Requirements, Prepare The Air Conditioner
 |
View all GE AEL14AP manuals
Add to My Manuals
Save this manual to your list of manuals |
Page 9 highlights
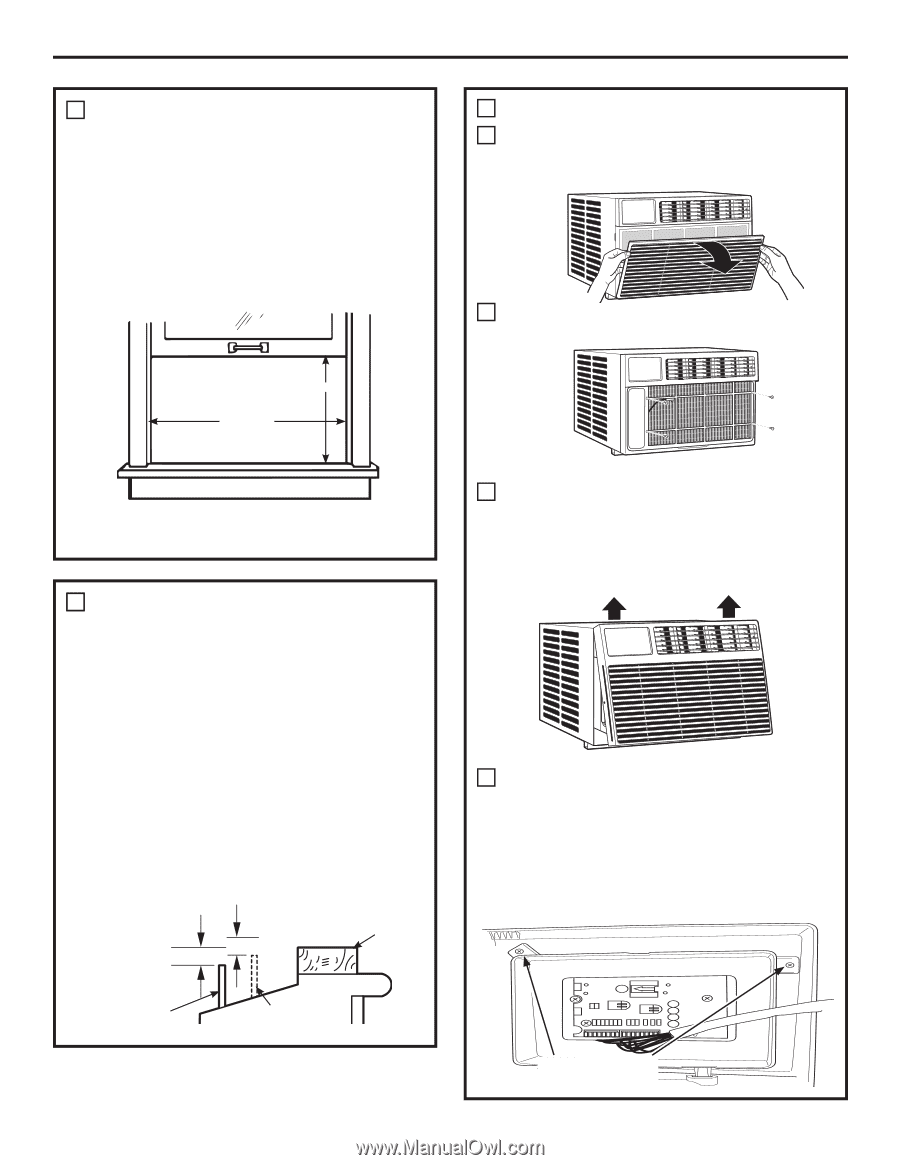
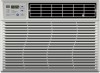
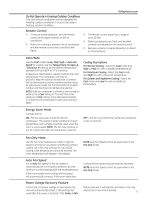
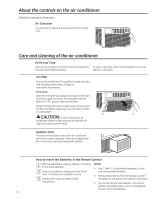
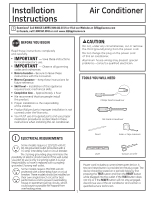
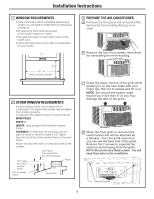
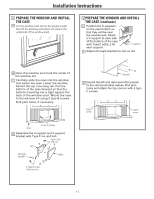
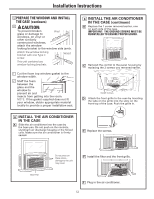
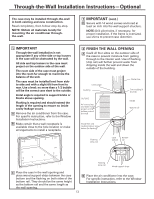
Installation Instructions 1 WINDOW REQUIREMENTS • These instructions are for a standard double-hung window . You will need to modify them for other types of windows . • All supporting parts must be secured to firm wood, masonry or metal . • The electrical outlet must be within reach of the power cord . • Follow the dimensions in the table and illustration for your model . 3 PREPARE THE AIR CONDITIONER A Pull down the front panel and remove the filter . Remove the front panel by lifting up at an angle . B Remove the four front screws. Save them for reinstalling the front housing. 18.5" 26"- 41" (With accordion panels) 2 STORM WINDOW REQUIREMENTS A storm window frame will not allow the air conditioner to tilt toward the outside, and will keep it from draining properly . To adjust for this, attach a piece of wood to the sill . WOOD PIECES WIDTH: 2" LENGTH: Long enough to fit inside the window frame . THICKNESS: To determine the thickness, place a piece of wood on the sill to make it 1/2″ higher than the top of the storm window frame or the vinyl frame . Attach securely with nails or screws provided by the installer . 1/2″ higher than storm window frame Storm window frame 1/2″ higher than vinyl frame (on some windows) Wood Sill Vinyl frame C Grasp the lower corners of the grille while pressing in on the case sides with your finger tips. Pull out to release and lift it up. NOTE: Do not pull the bottom edge toward you more than 3″ or you may damage the tabs of the grille. D When the front grille is removed the control panel will still be attached by a harness. Turn the grille around so you can see the back side of the grille. Remove the 2 screws to separate the control panel housing from the grille. NOTE: Be sure to save these screws. You will need them later in the installation. Remove Screws 9
-
 1
1 -
2
-
3
-
 4
4 -
 5
5 -
 6
6 -
 7
7 -
 8
8 -
 9
9 -
 10
10 -
 11
11 -
 12
12 -
 13
13 -
 14
14 -
15
-
16
-
17
-
18
-
19
-
20
-
21
-
22
-
23
-
24
-
25
-
26
-
27
-
28
-
29
-
30
-
31
-
32
-
33
-
34
-
35
-
36
-
37
-
38
-
39
-
40
-
41
-
42
-
43
-
44
-
45
-
46
-
47
-
48
-
49
-
50
-
51
-
52
-
53
-
54
-
55
-
56
 |
 |