GE AEL25DP User Manual - Page 10
Prepare The Air Conditioner, Continues, Prepare The Case
 |
View all GE AEL25DP manuals
Add to My Manuals
Save this manual to your list of manuals |
Page 10 highlights
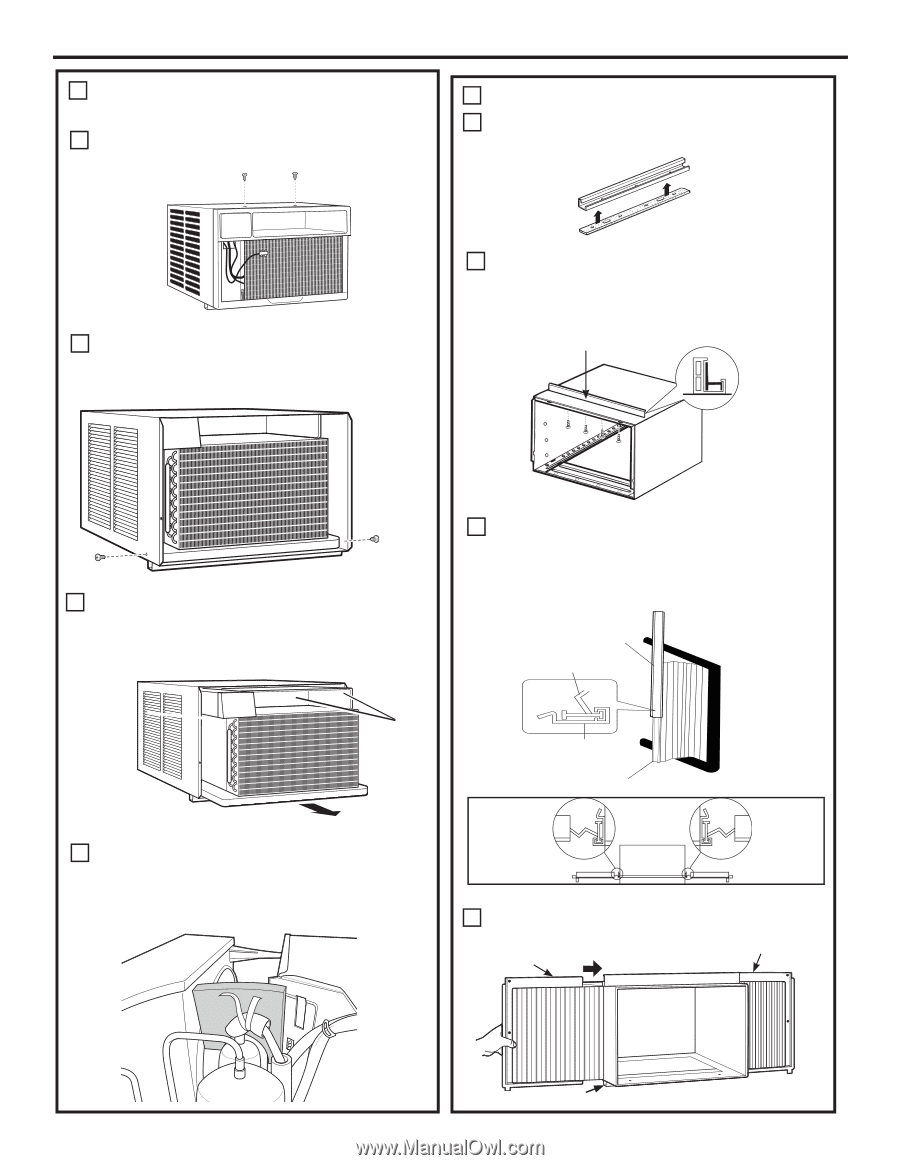
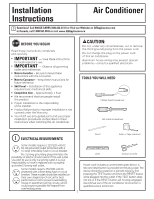
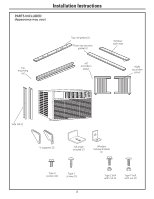
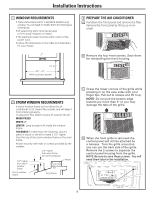
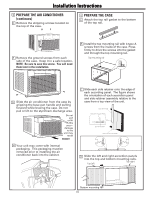
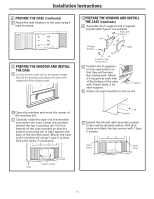
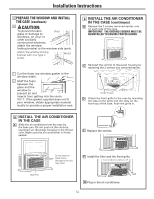
Installation Instructions 3 PREPARE THE AIR CONDITIONER (continues) E Remove the shipping screws located on the top of the case. 4 PREPARE THE CASE A Attach the top rail gasket to the bottom of the top rail. F Remove the ground screws from each side of the case. Keep it in a safe location. NOTE: Be sure to save this screw. You will need them later in the installation. B Install the top mounting rail with 4 type A screws from the inside of the case. Press firmly to drive the screws into the gasket and through the top mounting rail. Top mounting rail G Slide the air conditioner from the case by gripping the base pan handle and pulling forward while bracing the case. Do not pull or lift on the styrofoam discharge area. Do not pull or lift in this area- damage to the unit may result FRONT H Your unit may come with internal packaging. This packaging must be removed prior to installing the air conditioner back into the cabinet. C Slide each side retainer onto the edge of each according panel. The figure shows the orientation of each accordion panel and side retainer assembly relative to the case from a top view of the unit. SIDE RETAINER WINDOW FILLER PANEL SIDE RETAINER WINDOW FILLER PANEL D Slide the left and right accordion panels into the top and bottom mounting rails. Top left Top right Bottom mounting rail 10
-
 1
1 -
2
-
3
-
4
-
 5
5 -
 6
6 -
 7
7 -
 8
8 -
 9
9 -
 10
10 -
 11
11 -
 12
12 -
 13
13 -
 14
14 -
 15
15 -
16
-
17
-
18
-
19
-
20
-
21
-
22
-
23
-
24
-
25
-
26
-
27
-
28
-
29
-
30
-
31
-
32
-
33
-
34
-
35
-
36
-
37
-
38
-
39
-
40
-
41
-
42
-
43
-
44
-
45
-
46
-
47
-
48
-
49
-
50
-
51
-
52
-
53
-
54
-
55
-
56
 |
 |