GE AGM24DJ Owners Manual - Page 11
Window
 |
UPC - 084691145448
View all GE AGM24DJ manuals
Add to My Manuals
Save this manual to your list of manuals |
Page 11 highlights
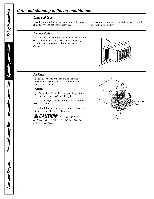
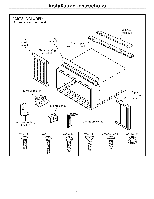
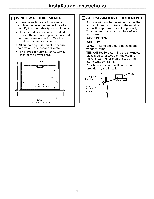
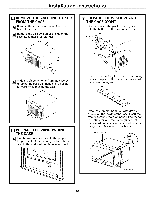
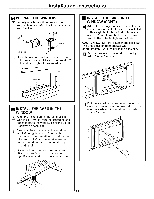
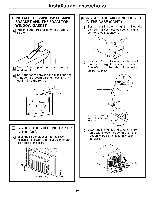
Installation instructions [] PREPARE THE WINDOW I_] Loosely attach the sill brackets to the support brackets using the 2 carriage bolts and 2 lock nuts. Cb0a1rrtiage Supportbracket I _ _..,,.. _,. _jock nut Sillbracket / [] Open the window and mark the centerline of the window stool. Measure and mark 11" to the left and right of the centerline. [] INSTALL THE CASE IN THE WINDOW (CONT.) [] Adjust the carriage bolts and the lock nuts in each support so that the case is installed with a slight tilt to the outside. Use a level; about 1/3 bubble will be the correct case slant to the outside. Tighten the bolts. CAUTION: DO NOT drill a hole in the base pan. The unit is designed to operate with approximately 1/2" of water in the base pan. [] Secure the case to the window stool by using 3 type B screws. Centerline [] INSTALL THE CASE IN THE WINDOW [] Align the inside edge of the sill brackets with the 11" marks from the centedine and attach them to the window sill using 2 type B screws on each side. [] Carefully place the case on the window stool aligning the center front on the bottom with the centerline marked on the window stool. Close the window making sure the window sash is behind the top mounting rail. [] Using the larger diameter hole in the case, attach the brackets to the case using two type D screws and 2 lock nuts on each side. [] Pull the accordion panels to each window sash track. Attach them on each side to the window sash and the window stool using 4 type C screws. 11
-
 1
1 -
2
-
3
-
4
-
5
-
 6
6 -
 7
7 -
 8
8 -
 9
9 -
 10
10 -
 11
11 -
 12
12 -
 13
13 -
 14
14 -
 15
15 -
 16
16 -
17
-
18
 |
 |
