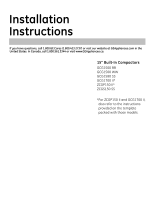
GE GCG1580PSS Installation Instructions - Page 6
Installation Preparation
 |
UPC - 084691172628
View all GE GCG1580PSS manuals
Add to My Manuals
Save this manual to your list of manuals |
Page 6 highlights
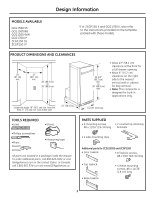
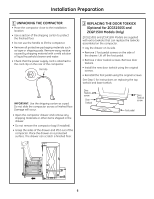
Installation Preparation 1 UNPACKING THE COMPACTOR • Move the compactor close to the installation location. • Use a section of the shipping carton to protect the finished floor. • Do not use the handle to lift the compactor. • Remove all protective packaging materials such as tape or shipping pads. Remove waxy residue caused by shipping material with a mild solution of liquid household cleaner and water. • Check that the power supply cord is attached to the cord clip on the rear of the compactor. Cord clip IMPORTANT: Use the shipping carton as a pad. Do not slide the compactor across a finished floor. Damage will occur. • Open the compactor drawer and remove any shipping materials or other items shipped in the drawer. • Do not remove the compactor bag (if installed). • Grasp the sides of the drawer and lift it out of the compactor. Place the drawer on a protected surface. The drawer can scratch a finished floor. 2 REPLACING THE DOOR TOEKICK (Optional for ZCGS150SS and ZCGP150II Models Only) ZCGS150SS and ZCGP150II Models are supplied with extra toekicks that can replace the toekicks assembled on the compactor. • Lay the drawer on its side. • Remove 2 foot pedal screws on the side of the drawer. Lift off the foot pedal. • Remove 2 door toekick screws. Remove door toekick. • Install the new door toekick using the original screws. • Reinstall the foot pedal using the original screws. See Step 5 for instructions on replacing the top toekick and base toekick. Door Toekick screw Door Toekick Door Toekick screw Foot pedal 6
-
 1
1 -
 2
2 -
 3
3 -
 4
4 -
 5
5 -
 6
6 -
 7
7 -
 8
8 -
 9
9 -
 10
10 -
 11
11 -
 12
12 -
13
-
14
-
15
-
16
-
17
-
18
-
19
-
20
-
21
-
22
-
23
-
24
 |
 |
