GE GMR04HASCS Use and Care Manual - Page 9
Installation Instructions, Preparing to install, the refrigerator. - appliances
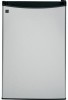 |
UPC - 084691136323
View all GE GMR04HASCS manuals
Add to My Manuals
Save this manual to your list of manuals |
Page 9 highlights
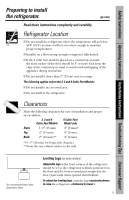
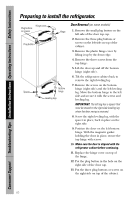
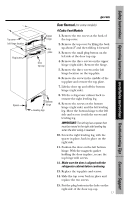
Safety Instructions Operating Instructions Installation Instructions Troubleshooting Tips Consumer Support Preparing to install the refrigerator. ge.com Read these instructions completely and carefully. Refrigerator Location I Do not install the refrigerator where the temperature will go below 50°F (10°C) because it will not run often enough to maintain proper temperatures. I Install it on a floor strong enough to support it fully loaded. I If the 2 cubic foot model is placed on a countertop or stand, the front surface of the door should be 3″ or more back from the edge of the countertop or stand to avoid accidental tipping of the appliance during normal use. I Do not install it closer than 5″ (13 cm) next to a range. The following applies only to the 2, 3 and 4 Cubic Foot Models: I Do not install it in a recessed area. I Do not build in the refrigerator. Clearances Allow the following clearances for ease of installation and proper air circulation. 2, 3 and 4 6 Cubic Foot Cubic Foot Models Model only Sides 1/2″ (13 mm) 0″ (0 mm)∗ Top 2″ (51 mm) 0″ (0 mm) Back 2″ (51 mm)** 0″ (0 mm) *1-1/4″ (32 mm) for hinge side clearance **From the rear cabinet surface to the wall Turn counterclockwise to raise, clockwise to lower. Leveling Legs (on some models) Adjustable legs at the front corners of the refrigerator should be set so the refrigerator is firmly positioned on the floor and the front is raised just enough that the door closes easily when opened about halfway. To adjust the leveling legs, turn the legs counterclockwise to raise the refrigerator, clockwise to lower it. 9
-
 1
1 -
2
-
3
-
 4
4 -
 5
5 -
 6
6 -
 7
7 -
 8
8 -
 9
9 -
 10
10 -
 11
11 -
 12
12 -
 13
13 -
 14
14 -
15
-
16
 |
 |
