GE GTN17DBEWW Use and Care Manual - Page 15
Remove When, Connecting To Acm
 |
View all GE GTN17DBEWW manuals
Add to My Manuals
Save this manual to your list of manuals |
Page 15 highlights
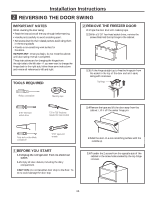
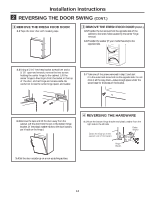
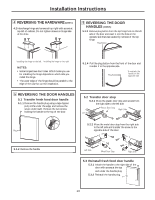
Installation Instructions 3 CONNECTING ENERGY SMART APPLIANCE 1 REMOVE LABEL OVER INTERCONNECT CABLE CONNECTOR ON ACCESS COVER REMOVE WHEN CONNECTING TO ACM LABEL 2 CONNECT APPLIANCE TO ACM 2.1 Locate interconnect cable. This accessory is part of ACM kit. 2.2 Plug interconnect cable into connector on access cover as shown. 2.3 Plug opposite end of interconnect cable into ACM. 2.4 Refer to ACM kit instructions to connect ACM to NucleusTM energy manager or Smart Meter 3 PLACE ACM NOTE: The ACM can be placed on top, back, or side of refrigerator. ACM can also be installed without direct contact with refrigerator (for example in adjoining cabinets). See ACM manual for further ACM installation details. 15
-
 1
1 -
2
-
3
-
4
-
5
-
6
-
7
-
8
-
9
-
 10
10 -
 11
11 -
 12
12 -
 13
13 -
 14
14 -
 15
15 -
 16
16 -
 17
17 -
 18
18 -
 19
19 -
 20
20 -
21
-
22
-
23
-
24
-
25
-
26
-
27
-
28
-
29
-
30
-
31
-
32
-
33
-
34
-
35
-
36
-
37
-
38
-
39
-
40
-
41
-
42
-
43
-
44
-
45
-
46
-
47
-
48
-
49
-
50
-
51
-
52
-
53
-
54
-
55
-
56
-
57
-
58
-
59
-
60
-
61
-
62
-
63
-
64
 |
 |
15
Installation Instructions
LABEL
NOTE: The ACM can be placed on top, back, or side of
refrigerator.
ACM can also be
installed without direct contact with refrigerator (for example in adjoining cabinets).
See
ACM manual for further ACM installation details.
PLACE ACM
3
CONNECTING ENERGY SMART APPLIANCE
3
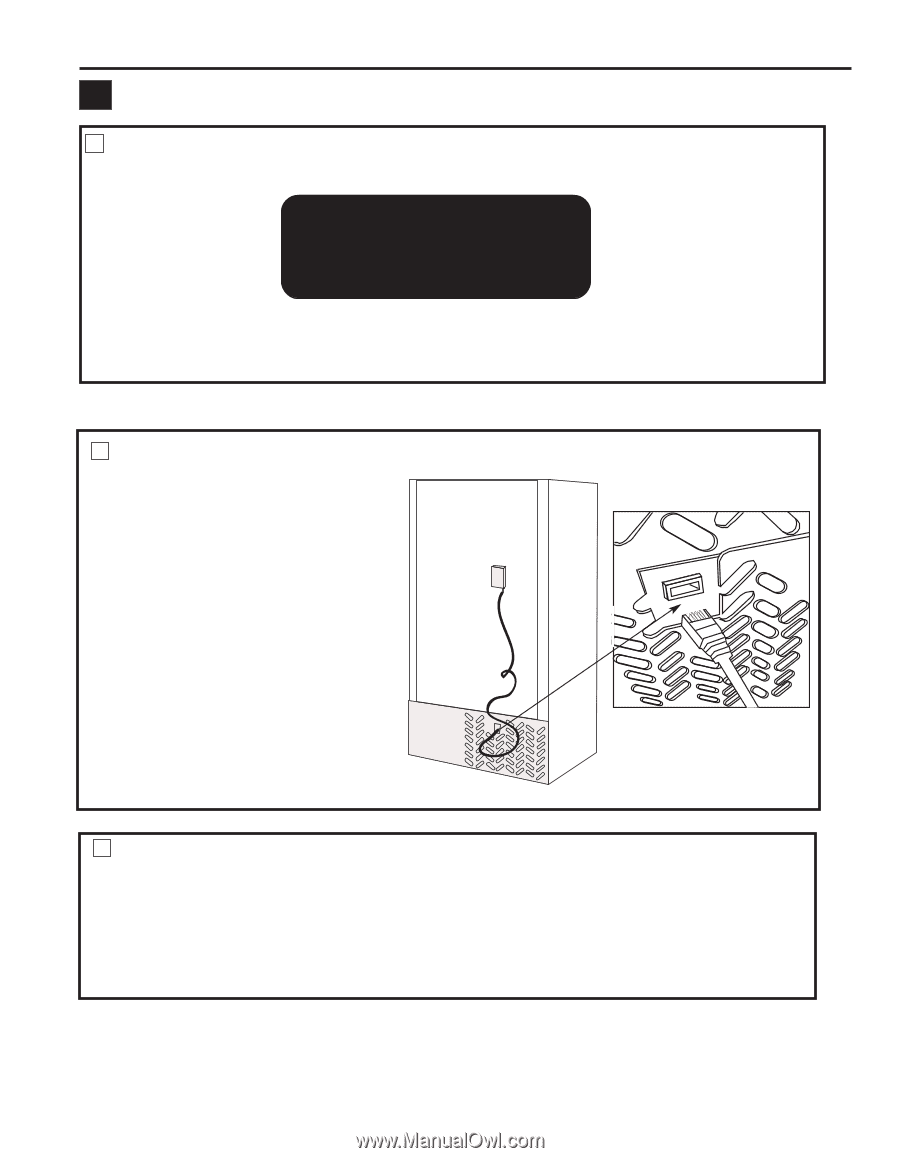
2.1 Locate interconnect cable.
This accessory is part of ACM
kit.
2.2 Plug interconnect cable into
connector on access cover as
shown.
2.3 Plug opposite end of
interconnect cable into ACM.
2.4 Refer to ACM kit
instructions to connect ACM
to Nucleus
TM
energy
manager or Smart Meter
CONNECT APPLIANCE TO ACM
2
REMOVE LABEL OVER INTERCONNECT CABLE CONNECTOR ON ACCESS COVER
1
REMOVE WHEN
REMOVE WHEN
CONNECTING TO ACM
CONNECTING TO ACM