GE GWE19JMLES Installation Instructions - Page 21
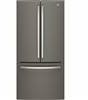
For NON Ice and Water Models Only
 |
View all GE GWE19JMLES manuals
Add to My Manuals
Save this manual to your list of manuals |
Page 21 highlights
Installation Instructions B. Remove the hinge cover on top of the left fresh food door by removing the screw using a Phillips screwdriver. C. Unplug the 3 wire connectors and move the wires until you can see the screws holding the hinge. For Ice and Water Models Only: Pull the water line very carefully. Wire Connectors Water Line (Ice and Water Models Only) For NON Ice and Water Models Only: Lift the hinge straight up to free the hinge pin from the socket in the top of the door and pass the wire through the slot in the hinge. For Ice and Water Models Only: Do not remove hinge from the door. E. Remove the tape from the door, open the door 90 degrees and tilt the door away from the cabinet. Lift the door off the center hinge pin. F. Set the door on a non-scratching surface with the inside up. 3 REMOVING CENTER HINGES AND BRACKETS A. Using a 1/4" Allen wrench, remove the 2 hinge pins from the hinge brackets. D. Using a 5/16" socket/ratchet driver, remove the bolts securing the top hinge to the cabinet. Wire Connectors Bolts Water Line (Ice and Water Models Only) B. Using a 5/16" socket/ratchet driver, remove the bolts securing the center hinge brackets to the cabinet. 21
-
 1
1 -
2
-
3
-
4
-
5
-
6
-
7
-
8
-
9
-
10
-
11
-
12
-
13
-
14
-
15
-
 16
16 -
 17
17 -
 18
18 -
 19
19 -
 20
20 -
 21
21 -
 22
22 -
 23
23 -
 24
24 -
 25
25 -
 26
26 -
27
-
28
-
29
-
30
-
31
-
32
-
33
-
34
-
35
-
36
-
37
-
38
-
39
-
40
-
41
-
42
-
43
-
44
-
45
-
46
-
47
-
48
-
49
-
50
-
51
-
52
-
53
-
54
-
55
-
56
-
57
-
58
-
59
-
60
-
61
-
62
-
63
-
64
-
65
-
66
-
67
-
68
-
69
-
70
-
71
-
72
-
73
-
74
-
75
-
76
-
77
-
78
-
79
-
80
-
81
-
82
-
83
-
84
-
85
-
86
-
87
-
88
-
89
-
90
-
91
-
92
-
93
-
94
-
95
-
96
-
97
-
98
-
99
-
100
-
101
-
102
-
103
-
104
-
105
-
106
-
107
-
108
-
109
-
110
-
111
-
112
-
113
-
114
-
115
-
116
-
117
-
118
-
119
-
120
-
121
-
122
-
123
-
124
-
125
-
126
-
127
-
128
-
129
-
130
-
131
-
132
-
133
-
134
 |
 |
