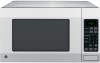
GE JES1656SRSS Owners Manual
GE JES1656SRSS Manual
 |
View all GE JES1656SRSS manuals
Add to My Manuals
Save this manual to your list of manuals |
GE JES1656SRSS manual content summary:
- GE JES1656SRSS | Owners Manual - Page 1
Operating Instructions Convenience Features. . . . . . 11-14 Microwave Terms 16 Oven Features 7-8 Other Features 15, 16 Power Levels 9 Time Features 10 Care and Cleaning 17 Troubleshooting Tips 18 Things That Are Normal 18 Consumer Support Consumer Support 20 Warranty 19 Owner's Manual - GE JES1656SRSS | Owners Manual - Page 2
the fire may spread. „ See door surface cleaning instructions in the Care and cleaning of the microwave oven section of this manual. „ This appliance must only be serviced by qualified service personnel. Contact the nearest authorized service facility for e[amination, repair or adMustment. „ As with - GE JES1656SRSS | Owners Manual - Page 3
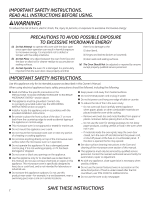
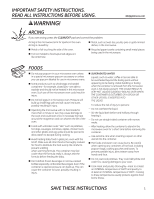
IMPORTANT SAFETY INSTRUCTIONS. READ ALL INSTRUCTIONS BEFORE USING. WARNING! GEAppliances.com ARCING If you see arcing, press the CLEAR/OFF pad and correct the problem. Arcing is the microwave term for sparks in the oven. Arcing is caused by: „ Metal, such as twist-ties, poultry pins or gold- - GE JES1656SRSS | Owners Manual - Page 4
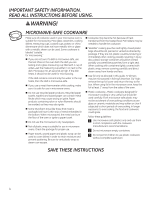
. READ ALL INSTRUCTIONS BEFORE USING. WARNING! MICROWAVE-SAFE COOKWARE Make sure all cookware used in your microwave oven is suitable for microwaving. Most glass casseroles, cooking dishes, measuring cups, custard cups, pottery or china dinnerware which does not have metallic trim or glaze with - GE JES1656SRSS | Owners Manual - Page 5
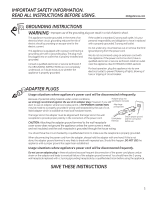
wire for the electric current. This appliance is equipped with a power cord having a grounding wire with a grounding plug. The plug must be plugged into an outlet that is properly installed and grounded. Consult a qualified electrician or service technician if the GROUNDING INSTRUCTIONS are not - GE JES1656SRSS | Owners Manual - Page 6
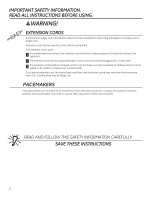
arranged so that it will not drape over the countertop or tabletop where it can be pulled on by children or tripped over unintentionally. If you use an e[tension cord, the interior light may flicker and the blower sound may vary when the microwave oven is on. Cooking times may be longer, too - GE JES1656SRSS | Owners Manual - Page 7
of your microwave oven. Throughout this manual, features and appearance may vary from your model. 1150 Watts GEAppliances.com Features of the Oven Door Latches. Window with Metal Shield. Screen allows cooking to be viewed while keeping microwaves confined in the oven. Convenience Guide. Touch - GE JES1656SRSS | Owners Manual - Page 8
About the features of your microwave oven. You can microwave by time or with the convenience features. Not all features on all models. JES1656 Sensor Popcorn Time Time Cook Defrost Power Defrost Beverage Level Weight Express Cook Vegetable 1 2 3 Potato 4 5 6 Reheat 7 8 9 Timer on/off Clock - GE JES1656SRSS | Owners Manual - Page 9
START. Variable power levels add fle[ibility to microwave cooking. The power levels on the microwave oven can be compared to the surface units on a range. Each power for stews and less tender cuts of meat. Low 2 or 3: Defrosting; simmering; delicate sauces. Warm 1: Keeping food warm; - GE JES1656SRSS | Owners Manual - Page 10
Express Cook 123 456 789 0 Time Cook Allows you to microwave for any time up to 99 minutes and 99 seconds. HI LEVEL once and then press the number pad to select power level. 4 Press START. The oven will begin defrosting. After defrosting is complete, Time Cook will count down. Express Cook 123 456 - GE JES1656SRSS | Owners Manual - Page 11
Pause Defrosting Guide Time Defrost Allows you to defrost for a selected length of time. See the Defrosting Guide for min. 2 to 5 min. Place unopened package in oven. Let stand 5 minutes after defrosting. Place unopened package in oven. Microwave Must until franks can be separated. Let stand 5 - GE JES1656SRSS | Owners Manual - Page 12
microwave popcorn weighing 3.0 to 3.5 ounces. Popcorn To use the Popcorn feature: 1 Follow package instructions, models) 1 Press Reheat pad. 2 Enter the food code. See Cooking Guide for Reheat feature below for codes. 3 The microwave will start immediately. IMPORTANT: Do not use the sensor - GE JES1656SRSS | Owners Manual - Page 13
sensor features twice in succession on the same food portion. If food is undercooked after the first countdown, use TIME COOK for additional time. Soften Melt Express Cook 123 456 789 0 Start Pause Soften/Melt (on some models) To use the Soften/Melt feature: Press SOFTEN/MELT pad. The microwave - GE JES1656SRSS | Owners Manual - Page 14
(Time Defrost is e[plained in the About the time features section.) There is a handy guide located on the inside front of the oven. „ Remove meat from package and place on microwave-safe dish. „ When the oven signals, turn the food over. Remove defrosted meat or shield warm areas with small pieces - GE JES1656SRSS | Owners Manual - Page 15
you to stop cooking without opening the door or clearing the display. Press START/PAUSE again to restart the oven. Clear Off Control Lock-Out You may lock the control panel to prevent the microwave from being accidentally started or used by children. To lock or unlock the controls, press and hold - GE JES1656SRSS | Owners Manual - Page 16
or covering with wa[ paper allows e[cess steam to escape. Shielding In a regular oven, you shield chicken breasts or baked foods to prevent over-browning. When microwaving, you use small strips of foil to shield thin parts, such as the tips of wings and legs on poultry, which would cook before - GE JES1656SRSS | Owners Manual - Page 17
dry. Never use a commercial oven cleaner on any part of your microwave. Removable Turntable and Turntable Support To prevent breakage, do not cloth and dry thoroughly before plugging cord into outlet. Stainless Steel (on some models) Do not use a steel-wood pad; it will scratch the surface. To - GE JES1656SRSS | Owners Manual - Page 18
Troubleshooting Tips. Problem Oven will not start Control panel lighted, yet oven will not start Microwave oven control will not not indicate a problem with the microwave. Plug the microwave into a different electrical circuit, move the radio or TV as far away from the microwave as possible, or - GE JES1656SRSS | Owners Manual - Page 19
warranty, GE will also provide, free of charge, all labor and related service to replace the defective part. For the above limited warranty: To avoid any trip charges, you must take the microwave oven to a General Electric Customer Care® servicer and pick it up following service. In-home service is - GE JES1656SRSS | Owners Manual - Page 20
Consumer Support. GE Appliances Website GEAppliances.com Have a question or need assistance with your appliance? Try the GE Appliances Website 24 hours a day, any day of the year! For greater convenience and faster service, you can now download Owner's Manuals, order parts, catalogs, or even - GE JES1656SRSS | Owners Manual - Page 21
y limpieza 17 Consejos para la solución deproblemas 18 Cosas que son normales 18 Soporte al consumidor Soporte al consumidor 20 Garantía 19 Manual del prJoEpSi1e6t5a1rio JES1651 JES1656 Escriba los números de modelo y de serie aquí: Número de modelo _________ Número de serie ___________ Estos - GE JES1656SRSS | Owners Manual - Page 22
de seguridad. (b) No Sitúe ningún obMeto entre la parte frontal del horno y la puerta ni permita que se manual. Do not use corrosive chemicals or vapors in this appliance. This microwave oven is usado por niños. „ No use las funciones del sensor dos veces seguidas con la misma porción de comida. Si - GE JES1656SRSS | Owners Manual - Page 23
INFORMACIÓN IMPORTANTE DE SEGURIDAD. LEA TODAS LAS INSTRUCCIONES ANTES DE USAR GEAppliances.com ¡ADVERTENCIA! FORMACIÓN DE ARCO ELÉCTRICO Si ve que se forman arcos eléctricos, presione el botón CLEAR/OFF (Borrar/Apagar) y resuelva el problema. Arco eléctrico es lo que, en la terminología de los - GE JES1656SRSS | Owners Manual - Page 24
la cubierta con cuidado y mantenga el vapor aleMado de sus manos y rostro. „ Use papel de aluminio sólo de la forma detallada en este manual. Los alimentos preparados en porciones listas para calentar y servir (TV Dinners) pueden cocinarse con microondas en bandeMas de papel aluminio de una altura - GE JES1656SRSS | Owners Manual - Page 25
MPORTANTE DE SEGURIDAD. LEA TODAS LAS INSTRUCCIONES ANTES DE USAR GEAppliances.com INSTRUCCIONES DE TOMA DE TIERRA ¡ADVERTENCIA!³El uso inadecuado del enchufe de conexión a tierra puede provocar riesgos de descargas eléctricas.. Este electrodoméstico debe estar conectado a tierra. Si se produMera - GE JES1656SRSS | Owners Manual - Page 26
los tiempos de cocción pueden prolongarse. AVISO: MARCAPASOS La mayoría de los marcapasos se encuentran protegidos contra la interferencia de productos electrónicos, incluyendo microondas. Sin embargo, los pacientes que tengan marcapasos deberían consultar a sus médicos si tienen alguna duda. FAVOR - GE JES1656SRSS | Owners Manual - Page 27
Funciones de su horno microondas. Su modelo puede tener otras características y apariencia que las ilustradas en este manual. 1150 Watts GEAppliances.com Características del horno Enganches de la puerta. Ventana con cobertura metálica. La pantalla permite que usted pueda ver lo - GE JES1656SRSS | Owners Manual - Page 28
Puede usar el microondas por tiempo o con las funciones de conveniencia. No todas las funciones aparecen en todos los modelos. JES1656 Sensor Popcorn Time Time Cook Defrost Power Defrost Beverage Level Weight Express Cook Vegetable 1 2 3 Potato 4 5 6 Reheat 7 8 9 Timer on/off Clock 0 AM/PM - GE JES1656SRSS | Owners Manual - Page 29
delmicroondas no hizo ciclo de apagado, la parte externa de los alimentos se podría cocinar antes que la parte interna se descongelara. A continuación le Cocción lenta y suave, como estofados y cortes de carnemenos suaves. Low 2 ó 3 (bajo): Descongelación sin cocción; alimentos hervidos a fuego - GE JES1656SRSS | Owners Manual - Page 30
Sobre las características de tiempo. Time Cook Express Cook 123 456 789 0 Start Pause Tiempo de Cocción Le permite la cocción en microondas hasta un tiempo de 99 minutos y 99 segundos. El nivel de potencia alta se configura automáticamente, pero usted puede cambiarlo para más flexibilidad. 1 - GE JES1656SRSS | Owners Manual - Page 31
5 Presione START (Iniciar). Una vez transcurrida la primera mitad del tiempo de descongelación, dé vuelta la comida y divida o vuelva a ordenar las partes para una descongelación más pareMa. Cubra cualquier área caliente con trozos pequeños de papel aluminio. El horno continuará descongelando si no - GE JES1656SRSS | Owners Manual - Page 32
Popcorn Use only with prepackaged microwave popcorn weighing 3.0 to 3.5 ounces ). 2 Ingrese el código de comida. Consulte Cooking Guide for Reheat (Guía de Cocción para Volver a reiniciar la cocción. IMPORTANTE: No use las funciones del sensor dos veces seguidas con la misma porción de comida. Si - GE JES1656SRSS | Owners Manual - Page 33
de 8 onzas. El microondas se iniciará de inmediato. Beverage pueden quedar muy calientes. Quite el recipiente con cuidado. IMPORTANTE: No use las funciones del sensor dos veces seguidas con la misma porción de comida. Si la comida no se cocina luego de la primera cuenta regresiva, use TIME COOK - GE JES1656SRSS | Owners Manual - Page 34
para adicionar tiempo. Función Cooking Guide for VEGETABLE (Guía de Cocción del temporizador). Hay una guía manual ubicada en el frente interior del Retire la carne descongelada o cobra las partes calientes con trozos pequeños de papel No use las funciones del sensor dos veces seguidas con la - GE JES1656SRSS | Owners Manual - Page 35
Sobre las otras funciones. Clock Express Cook 123 456 789 0 Start Pause Clock (reloj) Presione para ingresar la hora del día. 1 Presione Clock (reloj). 2 Entre la hora del día. La hora debe ser entre 1:00 y 12:59. 3 Presione Clock (reloj). GEAppliances.com Start Pause Pausa START/PAUSE (Iniciar - GE JES1656SRSS | Owners Manual - Page 36
pechugas de pollo o las comidas horneadas para que no se doren demasiado. Al usar elmicroondas, use pequeñas cintas de papel de aluminio para cubrir partes finas, como las puntas de las alas en las aves, que podrían cocinarse antes que las partesmayores. Cuando cocina en hornos regulares, los - GE JES1656SRSS | Owners Manual - Page 37
, aplicándolos con una esponja o un paño suave. Enjuague con un paño húmedo y seque. Nunca use un limpiador comercial de horno en ninguna parte delmicroondas. Plato giratorio desmontable y el apoyo del plato giratorio Para que no se rompa, no ponga el plato giratorio en agua Musto después de cocinar - GE JES1656SRSS | Owners Manual - Page 38
Consejos para la solución de problemas. Problema El horno no se pone enmarcha El panel de control está iluminado; sin embargo, el hornomicroondas no se pone enmarcha El control del horno microondas no funcionará. Posibles causas Un fusible en su casa o elcircuito interruptor podrían haberse - GE JES1656SRSS | Owners Manual - Page 39
GE proporcionará, sin costo adicional, mano de obra y servicio relacionado para reemplazar las partes defectuosas. En relación a la garantía limitada que figura más arriba: Para evitar cualquier costo de traslado, deberá llevar su horno de microondas a un Servicio al Cliente de General Electric - GE JES1656SRSS | Owners Manual - Page 40
GE Appliances 24 horas al día, cualquier día del año! Para mayor conveniencia y servicio más rápido, ya puede descargar los Manuales durante horas normales de oficina. GE Consumer Home Services estará aún ahí cuando su o escríbanos a: General Manager, Customer Relations GE Appliances, Appliance Park
-
 1
1 -
 2
2 -
 3
3 -
 4
4 -
 5
5 -
 6
6 -
 7
7 -
8
-
9
-
10
-
11
-
12
-
13
-
14
-
15
-
16
-
17
-
18
-
19
-
20
-
21
-
22
-
23
-
24
-
25
-
26
-
27
-
28
-
29
-
30
-
31
-
32
-
33
-
34
-
35
-
36
-
37
-
38
-
39
-
40
 |
 |

Microwave Oven
49-40634-1
09-10 GE
JES1651
JES1656
Owner’s Manual
GEAppliances.com
Safety Instructions
........
2–6
Operating Instructions
Convenience Features
......
11–14
Microwave Terms
..............
16
Oven Features
................
7-8
Other Features
.............
15, 16
Power Levels
....................
9
Time Features
..................
10
Care and Cleaning
.........
17
Troubleshooting Tips
......
18
Things That Are Normal
........
18
Consumer Support
Consumer Support
..............
20
Warranty
......................
19
Write the model and serial
numbers here:
Model # __________________
Serial # ___________________
You can find them on a label inside the
oven.